I used to think Dutch and French braids were basically the same style with two names, until I actually sat down and tried both on my own hair.
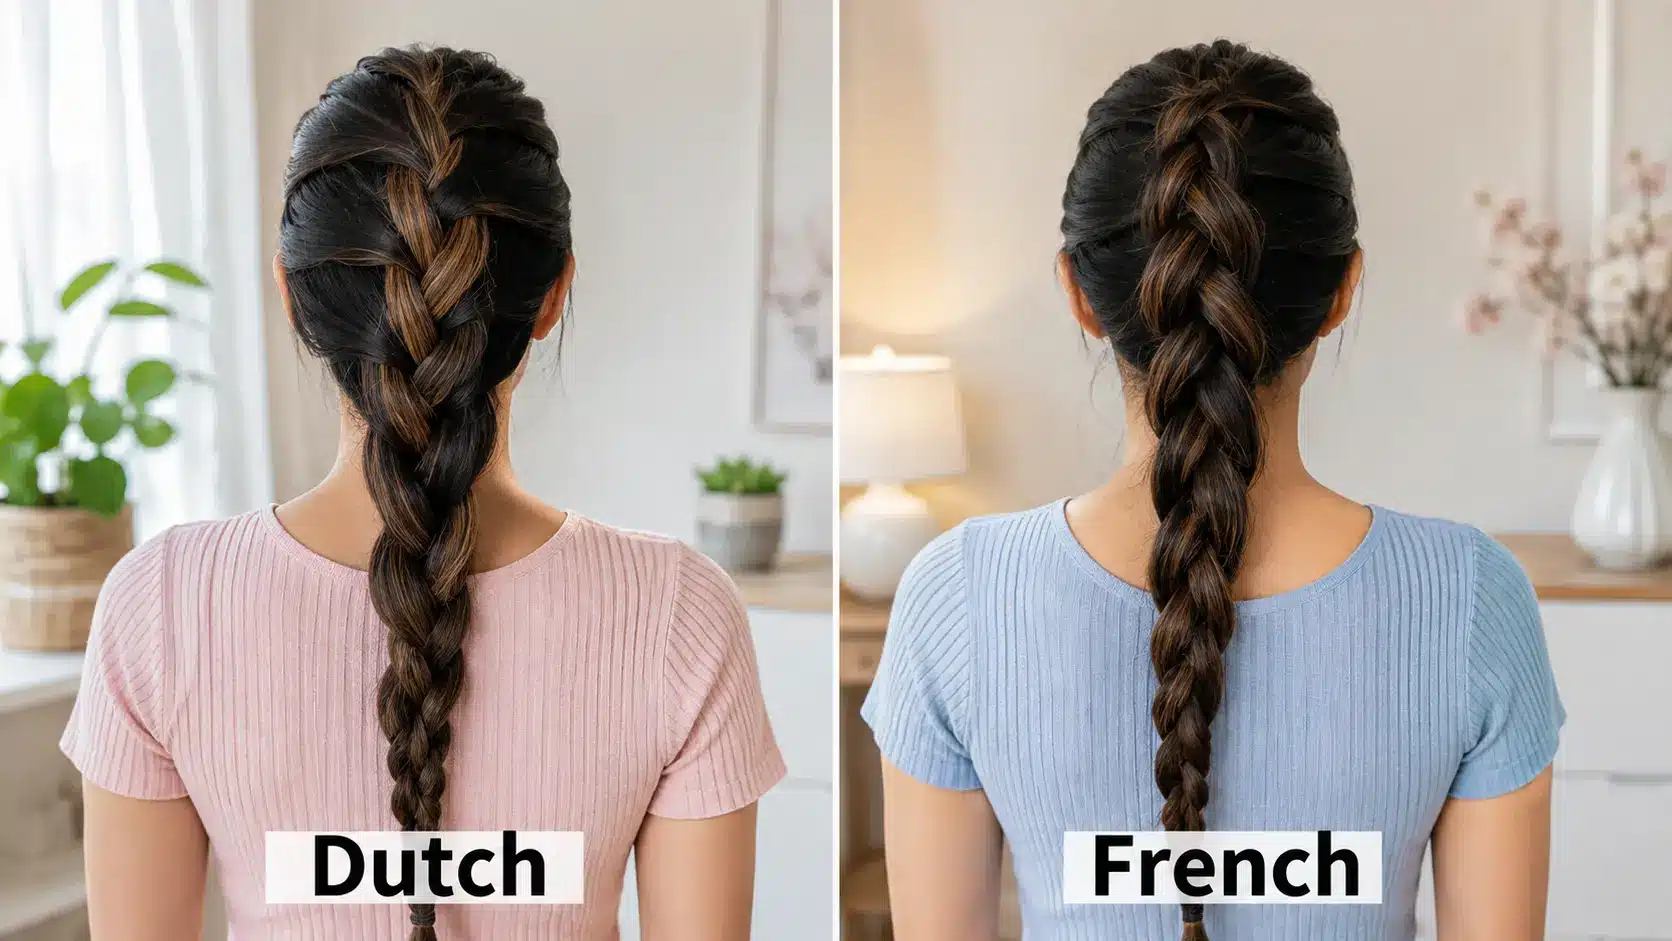
From a few feet away, they can look almost identical, especially from the side. Up close, the difference comes down to one simple thing.
A French braid crosses the outer strands over the middle, so it lies close to your head.
A Dutch braid crosses them under the middle, so it sits raised above the rest of your hair. Once you know that, everything else- the look, the hand movement, the difficulty- starts to make sense.
Dutch vs French Braid Key Differences
Here’s the quickest way to see it side by side.
| Feature | French braid | Dutch braid |
|---|---|---|
| Strand movement | Outer strands cross over the middle | Outer strands cross under the middle |
| Position | Blends into the hair, lies flatter | Sits above the surrounding hair |
| Finished appearance | Smooth, folded inward | Raised, more defined |
| Visible volume | More subtle | Usually looks fuller |
| Other name | French plait | Reverse French braid or inside-out braid |
| Basic structure | Three strands, hair added as you go | Three strands, hair added as you go |
| Learning curve | Over-crossing feels familiar to most beginners | Under-crossing takes a bit of hand adjustment |
The crossing direction is really doing all the work here; everything you notice about how each braid looks traces back to that one move.
How French and Dutch Braids are Similar
Before I get into what sets them apart, it’s worth pointing out how much they actually share:
- Both start with three sections, usually near the crown or hairline
- New hair gets added to the outer sections with every pass
- Both can taper into a regular three-strand braid once you pass the nape
- Either one works as a single braid, double braids, a side braid, or tucked into an updo
Dutch braids are also known as reverse French braids or inside-out braids. When two Dutch braids are worn side by side, the style is commonly called boxer braids.
Both styles adapt to different hair textures, though the amount of grip or prep work you need can vary depending on your hair.
What is a French Braid and How Does it Look?
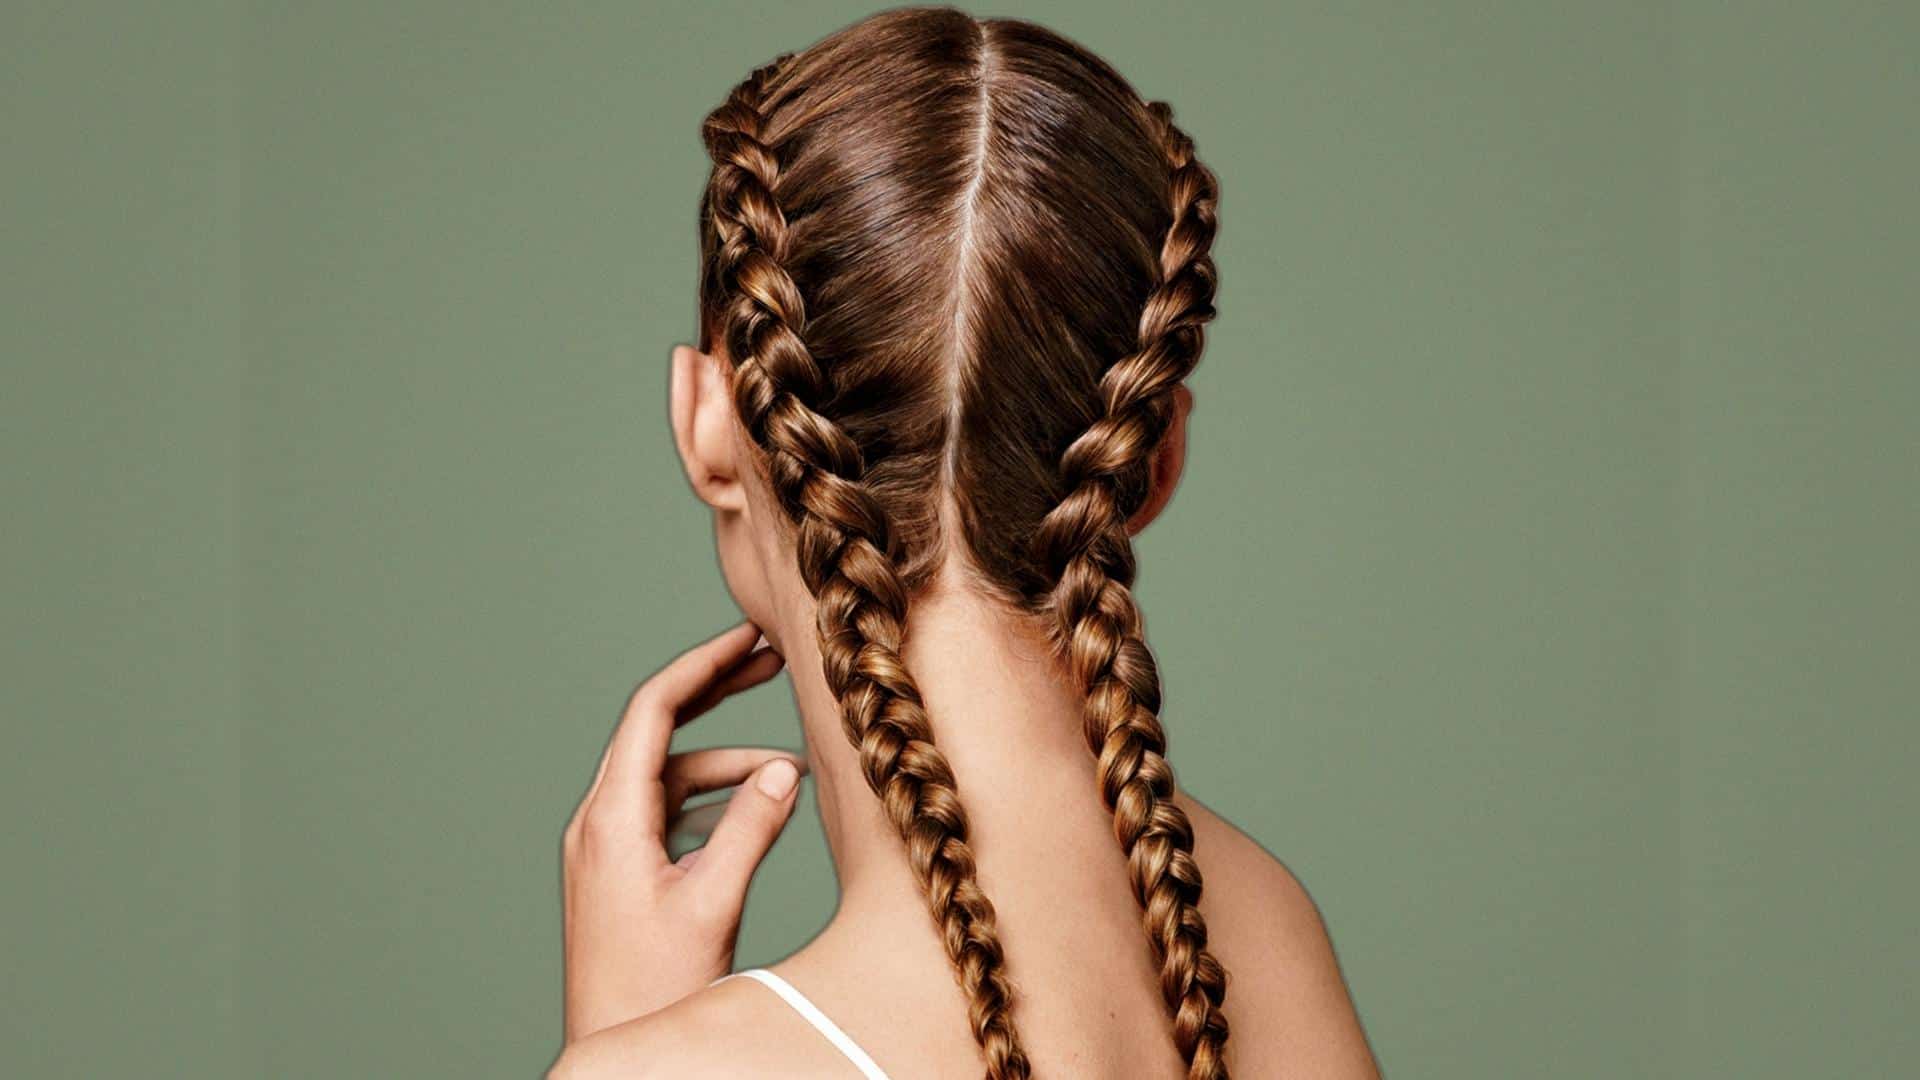
A French braid is the classic version most of us learned first. Crossing the outer sections over the middle pulls the braid inward, so it folds into your hair rather than sitting on top of it.
Look at it from the top, side, or back, and you’ll notice it stays close to the scalp with a smooth, tucked-in pattern. It’s less raised than a Dutch braid, which is part of why it reads as more understated.
It’s also worth separating this from a regular braid. A regular braid usually starts away from the scalp and doesn’t pick up new hair as you go, while a French braid does both. Keeping your sections even as you go helps that folded look stay balanced all the way down.
How to Style a French Braid
If you’ve never done a French braid before, practice the crossing motion once or twice without adding any hair. It makes the real thing much less confusing.
- Brush out any tangles and pick your starting point. Most people start right at the crown, but you can start lower if you want a shorter braided section.
- Gather a section near the crown and split it into three even strands. Keep track of which one is your middle strand. It’s easy to lose once your hands are moving.
- Cross the right outer strand over the middle strand.
- Cross the left outer strand over the new middle.
- Add a small, even piece of loose hair to each strand right before every over-cross. Pulling more from one side than the other is the most common reason braids end up crooked.
- Keep going to the nape, then finish with a regular three-strand braid and secure it. Aim for even tension the whole way down rather than pulling tight, which tends to pucker the pattern instead of smoothing it.
If the section near your nape looks loose or uneven, you don’t need to redo the whole braid. Undo just that bottom portion and rebraid it with slightly smaller sections.
What is a Dutch Braid and How Does it Look?
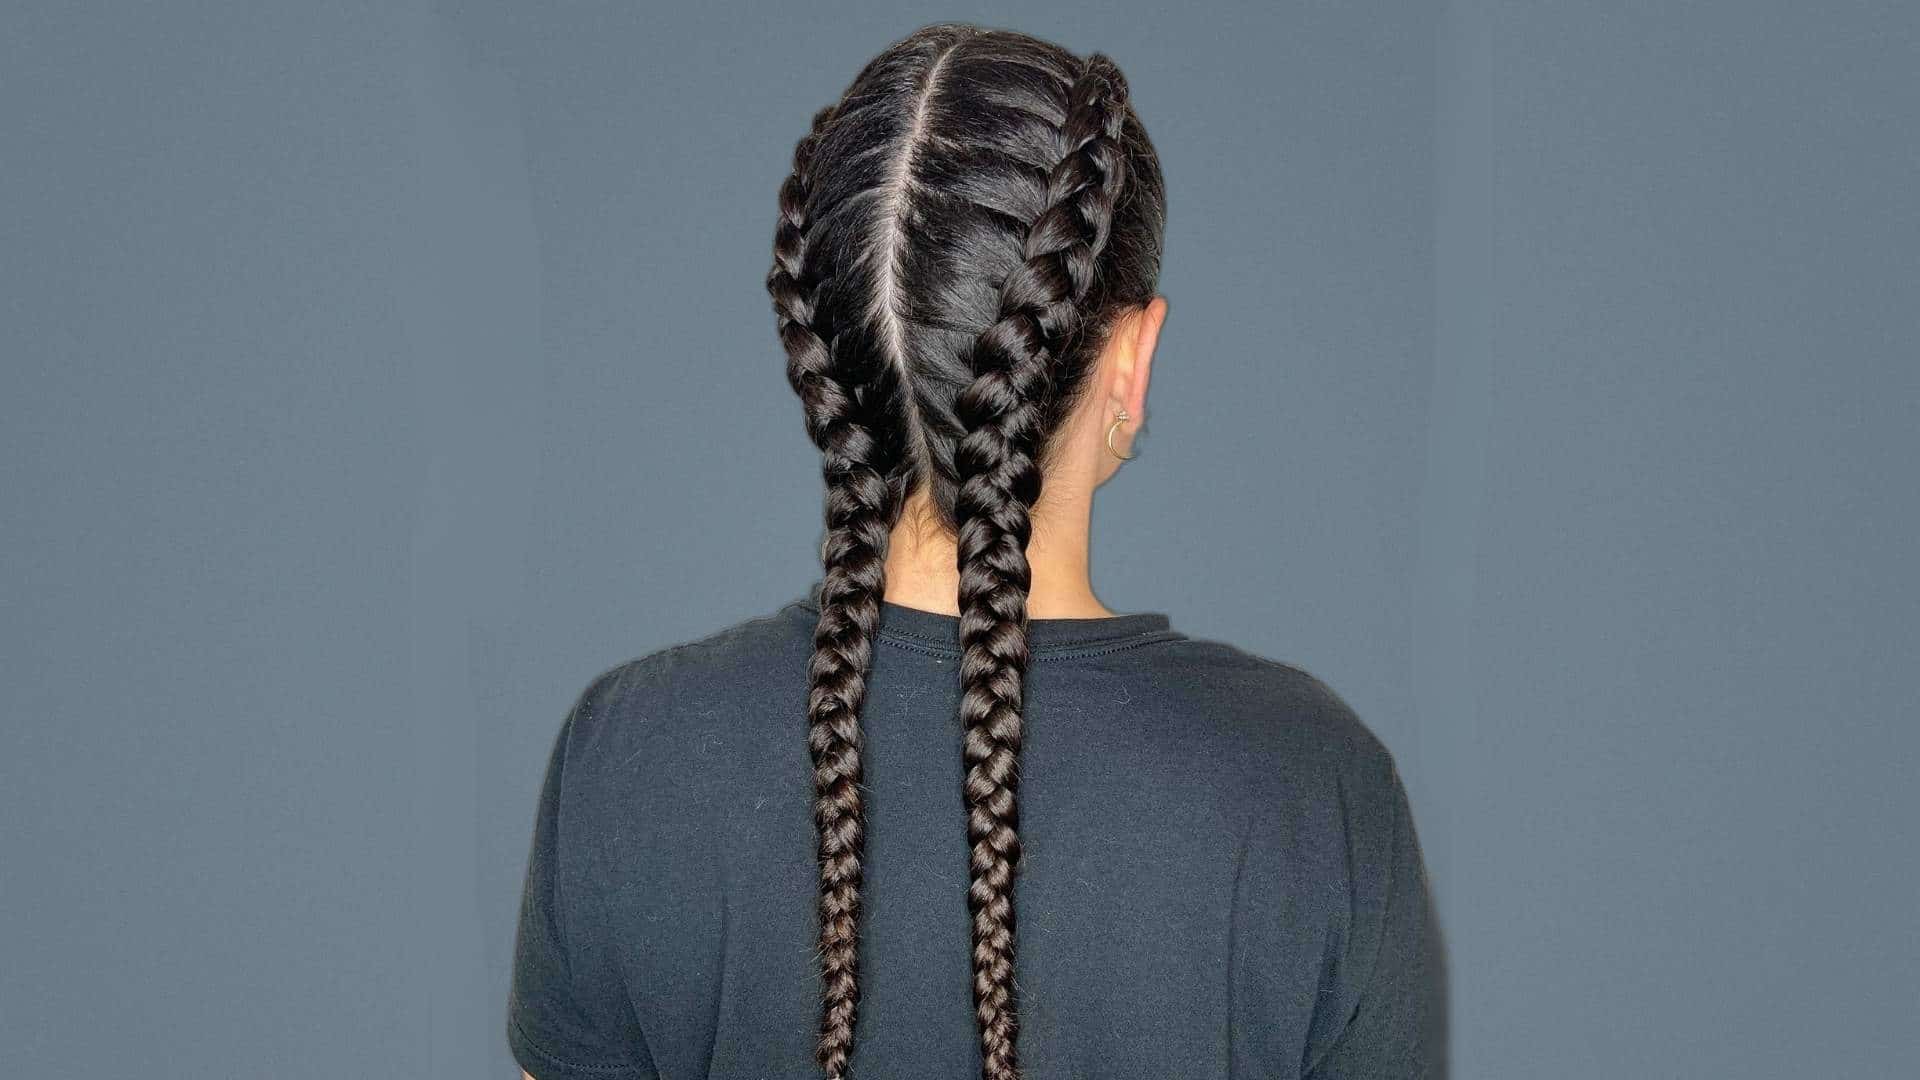
Suppose a French braid folds in; a Dutch braid does the opposite. It’s essentially an inverted three-strand braid, and crossing the strands underneath is what pushes the plait upward instead of into the hair.
That’s where the raised ridge comes from, the line you can trace down the center of the head. It’s also why you’ll hear it called a reverse French braid or an inside-out braid, since it’s really the same idea flipped.
Once it’s finished, gently widening the loops can make that raised shape look even fuller. One thing worth clearing up: a Dutch braid isn’t the same as cornrows, even though people sometimes lump them together.
How to Dutch Braid
The moves here are the same as a French braid, just flipped. If you can already French braid, this mostly means retraining your hands to go the opposite direction.
- Detangle your hair and choose your starting position. Same as a French braid, most people start at the crown.
- Divide a section near the crown into three strands.
- Pass the right outer strand under the middle strand. Not over. This is the one habit that takes practice if you’re used to French braiding.
- Pass the left outer strand under the new middle.
- Add loose hair to each outer strand right before crossing it underneath, keeping the added sections similar in size so the ridge stays centered instead of drifting to one side.
- Continue down to the nape, braid the rest, and secure the end. Focus on steady hand placement rather than pulling hard. My first few Dutch braids came out lopsided because I was yanking too tight instead of watching where each strand landed.
If you catch yourself crossing a strand over instead of under, stop and fix it right away. Otherwise, that one section will read as a mini French braid, and it stands out once the rest of the braid is raised. Once the braid is finished, you can loosen the outer loops carefully to add width.
Where Did French and Dutch Braids Get Their Names?
The names sound like they point directly to France and the Netherlands, but the history isn’t that simple. Braiding has been practiced across many cultures for thousands of years, so neither technique can be neatly traced to one European country.
The term French braid first shows up in English print in 1871, in a short story published in an American magazine. There’s no way to confirm that the braid described then is exactly the one we call by that name today.
The Dutch braid name is also commonly used for the under-cross version, along with the reverse French braid and the inside-out braid.
So, French and Dutch are useful modern labels for telling the techniques apart, but they shouldn’t be taken as definite proof of where either braid originally came from.
Which Braid Should You Choose?
This really comes down to what you want the finished braid to do.
Go with a French braid if you want something flatter that blends into the rest of your hair. Go with a Dutch braid if you want the braid itself to be the focal point, sitting up and visible. If you’re looking for more easy crazy hair day options for school mornings, both braids work as a base you can dress up with clips, ribbon, or color spray.
A few other things factor in:
- Section size, hair density, layers, and texture all affect how either braid turns out
- Some people find the French over-cross more natural right away; others pick up the Dutch under-cross faster, especially when braiding their own hair
There’s no strict rule that ties one style to one occasion. Pick based on the shape you want and the movement your hands find easier.
| Dutch vs French Braid: Which One Is Easier? |
|---|
|
French braids are often easier for beginners because the strands cross over the middle. Dutch braids use an under-cross motion, which may take more practice. Once you learn the movement, both are about equally easy. |
Styling Tips and Common Braiding Mistakes
A short list of things that consistently make a difference:
- Detangle before you start so sections separate cleanly
- Keep your sections consistent in size to avoid an uneven pattern
- Gather hair evenly from both sides to keep the braid centered
- If you accidentally switch between over and under mid-braid, fix it before moving on
- Keep tension comfortable around the hairline, and if you’re working with a tapered hairline style, use smaller sections so the edges stay neat
Dermatologists at the American Academy of Dermatology warn that braids worn too tight, too often, can lead to traction alopecia, a type of hair loss caused by repeated pulling. For shorter layers, use smaller sections or a light-hold product, then adjust the braid’s width after securing the end.
Dutch vs French Braid for Different Hair Types
Both styles can work across different hair types, but the finish and ease of braiding can vary.
| Hair Type | French Braid | Dutch Braid |
|---|---|---|
| Fine hair | Lies flat and creates a smooth finish | Can look fuller when the outer loops are gently loosened |
| Thick hair | Keeps dense hair controlled and close to the scalp | Creates a more raised and defined braid |
| Curly hair | Holds well because natural texture adds grip | Gives curls a defined, raised braided pattern |
| Wavy hair | Creates a soft, blended finish | Makes the braid stand out more clearly |
| Straight hair | May need a little texture or grip for easier braiding | Can appear sleek and defined but may need extra grip |
| Layered or short hair | Smaller sections help keep shorter pieces in place | Smaller sections can reduce loose strands and keep the braid neat |
Neither braid is limited to a certain hair type. If your hair leans straight and slippery, a quick pass with a chemical straightening treatment beforehand can actually make either braid easier to control, since the smoother, more uniform texture holds a section shape better.
For natural texture, a solid curly hair routine the night before helps sections stay defined instead of slipping apart mid-braid. The better choice really depends on the finish you want and which technique feels easier to control.
Final Thoughts
When it comes down to it, the whole Dutch vs French braid question is about one motion: over versus under. French braids cross over and sit flat against your head.
Dutch braids cross under and rise above it. From there, it’s just about what look you’re going for and which movement feels natural in your hands.
My advice: try both on the same section of hair back to back. You’ll feel the difference faster than you’d think.
Frequently Asked Questions
Is It Easier to French Braid or Dutch Braid?
It depends on practice, but many beginners find the French braid’s over-cross movement more familiar at first.
Is a Dutch Braid the Same as a Reverse French Braid?
Yes. A Dutch braid is often called a reverse French braid because the outer strands cross underneath the middle instead of over it.
Does a Dutch Braid Hold Better than a French Braid?
Not necessarily. Section size, hair texture, tension, prep, and the elastic you use all affect how long either braid holds.
Can You French or Dutch Braid Short Hair?
Yes, as long as you can gather sections securely. Shorter layers may need smaller sections or a bit of grip product.