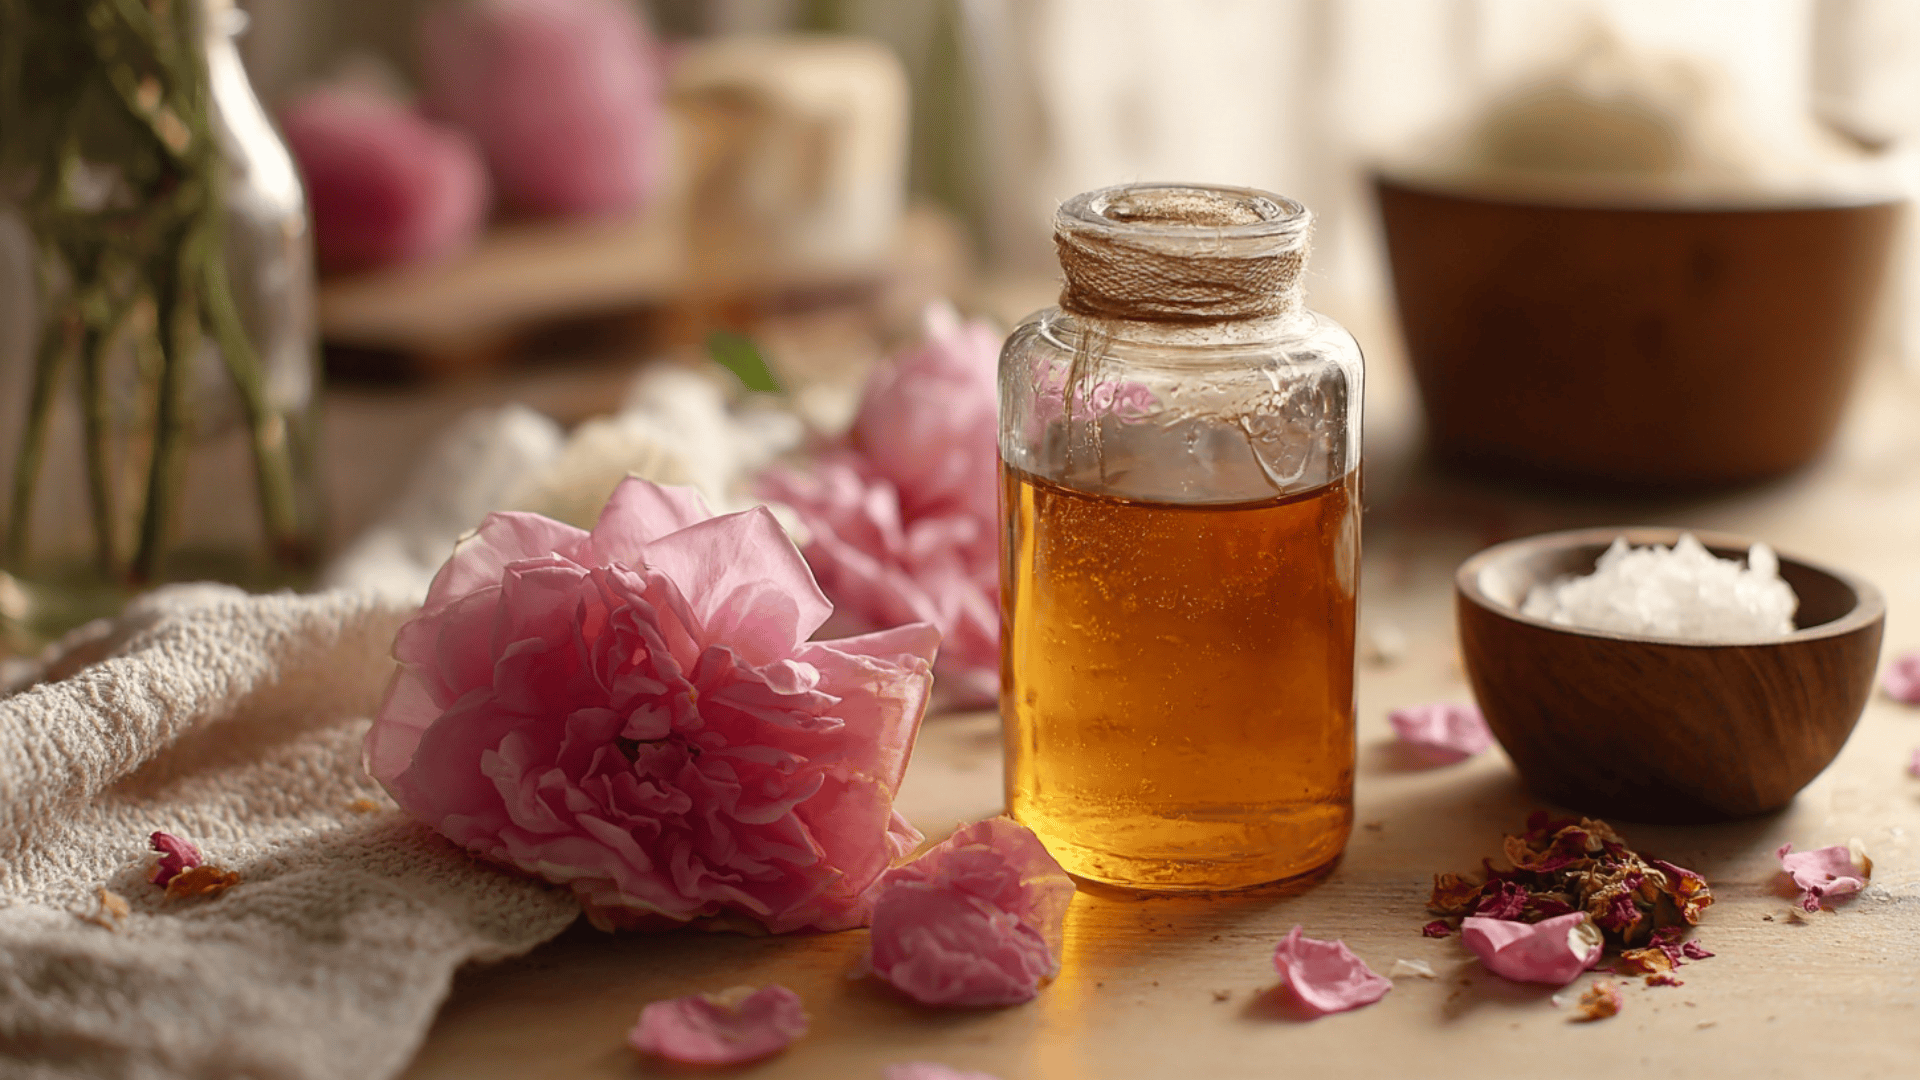
Roses have long been celebrated for their beauty and fragrance, but did you know you can modify their petals into nourishing rose oil right at home?
If you’ve ever wondered how to make rose oil, you’re not alone.
Many DIY admirers enjoy creating this classic oil for personal use, in their beauty routines, or as thoughtful handmade gifts.
Rose oil is cherished for its soothing aroma and skin-loving properties, making it a must-have in natural wellness.
Simple, step-by-step methods for creating DIY rose oil using cold infusion and other techniques are explained, along with its incredible benefits for the skin, hair, and nails.
Why Make Rose Oil at Home?
Making rose oil at home is cost-effective and worth the effort, especially compared to expensive store-bought versions.
When you make rose oil at home, you can choose organic rose petals and pure carrier oils, ensuring your final product is free from chemicals, preservatives, and artificial fragrances.
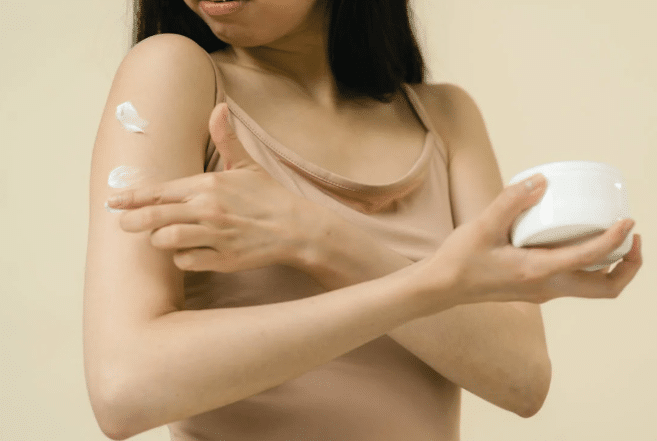
Rose oil is versatile in daily use, as a moisturizer, for massage, hair treatment, or aromatherapy. One bottle can replace multiple products.
The process itself is simple and requires no special equipment or advanced skills. With basic kitchen items and patience, anyone can create beautiful, fragrant rose oil.
Benefits of Rose Oil for Beauty & Wellness
Rose oil offers remarkable benefits for skin, hair, nails, and overall well-being. Understanding these advantages shows why this natural oil has been treasured for centuries.
1. Rose Oil Benefits for Skin
- Provides deep hydration without clogging pores.
- Reduces redness and irritation, making it suitable for sensitive skin.
- Contains natural compounds that soothe minor skin concerns.
- Promotes a healthy, radiant complexion with regular use.
2. Rose Oil Benefits for Hair
- Adds natural shine to dull or lifeless hair.
- Nourishes the scalp and helps reduce dandruff.
- Moisturizes to tame frizz and improve manageability.
- Works well as part of a regular scalp massage routine.
3. Rose Oil Benefits for Nails & Cuticles
- Strengthens cuticles and prevents dryness.
- Keeps the nail area soft and healthy-looking.
- Applying before bedtime improves nail and cuticle condition overnight.
4. Rose Oil Benefits for Wellness & Aromatherapy
- Promotes relaxation and reduces stress.
- The sweet floral scent helps improve mood balance.
- May support better sleep through its calming effects.
- Backed by traditional uses and modern natural beauty practices.
Different Methods of Making Rose Oil
There are several ways to make DIY rose oil at home, and each method offers unique benefits. Some are quick and convenient, while others take longer but deliver a stronger fragrance.
The table below compares different methods so you can choose the one that best suits your needs.
| Method | Time Needed | Shelf Life | Best For |
|---|---|---|---|
| Cold Infusion | 2–3 weeks | 6–12 months | Best fragrance, longest lasting |
| Quick Heat Infusion | 2–4 hours | 3–4 months | Fast results, simple process |
| Double Infusion | 2–6 weeks | 6–8 months | Stronger scent & potency |
| Oven Infusion | 2–3 hours | 3–4 months | Steady, controlled heating |
| Blender (Rapid) Method | 1–2 days | 2–3 months | Very quick, but cloudier oil |
No matter which method you choose, the result is a nourishing rose oil that can modify your beauty and wellness routine.
If you want fast results, long-lasting fragrance, or a highly concentrated oil, these approaches make it easy to enjoy the natural benefits of roses.
What You’ll Need to Get Started
Creating rose oil at home doesn’t require complicated tools or rare ingredients. Most essentials can be found in your kitchen or easily purchased online.
Here’s a simple breakdown of what you’ll need before starting the infusion process:
| Item | Quick Notes |
|---|---|
| Rose Petals | Fresh or dried. Choose organic if possible. |
| Carrier Oil | Jojoba, Almond, Olive, Coconut (moisturizing, may solidify at room temperature). |
| Glass Jar | Clean, airtight jar |
| Strainer/Cheesecloth | For separating petals from infused oil. |
| Dark Glass Bottle | Amber or cobalt blue; protects oil and extends shelf life. |
Having these supplies ready ensures a smooth, enjoyable DIY process. With just a few simple items, you’ll be well-prepared to create fragrant rose oil that’s both natural and flexible.
Step-by-Step Guide: Cold Infusion Method
Making rose oil at home is a simple, natural, and deeply rewarding process. With just a few ingredients and a gentle process, you can create a fragrant oil perfect for beauty and wellness.
Step 1: Prepare the Water Bath
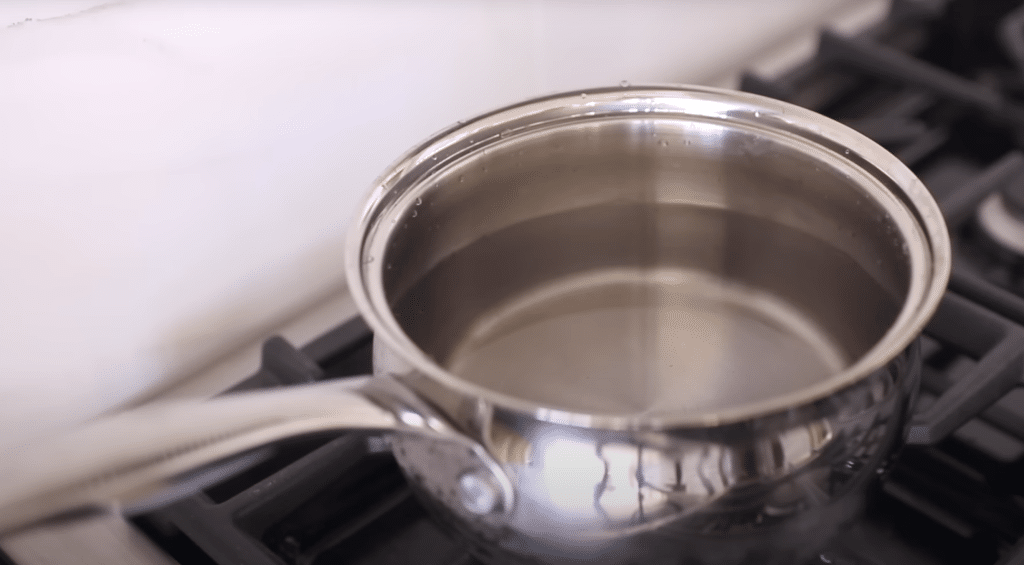
Boil a pot of water and then turn off the heat. The warm water creates a gentle bath to heat the oil, which helps release the fragrance of the petals without damaging them.
This method avoids overheating, which can destroy fragile plant compounds. A steady, gentle warmth is key for preserving the natural aroma and nutrients.
Step 2: Get the Petals Ready

Select 2–3 organic roses to yield approximately 1 cup of petals. Lightly shred them so the scent infuses more effectively, and always choose organic to avoid pesticides.
Fresh petals work beautifully, but dried ones last longer and can produce stronger results. Shredding increases surface area, making infusion quicker and more effective.
Step 3: Measure the Carrier Oil
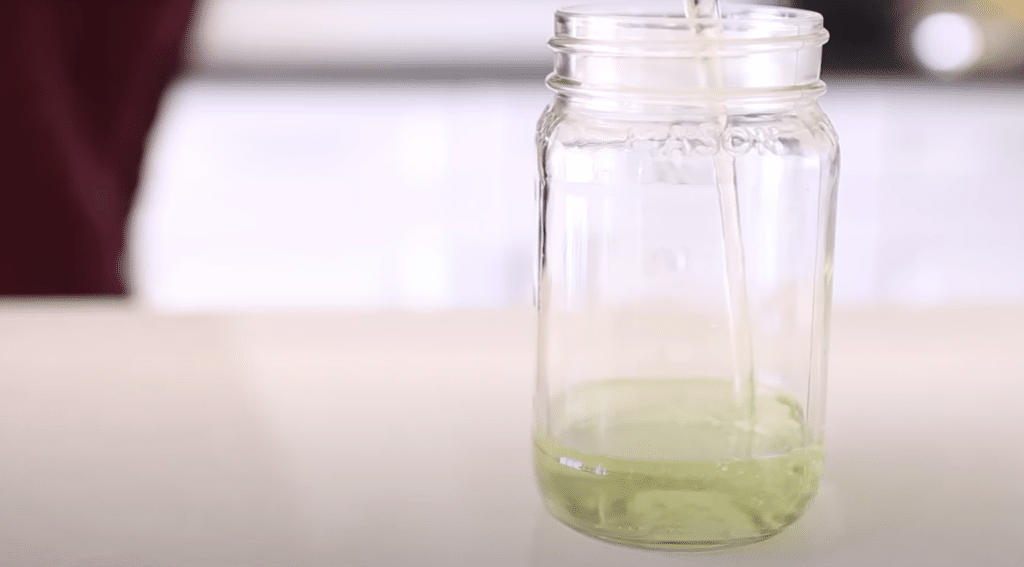
Pour 1 cup of grapeseed oil into a clean glass jar, or use jojoba/olive oil as alternatives. Each carrier oil offers unique benefits, but all work well for infusion.
Grapeseed is lightweight and neutral, jojoba is long-lasting and skin-friendly, while olive is rich but more aromatic. Choose the one that suits your needs best.
Step 4: Combine Petals and Oil
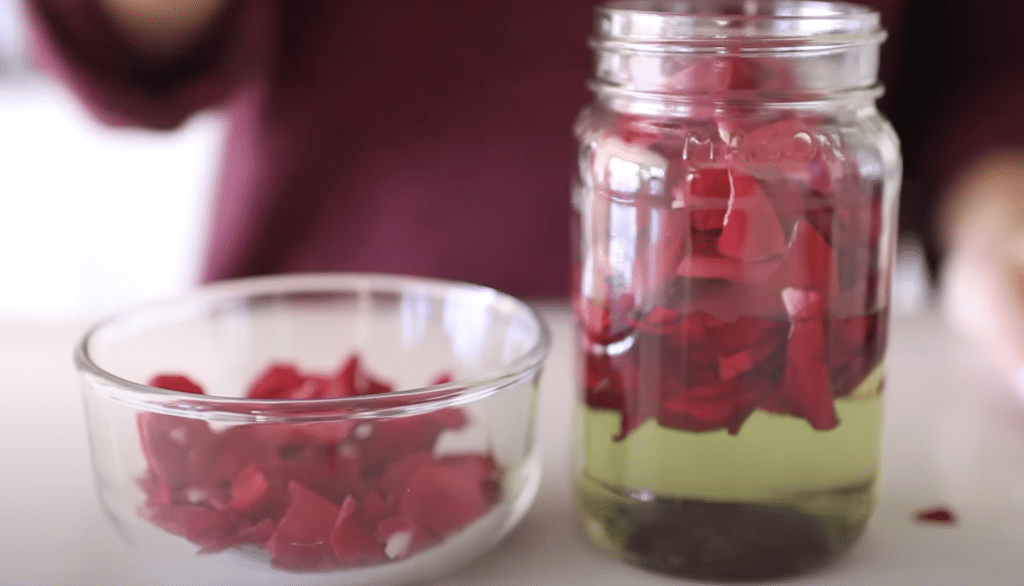
Add the shredded petals to the oil and stir gently with a wooden utensil. This ensures the petals are fully coated and submerged, which prevents spoilage and promotes even infusion.
Avoid using metal utensils as they may react with the oil. Ensuring the petals are completely under the oil also reduces the risk of mold forming.
Step 5: Warm the Infusion
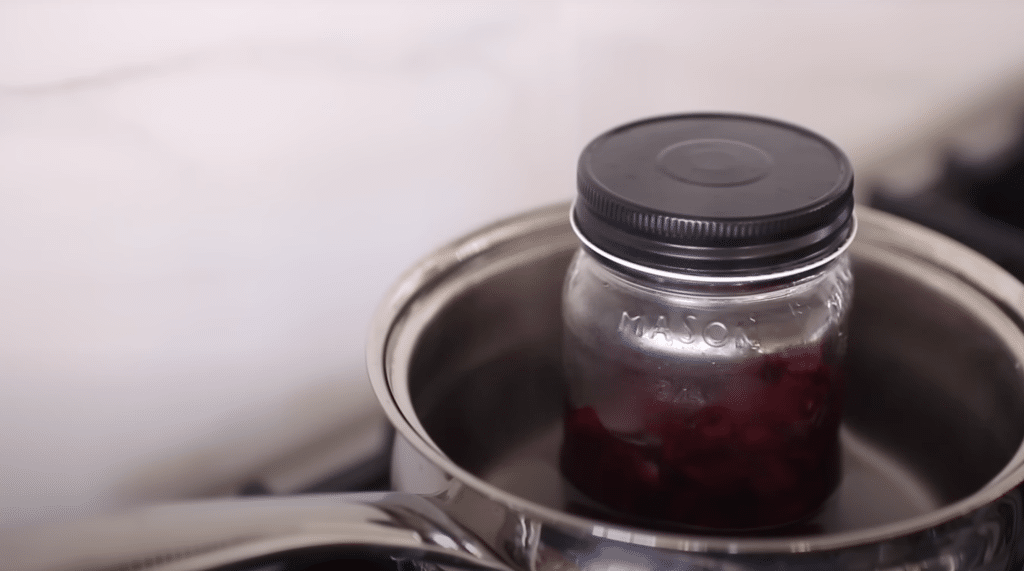
Seal the jar and place it in the hot water bath until the water cools. The gentle heat helps draw out the natural aroma and beneficial compounds from the rose petals.
This slow warming process increases the scent without losing potency. It’s a simple way to create a high-quality oil with minimal effort.
Step 6: Rest and Finish
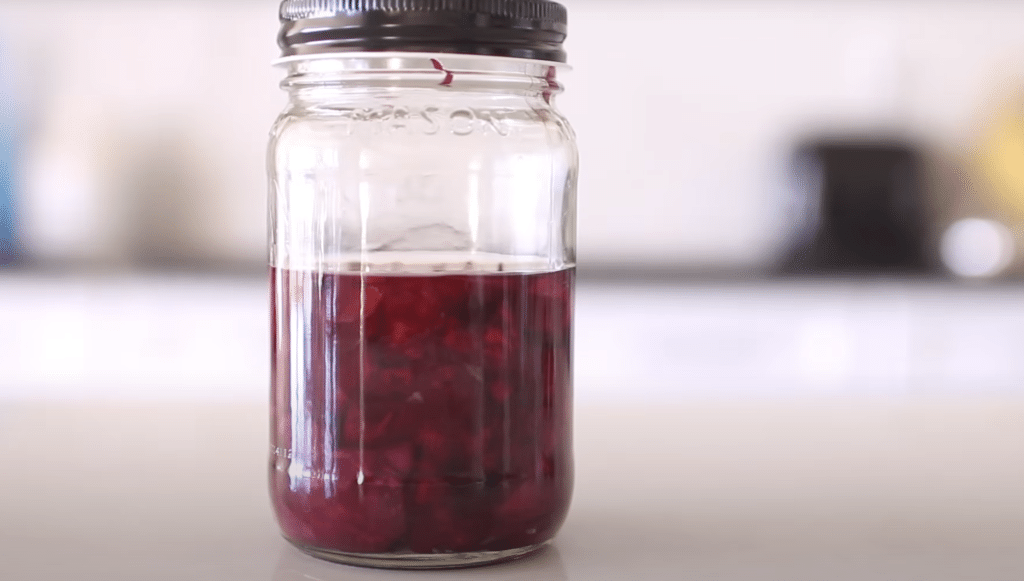
Let the jar sit for at least 24 hours, or longer for a stronger fragrance. Strain out the petals if desired, then store the finished oil in a dark glass bottle to keep it fresh.
Label the bottle with the date so you can track freshness. Stored properly, your DIY rose oil will last for several months and be ready to use anytime.
Video Tutorial
Thanks to Lavendaire for this insightful video that was referenced while creating this guide. Watch this video for helpful tips and further guidance.
Creative Ways to Use Your DIY Rose Oil
Homemade rose oil is flexible and can be used in many simple ways to modify your daily beauty and wellness routine. Here are some of the best uses:
- Apply a few drops to clean skin or mix with moisturizer for hydration.
- Add to bathwater for a soothing, aromatic soak.
- Massage into scalp before shampooing or mix into conditioner for shine and moisture.
- Rub into cuticles at night to prevent dryness and hangnails.
- Blend with oils like lavender or peppermint for a custom aromatherapy experience.
With just a few drops, your DIY rose oil can modify skincare, hair care, and self-care rituals. Experiment with these ideas to find the uses you love most.
Storage & Shelf Life Tips
Proper storage is essential for maintaining the potency of your rose oil and extending its usable life. Follow these essential tips to preserve quality.
- Store in dark glass bottles away from sunlight and heat sources
- Keep in cool, dark places like the pantry or bathroom cabinets
- Dried petal oil lasts 6-8 months, fresh petal oil 4-6 months
- Watch for spoilage signs: off odors, cloudiness, or mold growth
- The cold infusion method produces more stable oil than the heat infusion
Following these storage guidelines will help your homemade rose oil maintain its therapeutic properties and delightful fragrance for months.
Final Thoughts
Learning how to make rose oil at home is both rewarding and practical.
With just a few simple ingredients, you can create a natural product that defines your beauty routine and nurtures your wellbeing.
If you prefer the traditional cold infusion or the quicker heat method, the result is a fragrant oil that can be used for skin, hair, nails, or relaxation.
Best of all, this DIY rose oil makes a thoughtful, handmade gift that shows care and consideration. Try making your own batch today, you’ll enjoy the process as much as the many benefits that come with it.
Frequently Asked Questions (FAQs)
How Long Does Homemade Rose Oil Last?
Typically 3–12 months, depending on the method and storage conditions.
Can I Use Store-Bought Roses for Rose Oil?
Yes, but organic roses Are best to avoid pesticides.
Which Carrier Oil Is Best for Rose Oil?
Jojoba or Grapeseed Oil Are Ideal as They’re Lightweight and Have a Long Shelf Life.