Making your own lotion at home is one of the most rewarding DIY skincare projects.
It allows you to take full control over the ingredients, tailor the formula to your skin type, and skip the synthetic additives commonly found in commercial products.
A well-made lotion can be both safe and effective, and uniquely suited to your needs, offering both hydration and nourishment.
On the other hand, if it’s not formulated carefully, a lotion can spoil quickly or even become unsafe because water-based products are prone to contamination.
That’s why understanding the basics of ingredients, hygiene, and preservation is key to creating a lotion you’ll love to use.
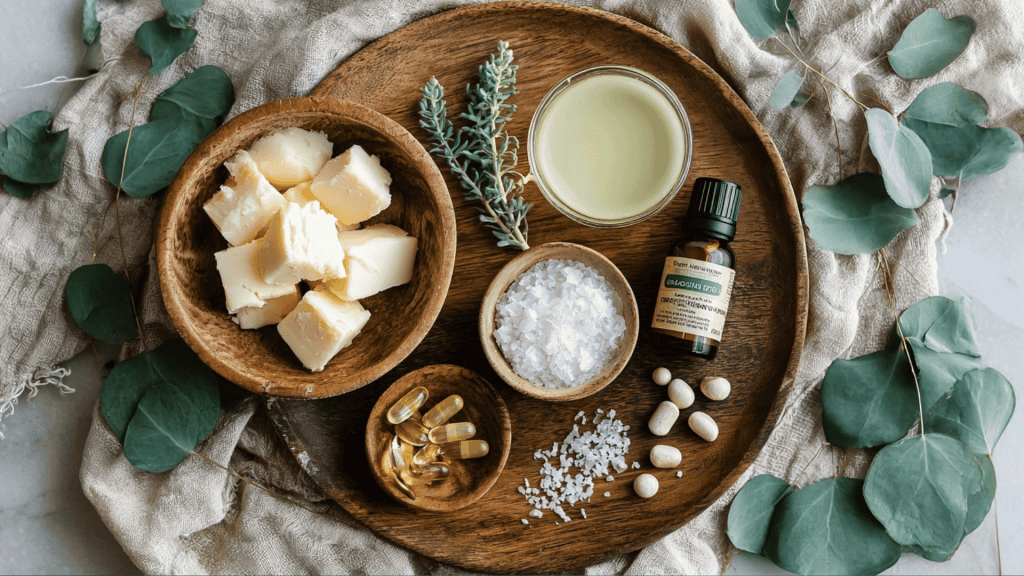
Ingredients You’ll NeedThis base recipe makes around 200 grams of lotion. You’ll need a digital scale for accuracy, two heat-safe containers, a double boiler, and an immersion blender. Water Phase (heat to ~70 °C):
Oil Phase (heat to ~70 °C):
Cool-Down Phase (≤45 °C):
|
Note: Always use a broad-spectrum preservative in water-based lotions. Natural options exist but are less effective than synthetic ones.
Easy Natural Lotion Recipe
Making lotion at home is a simple process once you understand the order of steps. Each stage plays an important role, from heating and blending to cooling and finishing with preservatives.
Follow these five steps carefully to create a safe, smooth, and nourishing homemade lotion.
Step 1: Heat the Phases
Place your oil ingredients in one heat-safe container and your water ingredients in another. Warm both using a double boiler until they reach about 70 °C.
Bringing them to the same temperature ensures they blend properly, resulting in a stable emulsion that won’t separate later.
Step 2: Emulsify
Once heated, slowly pour the water phase into the oil phase while blending with an immersion blender.
Work in short bursts for one to two minutes, then rest the mixture briefly. Repeat this process until the lotion thickens, developing a creamy, consistent base that feels smooth and uniform.
Step 3: Cool the Emulsion
After emulsifying, allow the mixture to cool down gradually to below 45 °C. This cooling phase is important because high heat can damage sensitive ingredients.
As it cools, the lotion begins to stabilize and achieve the rich texture that makes it easy to apply and pleasant to use.
Step 4: Add Cool-Down Ingredients
When the lotion is warm but no longer hot, stir in the preservative, vitamin E, and any optional fragrance or actives.
Adding them at cooler temperatures protects their potency and ensures the formula remains safe from bacteria, yeast, and mold while also enhancing its skin-loving benefits.
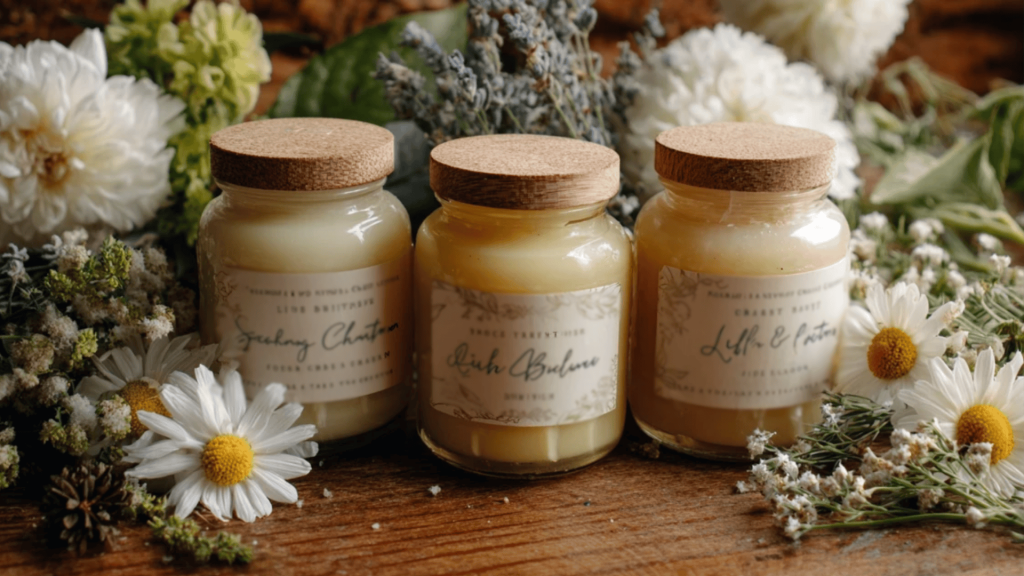
Step 5: Package and Label
Transfer the finished lotion into sanitized pump bottles or jars, taking care not to contaminate the mixture. Label each container with the batch date to track freshness.
Store your lotion in a cool, dry place, away from direct sunlight, to preserve its stability and extend its shelf life.
For a step-by-step demonstration, watch the full video on how to make nourishing lotion at home with simple ingredients by WholeElisa.
Benefits of Making Lotion at Home
People turn to homemade skincare for many reasons. By making your own lotion, you can:
- Control every ingredient and avoid unnecessary chemicals, such as parabens, synthetic fragrances, and petroleum-derived ingredients.
- Customize formulas for your skin type, light and fast-absorbing for oily skin, or rich and buttery for dry skin.
- Save money by making larger batches from bulk ingredients.
- Choose organic, sustainable, or ethically sourced oils and butters for a more eco-conscious product.
- Reduce packaging waste by reusing glass jars and pump bottles.
Many DIY makers also find it simply enjoyable, a blend of science and craft that allows you to create a product uniquely yours.
Storage, Shelf Life, and Spoilage
The lifespan of homemade lotion depends on preservation and storage.
With a broad-spectrum preservative, it can last several months to a year when kept in a clean pump bottle, away from sunlight and heat.
Without a preservative, shelf life drops to just a week or two in the fridge, and even then, it isn’t reliably safe.
Watch for signs of spoilage such as changes in smell, color, or texture, separation, bubbling, or visible growth. When in doubt, discard it.
Tips for Success
A few simple practices can make the difference between a lotion that feels professional and one that falls apart. Keep these essentials in mind every time you make a batch:
- Match temperatures: Heat the oil and water phases to the same temperature for a smooth, stable emulsion.
- Blend gently: Use short bursts with your immersion blender to avoid excess air that may cause separation.
- Preserve properly: Always add a broad-spectrum preservative. Vitamin E and essential oils are not substitutes.
- Package smartly: Use pump bottles instead of open jars to reduce contamination risks.
- Check shelf life: Even with preservatives, discard lotion if it changes in smell, color, or texture.
By following these tips, you’ll create lotions that not only feel great on the skin but also stay safe and effective for longer.
Customizing Your Lotion
Once you’ve mastered the base recipe, you can easily adapt it to suit different needs, textures, and preferences. Here are some ways to make it your own:
- Lighter lotion: Increase the water phase and reduce oils for a softer, fast-absorbing texture.
- Richer cream: Add more shea butter and coconut oil while reducing water for deeper nourishment.
- Soothing formula: Replace part of the water with chamomile or oat infusion to calm sensitive skin.
- Vegan option: Replace beeswax-based emulsifiers with plant-derived alternatives, such as Olivem 1000.
Customizing your lotion lets you experiment creatively while keeping the foundation safe and stable. With small adjustments, you can create formulas tailored to every skin type and season.
Troubleshooting Lotion Problems
If your lotion separates, it may be because the phases were not heated evenly or blended for a sufficient amount of time. Always heat them to the same temperature and emulsify thoroughly.
A lotion that turns out too thick often contains too much cetyl alcohol or butter; reduce these ingredients or thin the mixture with a little heated distilled water.
When the formula feels too thin, add more cetyl alcohol or emulsifying wax for extra structure.
If the texture feels greasy, consider switching to lighter oils, reducing the overall oil percentage, or increasing the water phase.
Final Thoughts
Making your own lotion is a blend of science and creativity. With a little knowledge of ingredients and proper safety practices, you can create products that are nourishing, personalized, and cost-effective.
Start small, experiment with variations, and prioritize safety above all else. If you ever plan to sell, take the time to understand USDA and FDA requirements so you can market your creations responsibly.
DIY lotion making is not only practical but also deeply satisfying. You’ll be amazed at what you can whip up in your own kitchen once you learn the basics.
Frequently Asked Questions
Is Vitamin E Enough To Preserve Lotion?
No, vitamin E is an antioxidant, not a preservative; broad-spectrum preservatives are essential.
Do Essential Oils Preserve Lotion?
Essential oils have mild antimicrobial effects but cannot replace properly tested, safe cosmetic preservatives.
Can I Call My Lotion Organic?
Only USDA-certified products meeting strict standards can be labeled organic; organic oils alone aren’t enough.