Acrylic nails are beautiful, but pulling them off the wrong way can leave your natural nails sore, weak, and badly damaged.
Too often, people end up regretting their choice after ripping or peeling them off in frustration.
Here’s the exciting part: You can actually remove acrylic nails at home safely using a few common items and salon-tested tricks.
While reading this, you’ll find out step-by-step methods that protect your natural nails while delivering smooth, professional results.
With a little patience and the right process, your nails can stay strong, healthy, and beautiful, ready for their next look. Let’s learn the safest and most effective removal techniques.
How to Take off Fake Nails
Understanding the process of removing acrylic nails is crucial for maintaining healthy and damage-free natural nails.
Acrylic nails adhere tightly through strong chemical bonds, which is why acetone is needed to break them down safely. The removal usually takes between 30 and 60 minutes, depending on the thickness of the acrylic.
Patience is essential during this process. Rushing can peel away natural layers and cause weakness, while allowing enough time ensures the acetone works gently and effectively.
Always prepare your tools ahead of time, work in a well-ventilated space, and finish with moisturizing care for the best results.
Consistency is important, so follow each step carefully. Taking your time will help you achieve salon-quality results at home.
Step-by-Step: Foil & Acetone Method for Removing Acrylic Nails
The foil and acetone method is one of the safest, most effective techniques for removing acrylic nails at home without causing harm. Here’s a step-by-step guide to follow.
Tools You Will Need
Before starting the removal process, gather these essential tools. Having everything ready will make the process smoother and safer.
| Tool | Use |
|---|---|
| E-file or Nail File | Remove shine from acrylic |
| Acetone | Soften and dissolve acrylic |
| Lint-Free Pads | Apply and hold the acetone |
| Aluminum Foil | Wrap and secure pads |
| Cuticle Pusher | Lift the softened acrylic gently |
| Nail File | Shape natural nails |
| Nail Buffer | Smooth nail surface |
| Cuticle Oil | Hydrate nails and cuticles |
| Topcoat | Protect and strengthen nails |
With these simple items on hand, you can take off fake nails effectively while keeping them healthy and protected.
Step 1: Remove the Shine
Use an e-file or a medium-grit sanding bit to gently file away the glossy top layer of the acrylic. Work from the cuticle area down to the free edge in smooth motions.
This helps acetone penetrate the acrylic more effectively, speeding up the removal process. Be careful not to over-file, as this can weaken your natural nails. Take your time and focus only on removing the shine, not thinning the entire acrylic layer
Step 2: Apply Acetone-Soaked Pads
Soak lint-free wipes or cotton pads in acetone until they are fully saturated, then place one directly on each nail. Ensure the pad fully covers the acrylic for even softening.
Proper soaking makes removal easier and reduces the risk of damage. Press the pad gently onto the nail to help the acetone absorb evenly. If needed, refresh the pads with a bit more acetone halfway through to maintain their effectiveness.
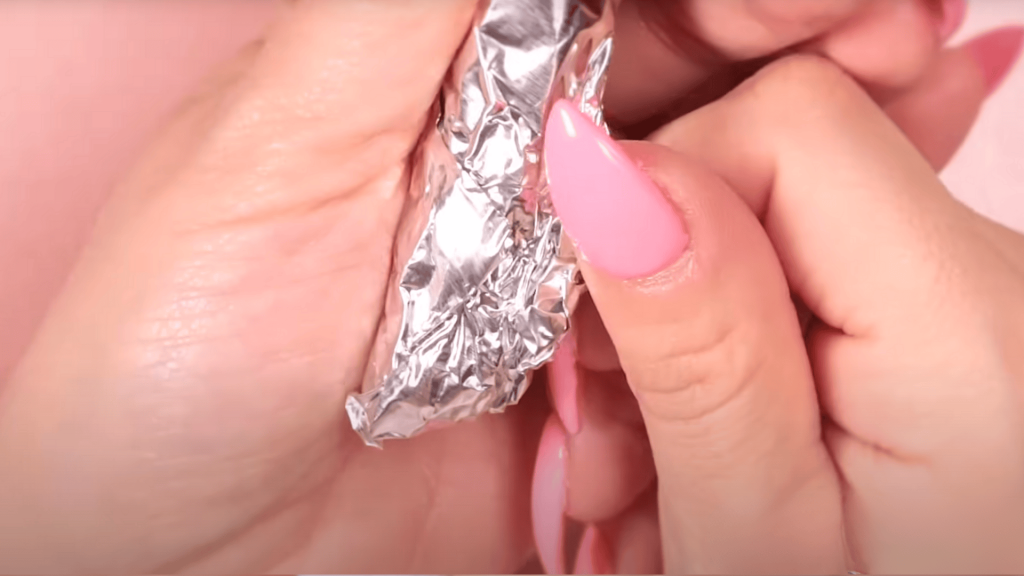
Step 3: Wrap in Foil

Wrap each fingertip with aluminum foil to hold the acetone-soaked pad securely in place. The snug wrap helps trap heat, which activates the acetone. This extra warmth allows the product to break down more quickly.
Ensure the foil is wrapped tightly, but not so tightly that it cuts off circulation. For added efficiency, gently press on each wrapped nail to maintain contact between the pad and the acrylic surface.
Step 4: Wait 10 to 15 Minutes
Leave the foil wraps on your nails for about 10 to 15 minutes to give the acetone time to work.
The acrylic should begin to soften and lift from your natural nail. Being patient during this step ensures smoother results in the long run. Avoid the urge to check too often, as removing the wraps early can slow the process.
Use this time to relax and let the acetone do the work for you.
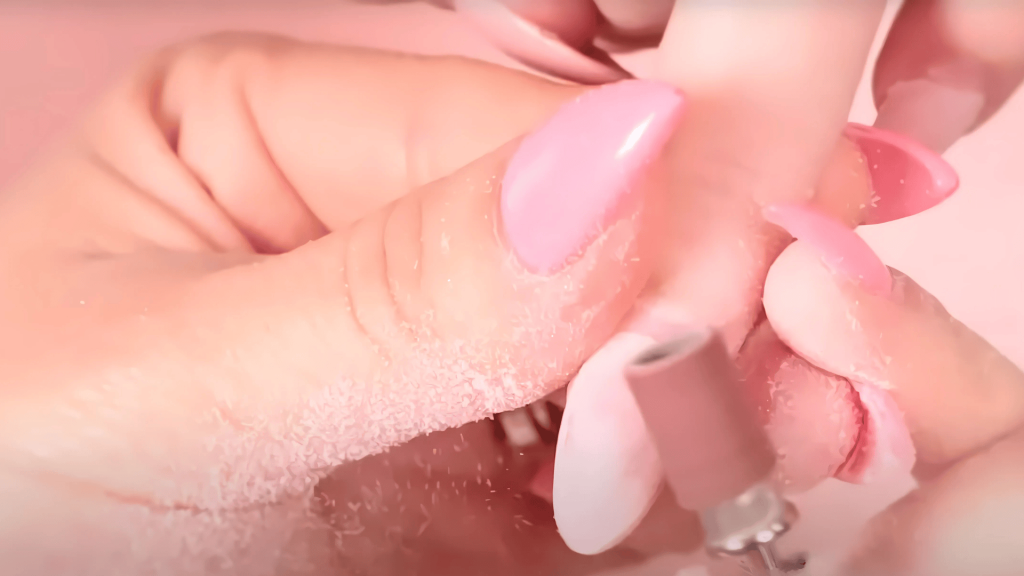
Step 5: Gently Remove Acrylic
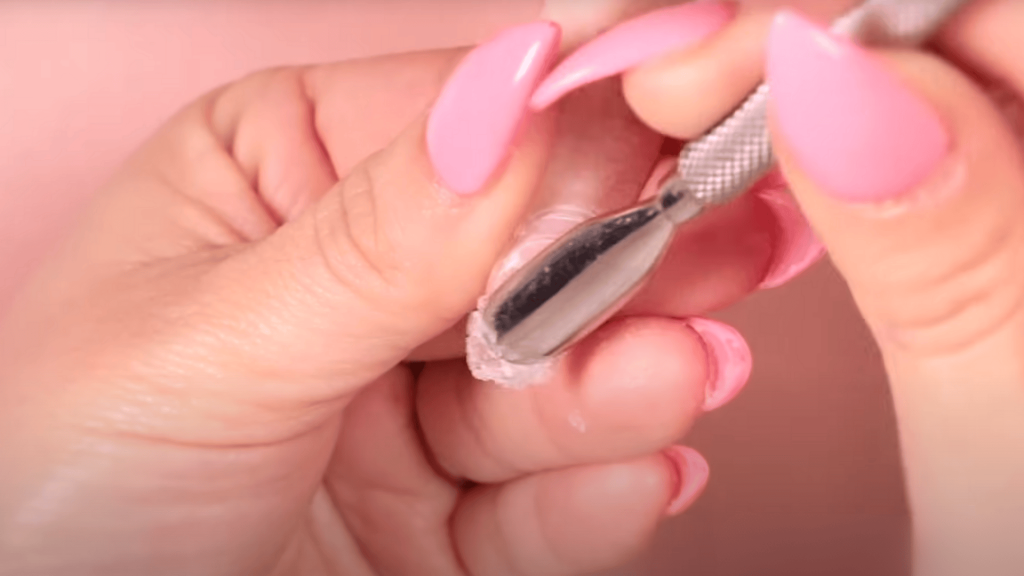
Remove the foil wraps and check one nail first. Use a cuticle pusher to gently scrape away the softened acrylic, which should peel off easily. If resistance occurs, reapply acetone and rewrap for another 5 to 10 minutes.
Never force the acrylic off, as this can cause the removal of layers of your natural nail. Work slowly and carefully, giving the acetone enough time to fully break down stubborn spots.
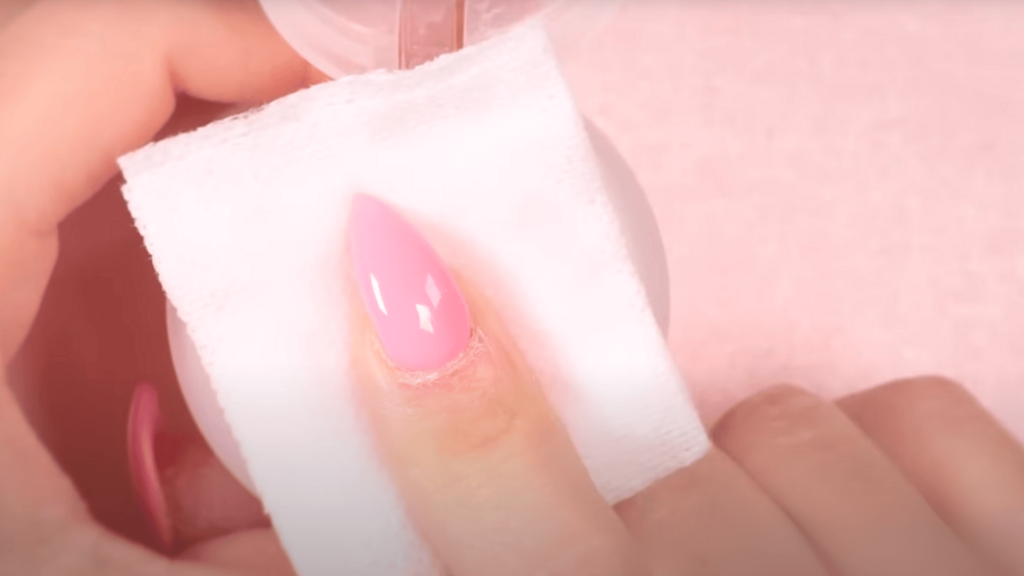
Step 6: File and Shape Natural Nails
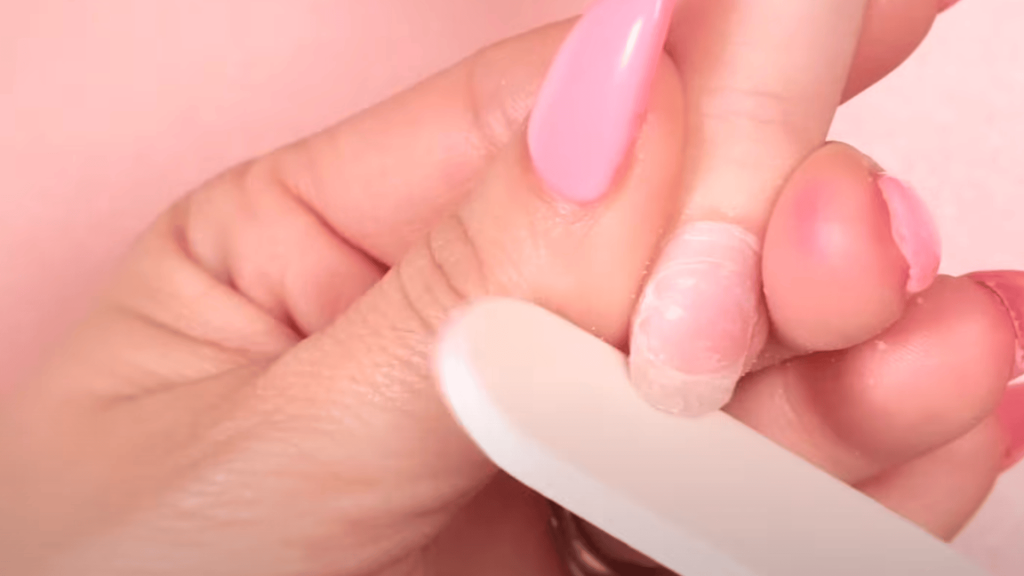
Once the acrylic is gone, use a nail file to shape your natural nails neatly. Smooth the edges to your preferred shape, whether rounded or square. Filing gently prevents unnecessary thinning and leaves nails looking healthy.
Work in one direction instead of sawing back and forth to avoid splitting. Take your time with this step, as a clean shape makes your nails look polished even without color. Always choose a fine-grit file for the best, safest results.
Step 7: Buff the Nails
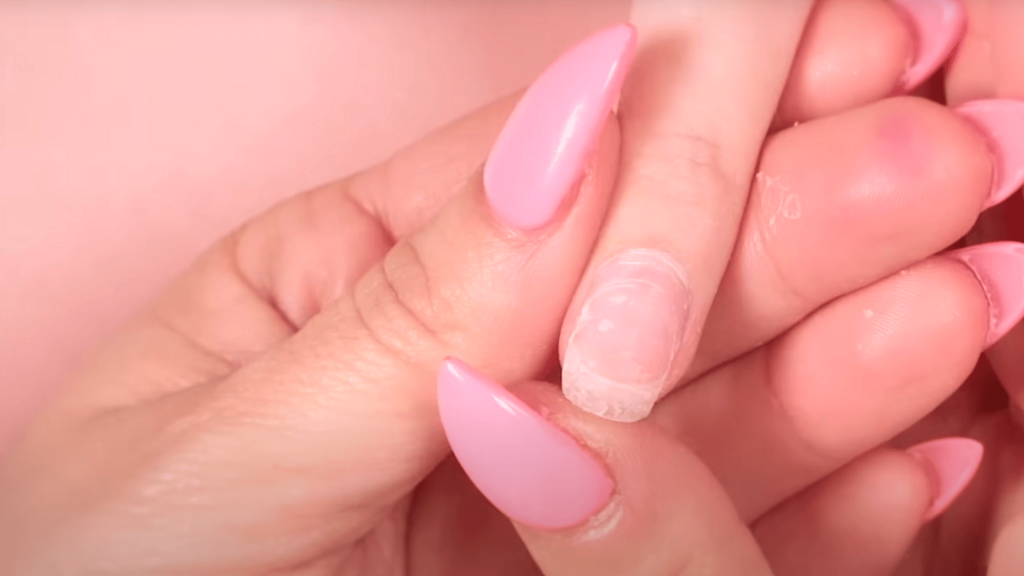
Lightly buff each nail to remove any remaining residue and restore smoothness. Use soft, even strokes without over-buffing to avoid weakening the surface. This step leaves your natural nails looking clean and polished.
Buffing also helps prepare your nails for any strengthening treatment or polish you plan to apply afterward. Always use a gentle buffer, not a coarse one, to maintain the health of your natural nails.
Step 8: Apply Topcoat
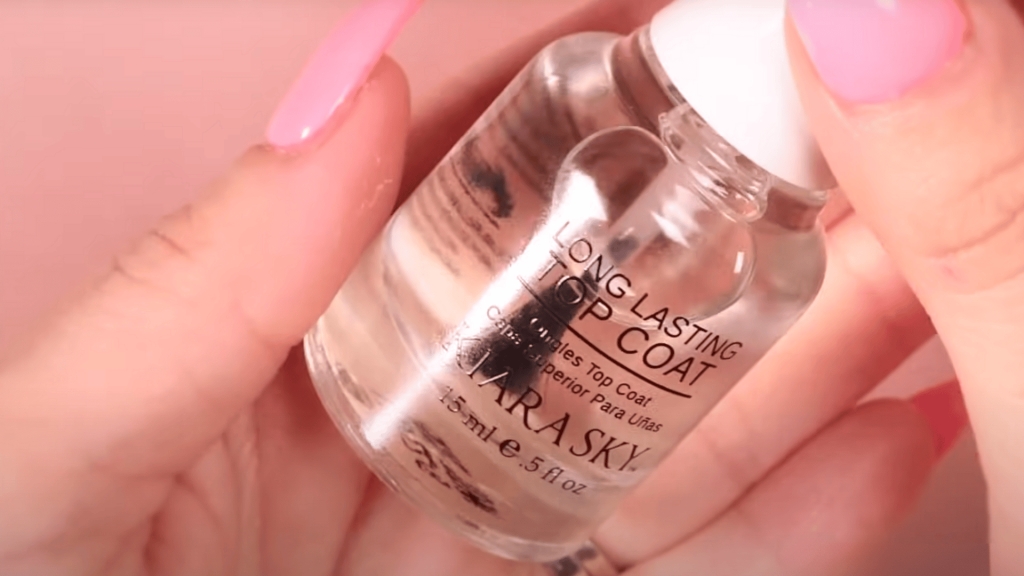
Apply a layer of long-lasting topcoat to protect the natural nail from damage. This creates a barrier while adding a healthy shine. A protective coat also helps strengthen nails after exposure to acetone.
Choose a strengthening or nourishing formula for extra benefits during recovery. Reapply every few days to maintain the shield and keep your nails looking fresh and polished.
Step 9: Moisturize Cuticles
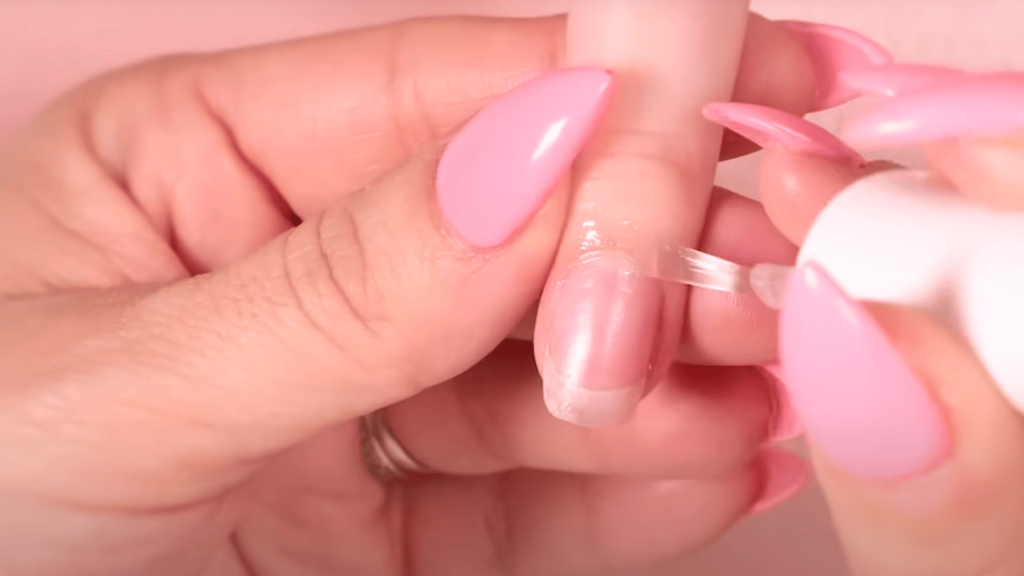
Finish by applying nourishing cuticle oil around each nail and massaging it in. This restores lost moisture and keeps the nail bed hydrated. Healthy cuticles promote stronger nail growth and prevent peeling.
For best results, use cuticle oil daily, even after the removal process is complete. Regular hydration not only heals your nails faster but also keeps them flexible and less prone to breakage.
Video Tutorial
Thanks to Kiara Sky Nails for this insightful video that was referenced while creating this guide. Watch this video for helpful tips and further guidance.
Other Common Methods of Removing Acrylic Nails
While the foil wrap method is the most common, other safe options are available, depending on your preference and the materials you use.
1. Soak-Off Bowl Technique
This method is ideal if you want to soak all your nails at once, rather than wrapping each finger individually.
Steps to Follow:
- Prepare a small bowl with acetone and place it inside a larger bowl of warm water
- Soak fingertips for 20–30 minutes, checking progress
- Use a cuticle pusher to gently remove softened acrylic
- Re-soak nails if needed for another 10 minutes
- Wash hands, buff the surface, and apply moisturizer
2. Acetone-Free Method
This slower method avoids acetone, making it gentler but requiring patience.
Steps to Follow:
- Trim nails short and file down the acrylic surface
- Soak nails in warm soapy water for 30–40 minutes
- Apply cuticle oil or olive oil around nail edges
- Use a cuticle stick to gently lift acrylic as it softens
- Repeat soaking and oiling over multiple sessions
- Keep nails moisturized and allow gradual removal
Both methods can be used safely at home to remove acrylics if done with care. Choose the one that best suits your comfort, time, and nail health.
How to Do Nail Aftercare
After removing acrylics, your natural nails need special care to regain strength and health.
Simple daily habits, such as moisturizing, eating nutrient-rich foods, and protecting your nails from harsh chemicals, can have a significant impact on your overall well-being.
Follow these aftercare tips to maintain healthy and strong nails.
| Step | Action |
|---|---|
| Daily Moisturizing | Use cuticle oil and hand cream twice daily. |
| Gentle Buffing | Lightly buff rough spots, avoid over-buffing. |
| Strengthening Treatment | Apply nail-strengthening base coat or serum. |
| Protein-Rich Diet | Eat foods rich in biotin, protein, and vitamins. |
| Protective Gloves | Wear gloves when cleaning or washing dishes. |
| Rest Period | Wait at least two weeks before new acrylics. |
| Keep Nails Short | Trim nails to prevent breaking or splitting. |
| Regular Massage | Massage cuticle oil to boost circulation. |
| Stay Hydrated | Drink water to prevent brittle nails. |
Proper aftercare not only restores nail health but also prepares them for future manicures. By keeping your nails moisturized, protected, and nourished, you’ll reduce damage and encourage stronger growth.
Consistent care ensures your nails remain resilient, smooth, and ready for your next style.
Final Thoughts
Successfully removing acrylic nails at home requires patience, the right materials, and proper technique. The foil wrap method offers the most reliable results, closely matching professional salon standards while protecting your natural nails.
Alternative methods, such as bowl soaking or acetone-free removal, offer options for individuals with different preferences and sensitivities.
Remember that rushing this process often leads to nail damage that takes weeks to heal.
Treat your natural nails with care by taking time for safe removal. Afterward, support recovery with moisturizers, cuticle oil, and strengthening treatments.
With proper aftercare, your nails will quickly return to their healthy state, ready for whatever style you choose next. Take your time, follow these proven methods, and your nails will thank you for the gentle care.
Frequently Asked Questions
How Long Does It Take to Remove Acrylic Nails at Home?
The Complete Process Typically Takes 45-60 Minutes Using the Foil Wrap Method.
Can I Reuse the Same Cotton Balls During Removal?
No, Replace Cotton Balls Every 20 Minutes as They Lose their Acetone Effectiveness Over Time.
Is It Normal for Nails to Feel Weak After Acrylic Removal?
Yes, Temporary Weakness Is Normal and Improves with Proper Aftercare Within 2-3 Weeks.