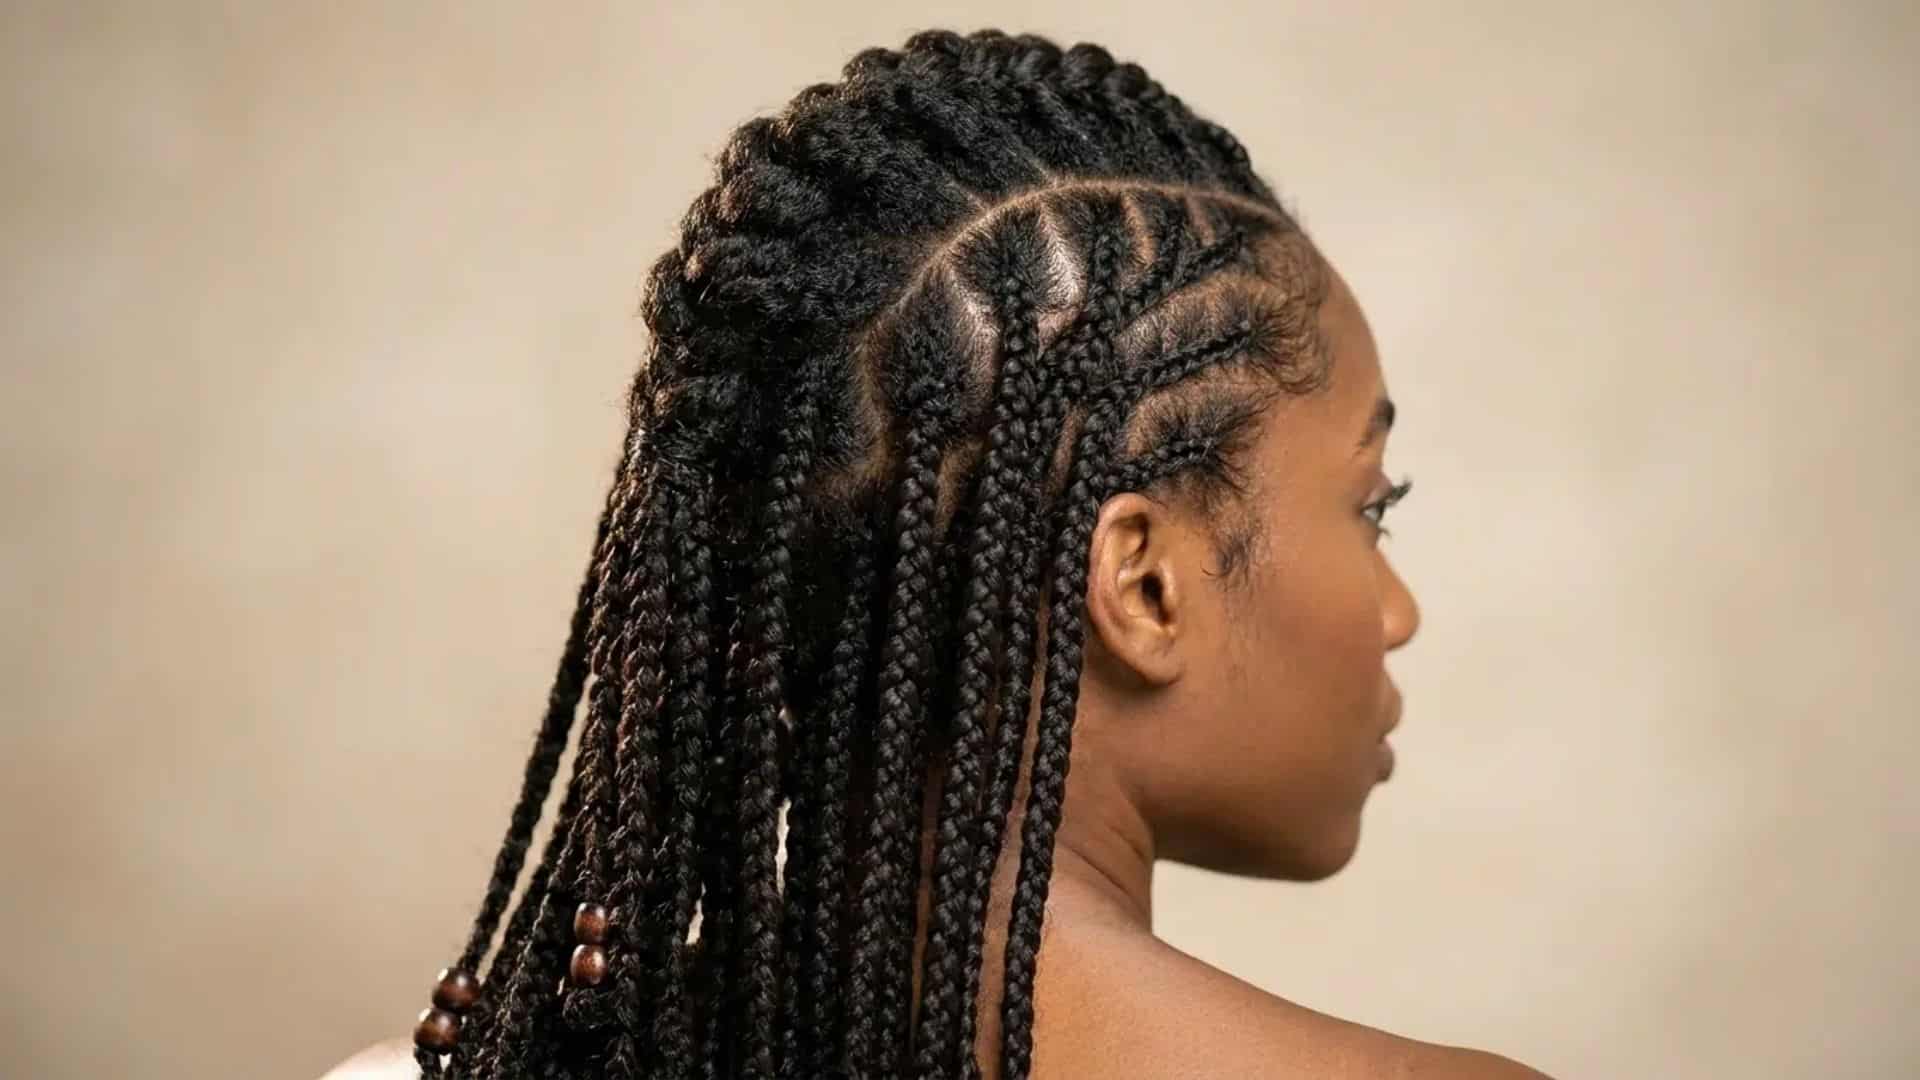
Most of us grew up with the basic three-strand plait, something our moms did before school or before bed.
That simple style has turned into one of the most creative corners of hair fashion, with fresh takes showing up constantly.
I have worked with every hair texture you can imagine, and one thing stays true: there is no single “best” Braid. There are just the right types of braids for your hair, your lifestyle, and the moment you are dressing for.
This list covers the braid styles worth knowing in 2026.
Some you can learn in a weekend with a mirror and a little patience. Others take a professional a few hours, especially the more detailed protective styles.
Trying to protect your curls, get ready for a wedding, or switch up your everyday look? There’s a braid here for you.
How to Choose the Right Braid Style for Your Hair
The right braid comes down to five things: your hair texture, your length, how much upkeep you are willing to do, how long you want the style to last, and what you are dressing it for.
A style that looks effortless on fine, straight hair might need a completely different approach on coily 4C hair, and that is normal.
Here is a quick way to narrow things down.
| Hair Goal | Recommended Braid Styles |
|---|---|
| Protective styling | Box braids, knotless braids, cornrows |
| Natural hair care | Nubian twists, Senegalese twists, flat twists |
| Low maintenance look | Ghana braids, feed-in braids |
| Romantic or event hairstyles | Waterfall braids, braided updos |
| Trendy styles | Mermaid braids, boho braids, bubble braids |
Classic Types of Braids Everyone Loves
These are the techniques most people learn first, and they still hold up as everyday go-to hairstyles or the foundation for something more advanced.
1. French Braid
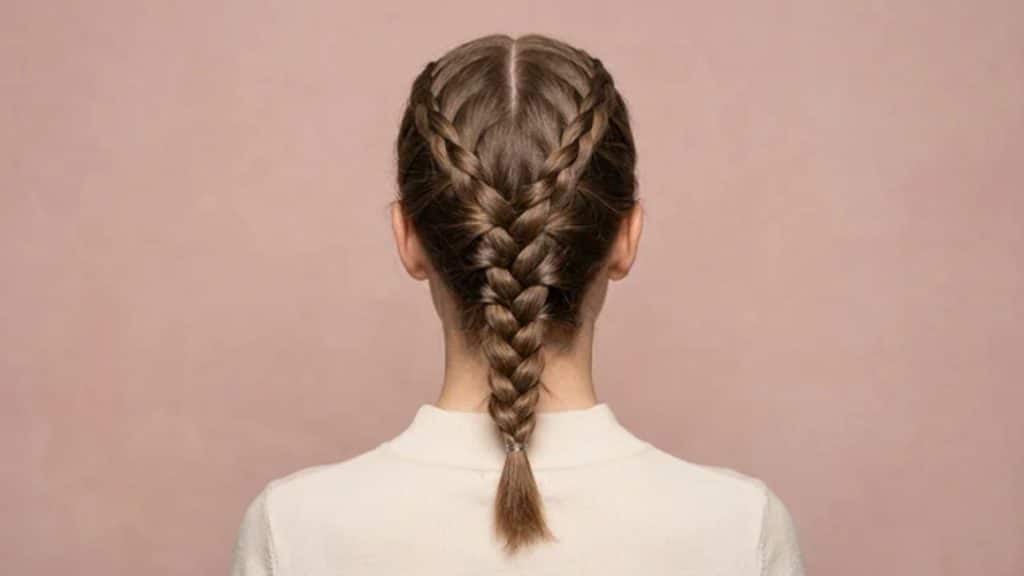
Level: Intermediate
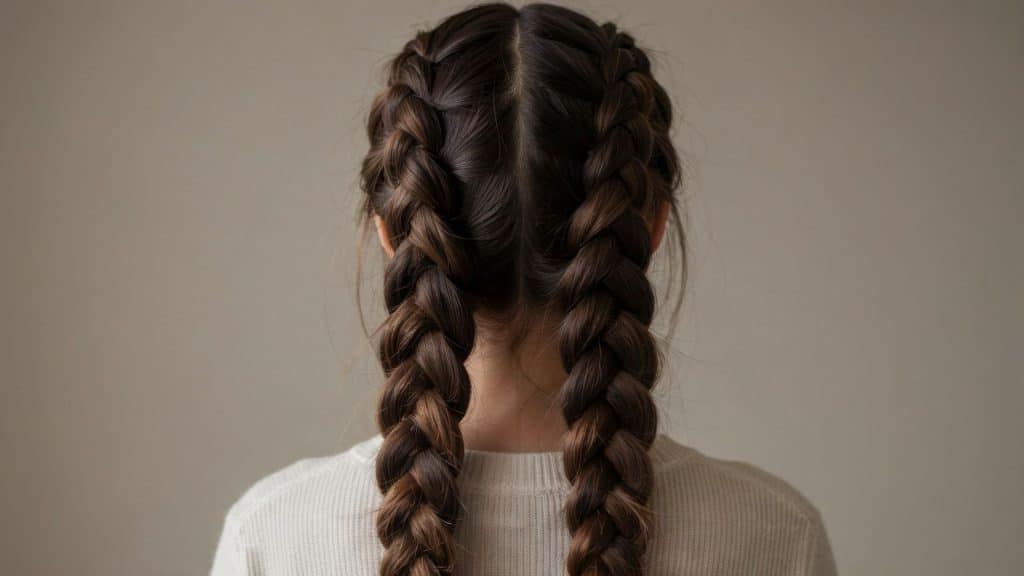
The French Braid is a three-strand braid where you gradually add in new hair from both sides as you cross sections over the middle.
It is the style most of us picture when we hear the word braid. It looks polished without trying too hard, which is exactly why it works for both a school run and a formal event.
How to Create the Look:
- Section a piece of hair at your crown and split it into three even strands.
- Cross the right strand over the middle, then the left strand over the new middle, adding a small piece of hair from the side each time you cross.
- Keep braiding down the back of your head, picking up hair until every section is woven in, then finish with a regular three-strand braid to the ends.
- Secure with an elastic and gently tug the edges to loosen and soften the shape.
2. Dutch Braid
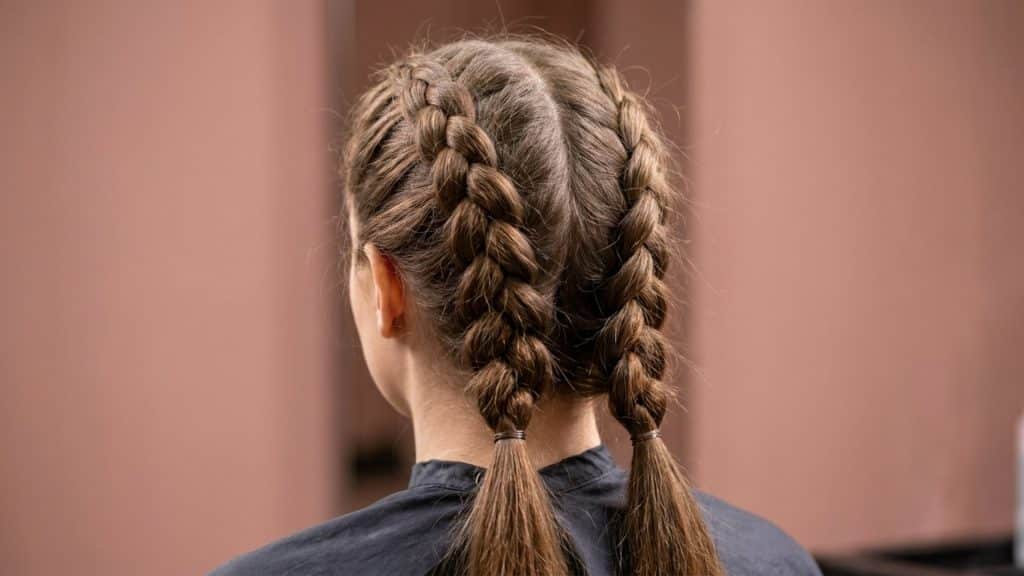
Level: Intermediate
Think of the Dutch Braid as the French Braid’s bolder sibling. Instead of crossing strands over the middle, you cross them underneath, so the Braid sits on top of the hair rather than blending into it.
That underneath crossing gives the braid a raised, almost three-dimensional look that photographs beautifully.
How to Create the Look:
- Take a section at the crown and divide it into three strands.
- Cross the right strand under the middle, then the left strand under the new middle, picking up a new piece of hair from each side as you go.
- Continue down the head, keeping tension even so the braid stays raised and doesn’t flatten.
- Braid the remaining length as a regular three-strand plait and secure with an elastic.
- Tip: pull the edges of each stitch outward slightly for a fuller, more dimensional finish.
3. Three Strand Braid
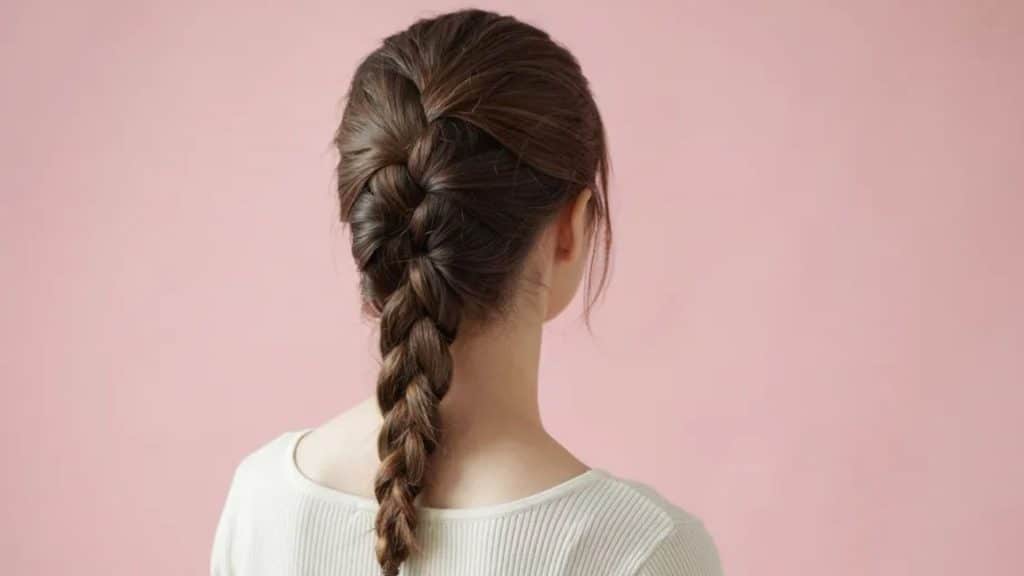
Level: Beginner
This is the most basic Braid there is, and honestly, it is the one worth mastering first.
Once you have the three-strand technique down, most other braids on this list start to make a lot more sense. It works on nearly every hair texture and length, which is part of why it never really goes out of style.
How to Create the Look:
- Gather your hair into a low ponytail or hold it at the nape of your neck, then split it into three equal strands.
- Cross the right strand over the middle strand, then cross the left strand over the new middle strand.
- Repeat this pattern, alternating sides, all the way down to the ends.
- Secure with an elastic and tighten each section evenly as you braid to avoid a lopsided finish.
4. Fishtail Braid
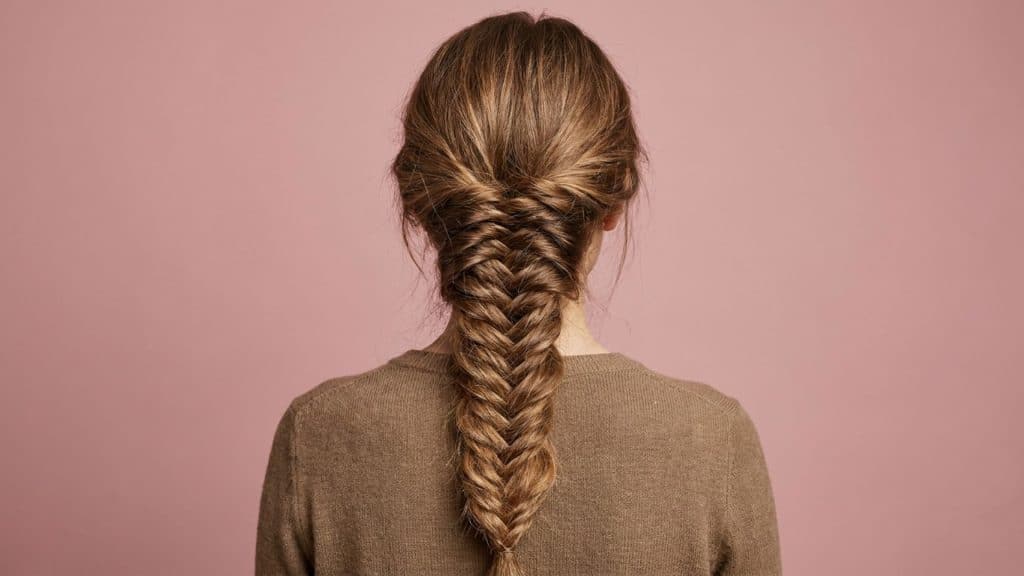
Level: Intermediate
The fishtail braid gets its name from the fine, textured pattern it creates when you cross tiny sections from each side of the hair instead of three even strands.
People always assume it takes years to master, but honestly, the technique is more forgiving than it looks once you find the rhythm.
How to Create the Look:
- Divide your hair into two equal sections and hold one in each hand.
- Take a thin piece from the outer edge of the left section and cross it over to join the right section.
- Take a thin piece from the outer edge of the right section and cross it into the left, repeating this pattern down the length of your hair.
- Secure the ends with an elastic, then gently pull at the edges to loosen and widen the woven pattern.
5. Rope Braid
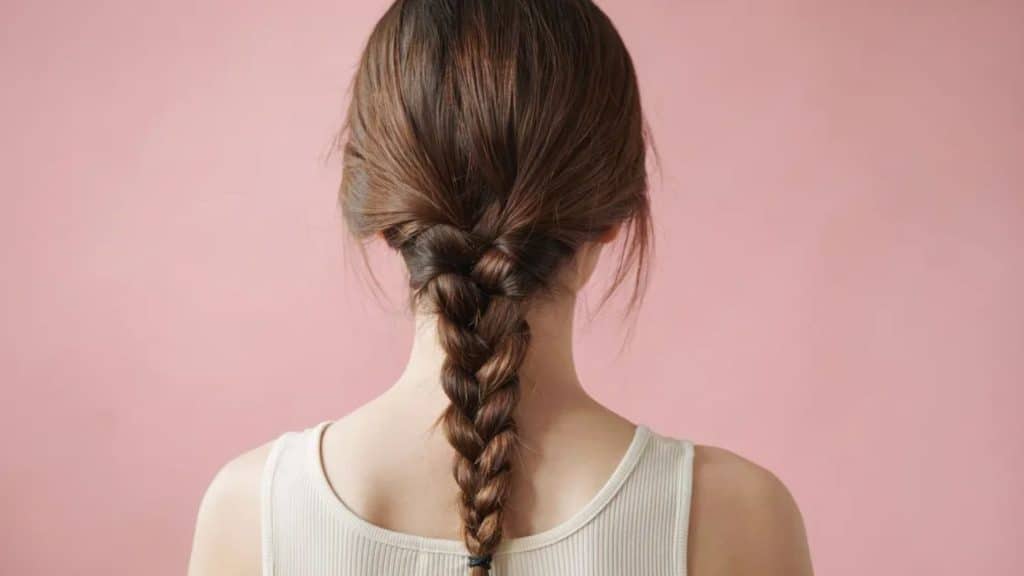
Level: Beginner
The rope braid is made by twisting two sections of hair around each other rather than crossing three strands together.
If you are short on time, the rope braid is your friend. Twist two sections of hair around each other, and that is the whole technique. It reads as more done up than a plain ponytail but takes barely any extra time in the morning.
How to Create the Look:
- Gather your hair into a ponytail and divide it into two even sections.
- Twist each section clockwise on its own a few times to add tension.
- Wrap the two twisted sections around each other in the opposite direction, keeping the twist consistent as you move down.
- Secure the ends with an elastic, then tug lightly on the twists to loosen them for a softer look.
6. Pull-Through Braid
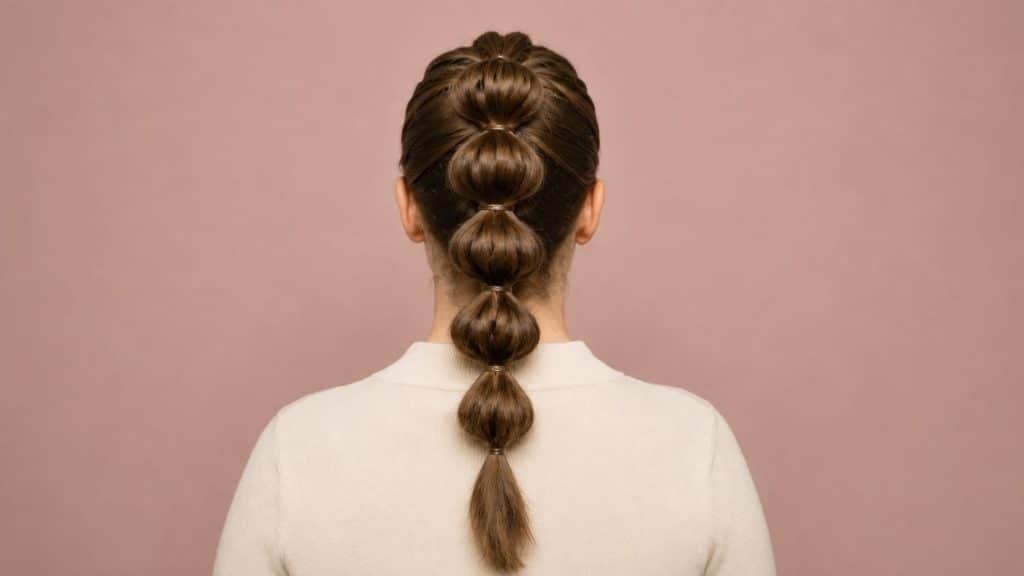
Level: Beginner
The pull-through Braid is not technically woven like a traditional braid. Instead, small ponytails are looped through one another to create a thick, rounded pattern that looks far more complicated than it actually is.
This is one I recommend when someone wants maximum volume, especially on fine hair that tends to disappear inside a regular braid.
How to Create the Look:
- Gather a small ponytail at the crown and secure it with an elastic, then split it into two sections.
- Gather a new section of hair just below it into a second ponytail, and pull that second ponytail up through the middle of the first split section.
- Combine the two outer pieces with a new section of hair below, tie with an elastic, then repeat the pulling-through step down the length of your hair.
- Once you reach the ends, gently pull the sides of each segment to make the braid look fuller, then secure with a final elastic.
7. Crown Braid
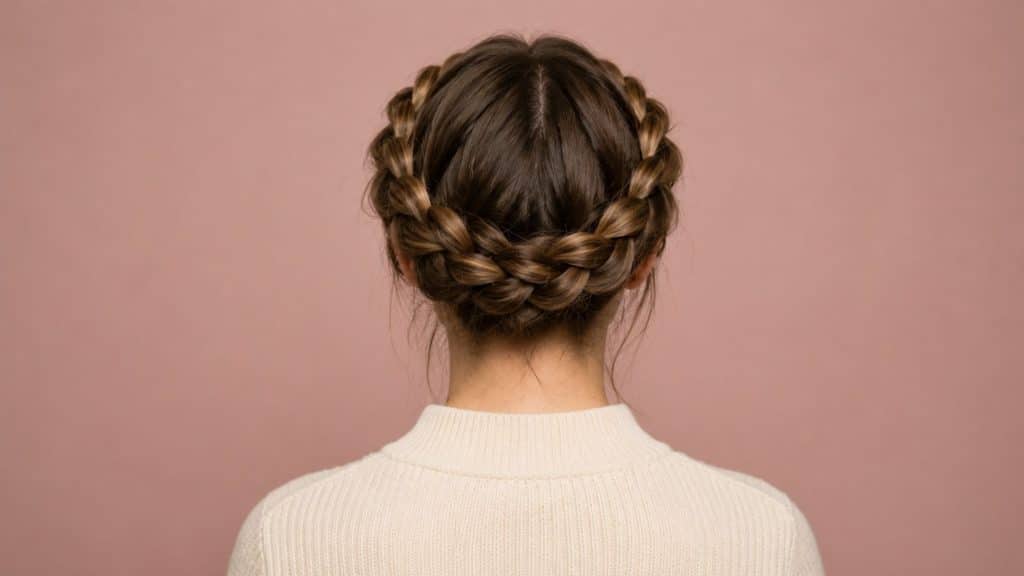
Level: Expert
A crown braid wraps around the head like a headband, usually using a French or Dutch braiding technique. The finished style keeps every strand tucked away while still looking soft and intentional.
It works beautifully for weddings, summer events, or any day when you want your hair completely off your neck without settling for a basic bun.
How to Create the Look:
- Make a side part near one ear and divide the starting section into three strands.
- French Braid around the hairline, adding a small amount of hair with every crossover.
- Continue around the back and opposite side until all loose hair is incorporated.
- Braid the remaining tail normally, tuck it beneath the starting point, and secure it with pins.
Protective Types of Braids for Natural Hair
Protective braids reduce how much you have to manipulate your hair day-to-day, which makes them especially popular for curly and coily textures.
That said, how they are installed and removed matters just as much as the style itself when it comes to keeping your hair healthy.
8. Box Braids
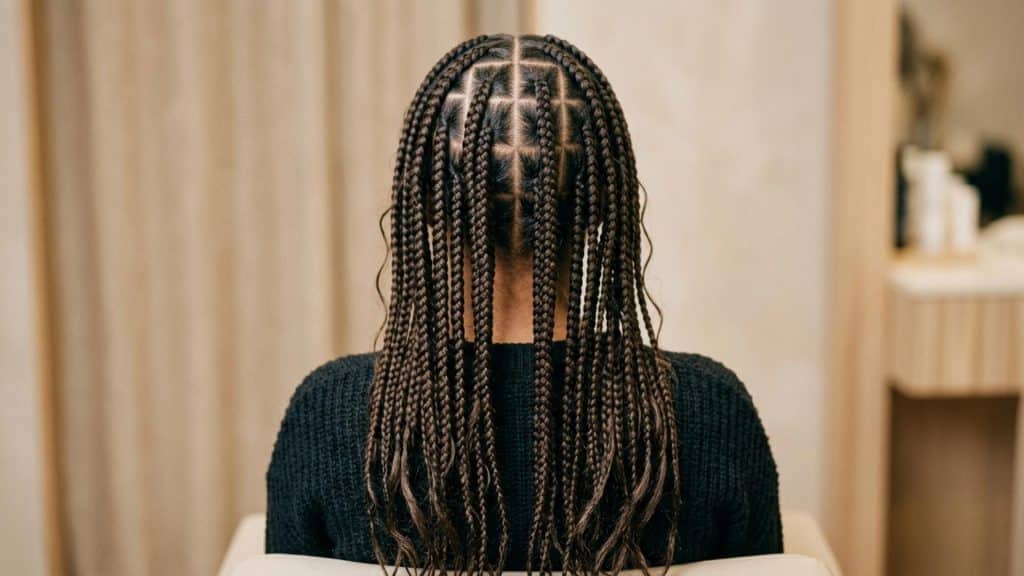
Level: Expert
Box braids are probably the most recognizable protective style on this entire list. The hair gets divided into small, neat square sections, each one braided individually with or without added extensions.
You can go small, medium, or jumbo depending on how much time you want to spend in the chair and how bold you want the finished look to be.
Jumbo box braids install fastest and use the fewest pieces on your head, while micro-sized sections take the longest but usually last longer between touch-ups.
Size is really the first decision to make here, and it’s worth thinking through before you sit down for a full hair extension appointment, since your natural density affects how heavy the finished style will feel.
How to Create the Look:
- Section clean, detangled hair into small, even squares using a rat-tail comb, clipping the rest out of the way.
- Take one section, add a piece of braiding hair at the root, and braid all three strands together in a standard three-strand pattern down to the ends.
- Seal the ends with a small elastic or dip in hot water, depending on the extension type.
- Repeat section by section across the head, keeping the tension even so no single braid pulls tighter than the rest.
- Tip: leave a little slack at the root of each Braid to protect your hairline over the following weeks.
9. Knotless Box Braids
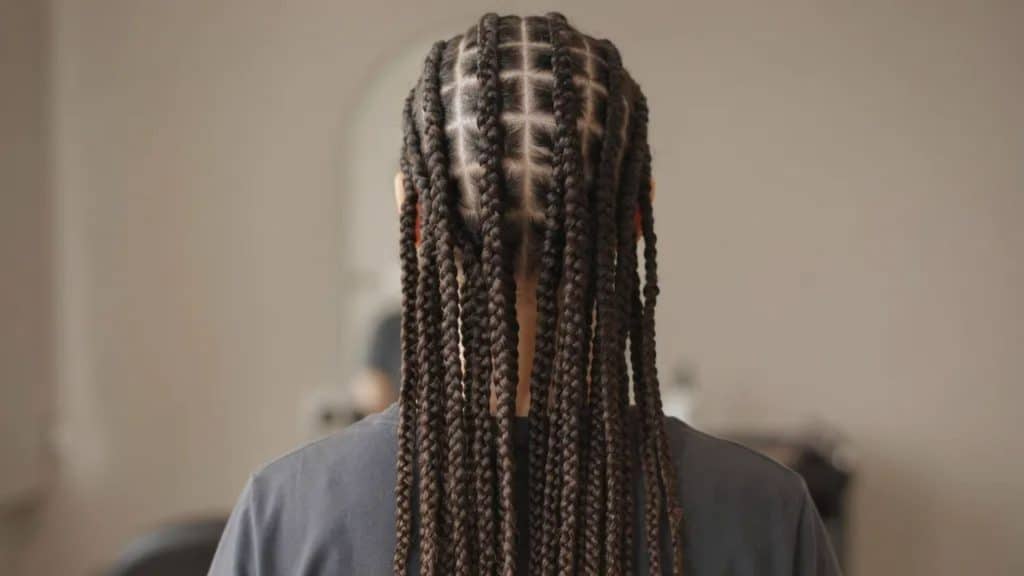
Level: Expert
Knotless braids start with a feed-in technique instead of adding all the extension hair right at the root. That single difference makes a noticeable impact.
The root sits flatter and looks more like it is growing naturally from your scalp, and most people find the whole style feels lighter than traditional box braids.
How to Create the Look:
- Section clean, detangled hair into small squares, similar to standard box braids.
- Start each Braid with only your natural hair in a three-strand pattern for the first inch or two.
- Gradually feed in small pieces of braiding hair as you continue down, rather than adding it all at once.
- Once the extension hair is fully incorporated, continue a regular three-strand braid to the ends and seal.
10. Cornrow Braids
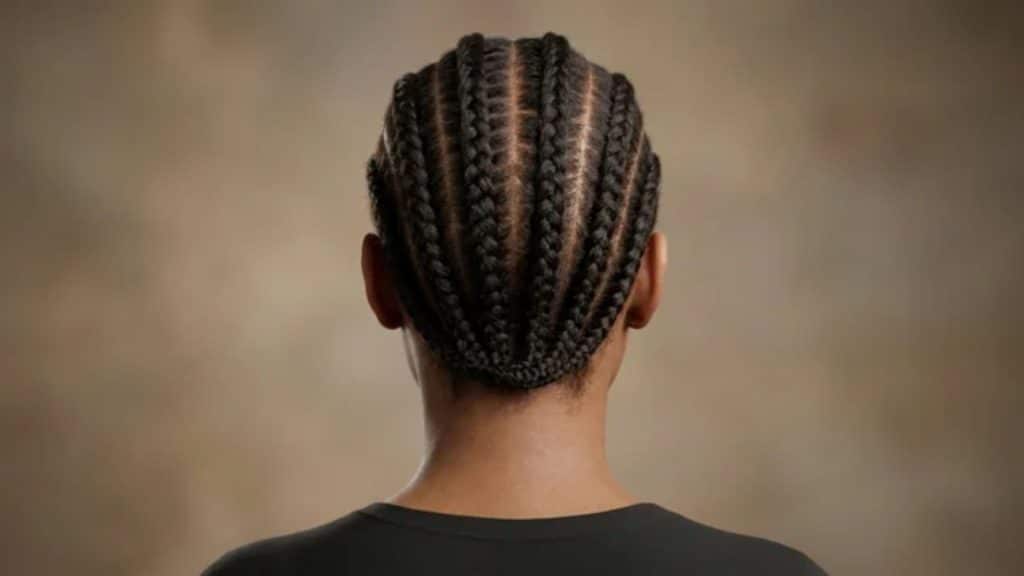
Level: Expert
Cornrows sit braided close to the scalp, and that closeness is really the whole look. Straight back is the classic version, but plenty of people curve them around the head or ask their braider for a more detailed pattern instead.
This style works well on natural, coily, and kinky textures and can last one to two weeks with care.
How to Create the Look:
- Part clean, detangled hair into straight or curved rows using a rat-tail comb.
- Take a small section at the root of one row and split it into three strands.
- Braid underhand, close to the scalp, picking up small amounts of hair from each side as you move along the row.
- Continue to the end of the row and secure the tail, then repeat for each remaining row across the head.
11. Stitch Braids
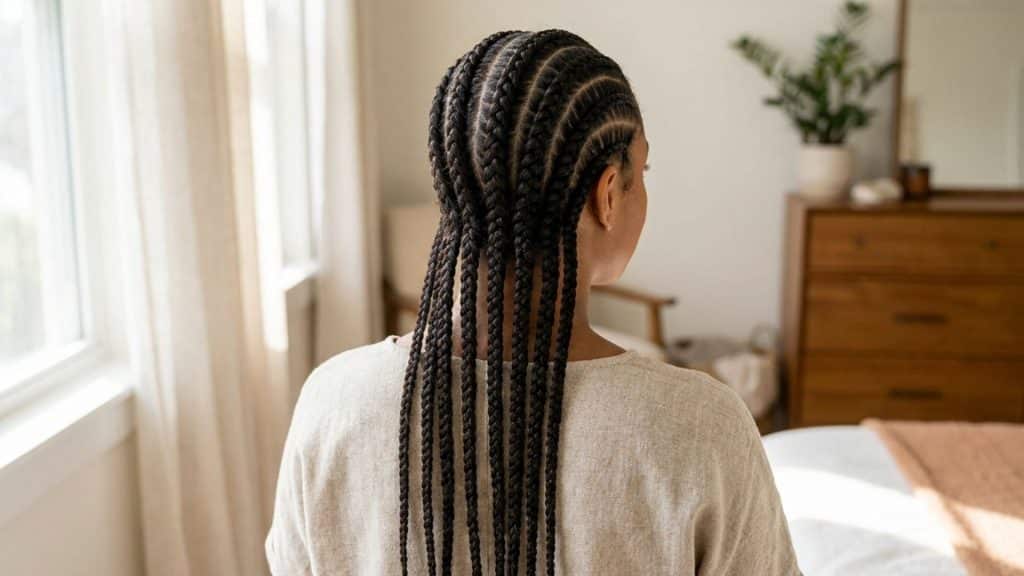
Level: Expert
Stitch braids are cornrows with one deliberate difference: a slightly thicker, raised part running down the center of each row.
That thin ridge is what gives the style its name, since each row looks like a line of stitching.
They read as more polished and structured than a standard cornrow, which is why so many clients request them for special occasions.
How to Create the Look:
- Part clean, detangled hair into clean, evenly spaced rows.
- Start each row with a slightly thicker section at the base to create the raised “stitch” line.
- Cornrow the row close to the scalp, keeping the part clean and pulling minimal extra hair into the outer edges.
- Secure each tail and repeat across the head, checking that every part line stays crisp and even.
12. Ghana Braids
Level: Expert
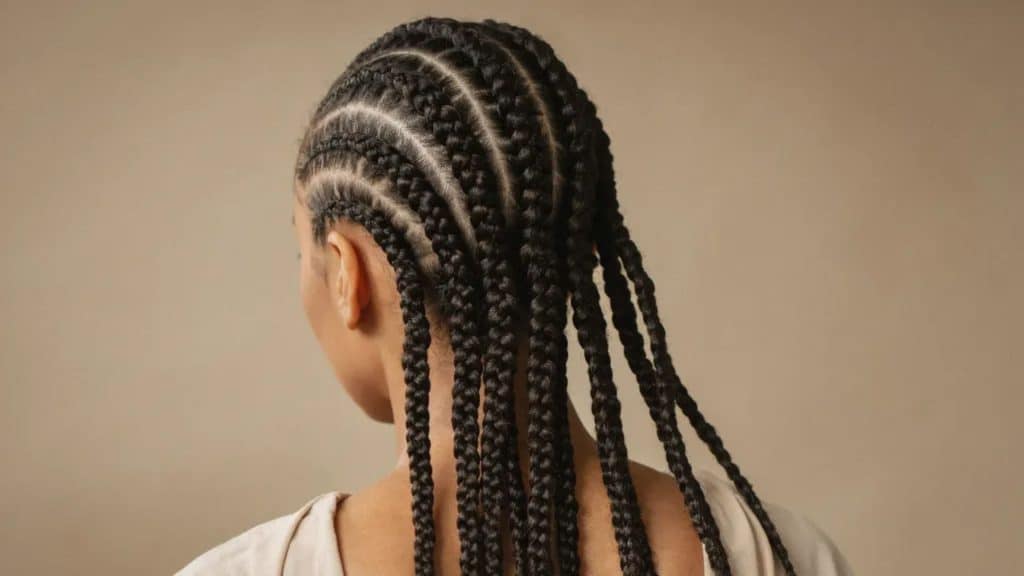
Ghana braids are a type of feed-in cornrow style, and the direction the extensions are added is what sets them apart.
As the braid moves backward, extensions get added gradually, building a thicker base that tapers down toward the ends.
You will also hear these called banana braids or invisible cornrows, and they are commonly styled straight back or in curved patterns.
How to Create the Look:
- Part hair into clean rows, deciding whether you want straight-back or curved lines.
- Begin each row with a small three-strand cornrow close to the scalp.
- Feed in slightly more extension hair with each pass as you move down the row, allowing the Braid to thicken gradually.
- Taper the amount of hair added as you near the ends so the braid narrows again, then secure the tail.
13. Fulani Braids
Level: Expert
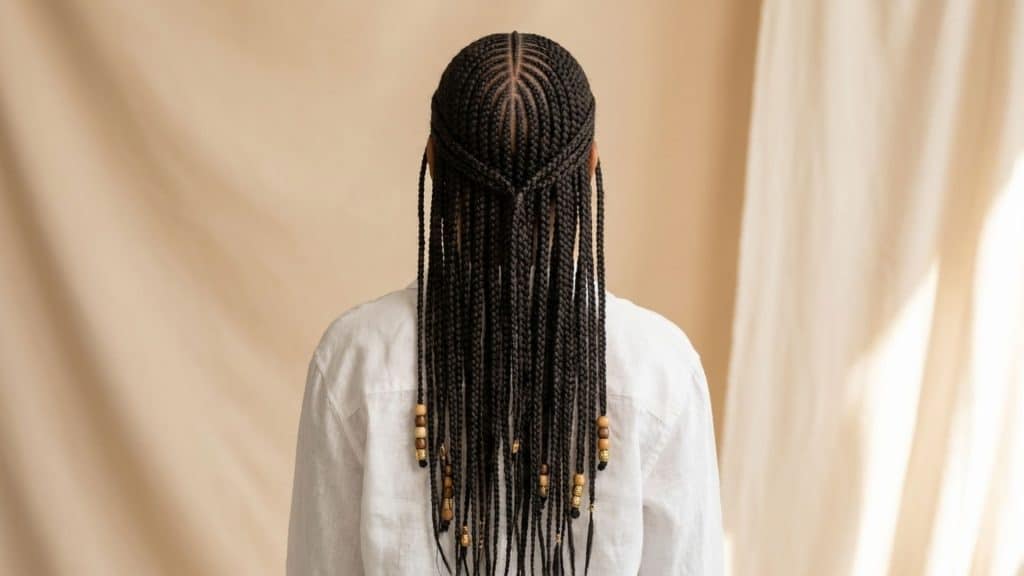
Fulani braids combine scalp cornrows with individual hanging braids.
A traditional-inspired layout often features one or more cornrows through the center of the head, side or temple cornrows directed toward the ears, and loose box-style braids hanging at the sides or back.
Beads, cuffs, shells, and rings may be added as decorative details.
The style draws from the hairstyling traditions of the Fulani or Fula people across West Africa and the Sahel.
When a client asks me for Fulani braids, I map the center cornrow and face-framing braids first because those elements define the finished design.
How to Create the Look:
- Map the center cornrow and side or temple cornrows before sectioning the remaining hair.
- Braid the cornrows close to the scalp, directing the side rows toward the temples or ears.
- Create individual hanging braids through the back and remaining side sections.
- Add beads or cuffs while keeping the front braids light enough to protect the hairline.
14. Lemonade Braids
Level: Expert
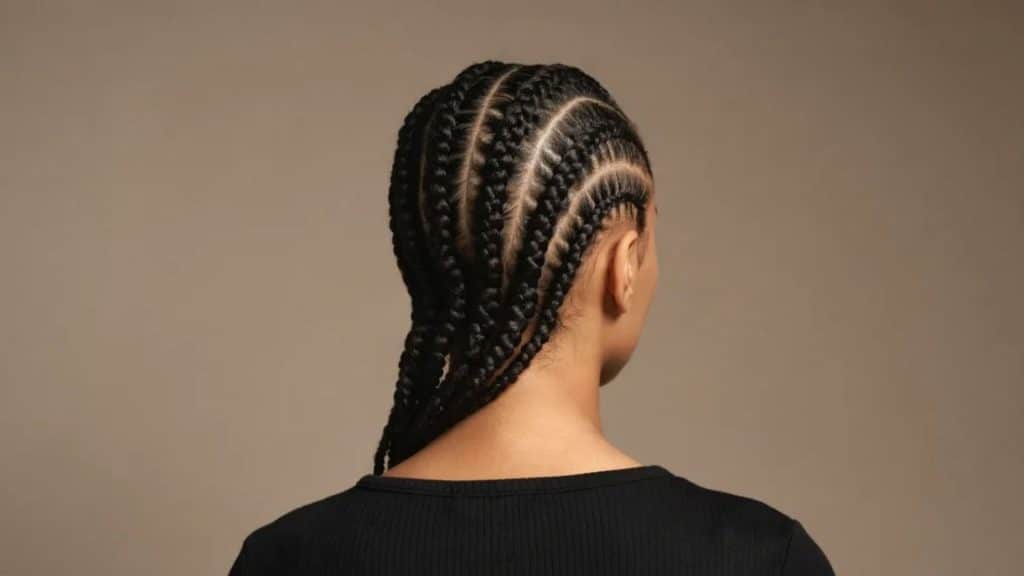
Lemonade braids took off after celebrity culture put them front and center, and the style itself is a fairly standard cornrow. What sells it is the direction.
Sweeping every Braid to one side instantly reads as sleek and a little dramatic. They work well on natural and coily hair and suit both casual days and dressed-up events.
How to Create the Look:
- Part your hair so the majority sweeps toward one side of your head.
- Cornrow each row close to the scalp, angling the rows to follow the sweep rather than braiding straight back.
- Feed in extension hair evenly as you braid each row to the ends.
- Secure the tails and let them fall over one shoulder for the signature swept look.
15. Feed-In Braids
Level: Expert
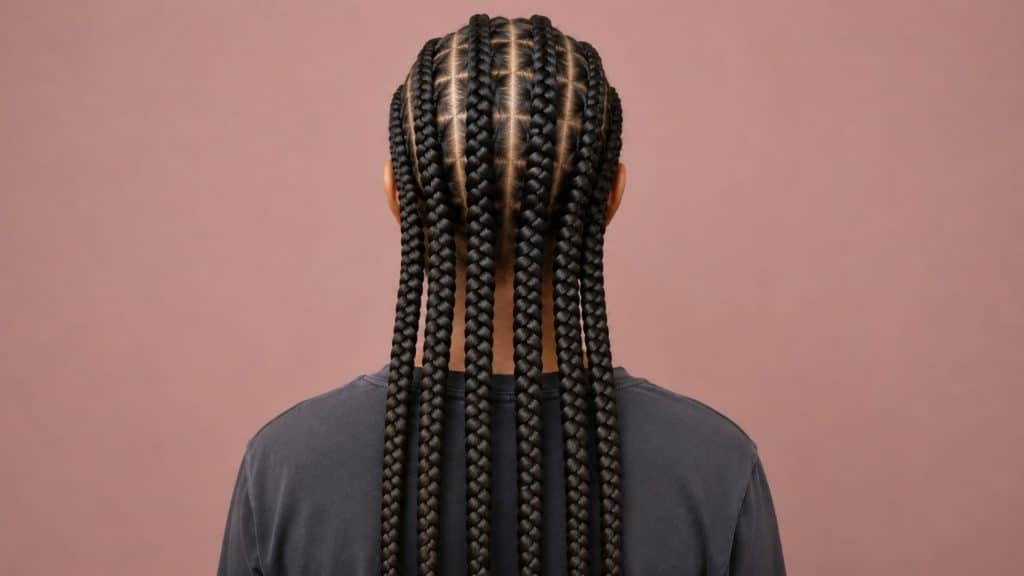
Feed-in braids are created by gradually adding small pieces of extension hair as the braid moves along the scalp. This keeps the roots looking slim and natural before the Braid becomes fuller farther down.
The gradual installation can also feel lighter at the hairline than starting with one large piece of extension hair, although the braids should still never feel painfully tight.
How to Create the Look:
- Part hair into clean sections depending on whether you want cornrows or individual braids.
- Begin each Braid with only your natural hair for the first inch.
- Add small pieces of extension hair gradually with each crossover, increasing the amount slightly as you move down.
- Finish the remaining length as a standard three-strand braid and seal the ends.
16. Micro Braids
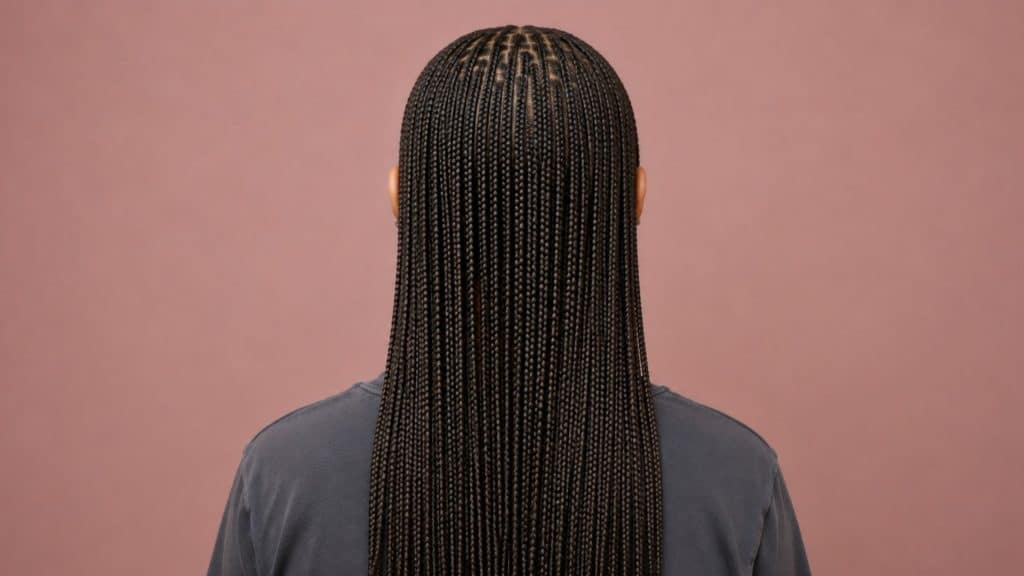
Level: Expert
Micro braids are extremely small individual braids installed throughout the hair. Their tiny size gives them plenty of movement and makes them easy to style into ponytails, buns, or half-up looks.
They take much longer to install than medium or jumbo braids, so this is not the style to choose when you are hoping for a quick appointment.
How to Create the Look:
- Section hair into very small, even parts across the entire head using a fine-tooth comb.
- Add a small piece of extension hair to each section and Braid in a standard three-strand pattern down to the ends.
- Seal each Braid’s ends with a small elastic or dip method.
- Continue section by section until the whole head is complete, checking that tension stays even throughout.
Twist and Natural Hair Braid Styles
Twists technically use a two-strand technique rather than a true braid, but they’re often grouped with protective braid styles because they offer many of the same benefits.
17. Nubian Twists
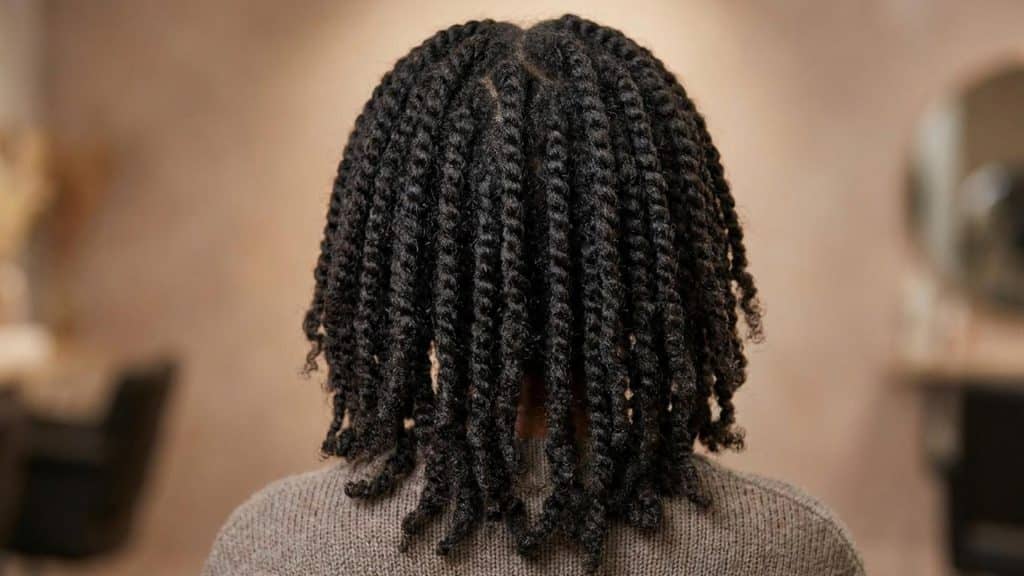
Level: Intermediate
Nubian twists are a protective style made by twisting two strands of natural hair or extensions together. They have a springy, textured look to them and tend to feel lighter and more flexible than some of the bulkier extension styles.
Working with natural hair clients, this is usually where I steer people who want something protective but do not want a heavy set on their head all day.
How to Create the Look:
- Section clean, detangled hair into even parts across the head.
- Take a small section, add extension hair if desired, and split it into two even strands.
- Twist the two strands around each other from root to tip, keeping tension consistent.
- Seal the ends with a small elastic, and repeat across the head.
18. Senegalese Twists
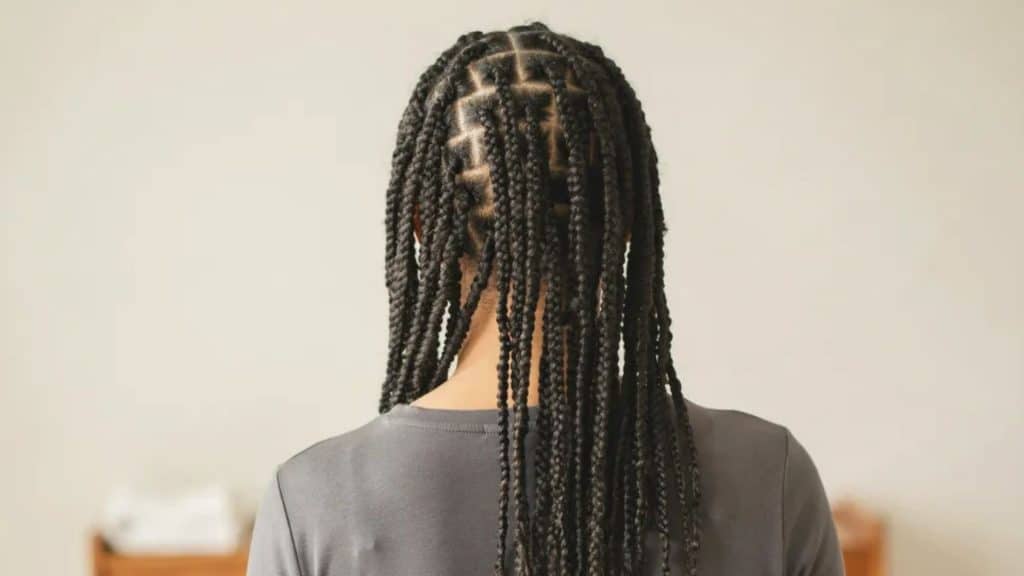
Level: Intermediate
Senegalese twists use that same two-strand twisting method, but the finished result is smoother and more rope-like than Nubian twists.
They have earned a reputation as one of the longest-lasting protective styles out there, and it is well deserved. They suit natural and coily hair and work for both casual and dressed-up looks.
How to Create the Look:
- Section hair into even parts and clip away what you’re not working on.
- Take a small section, add a piece of kanekalon extension hair, and split it into two strands.
- Twist the two strands tightly around each other from root to tip for a smooth, uniform look.
- Seal the ends with hot water or a small elastic, then repeat across the head.
19. Marley Twists
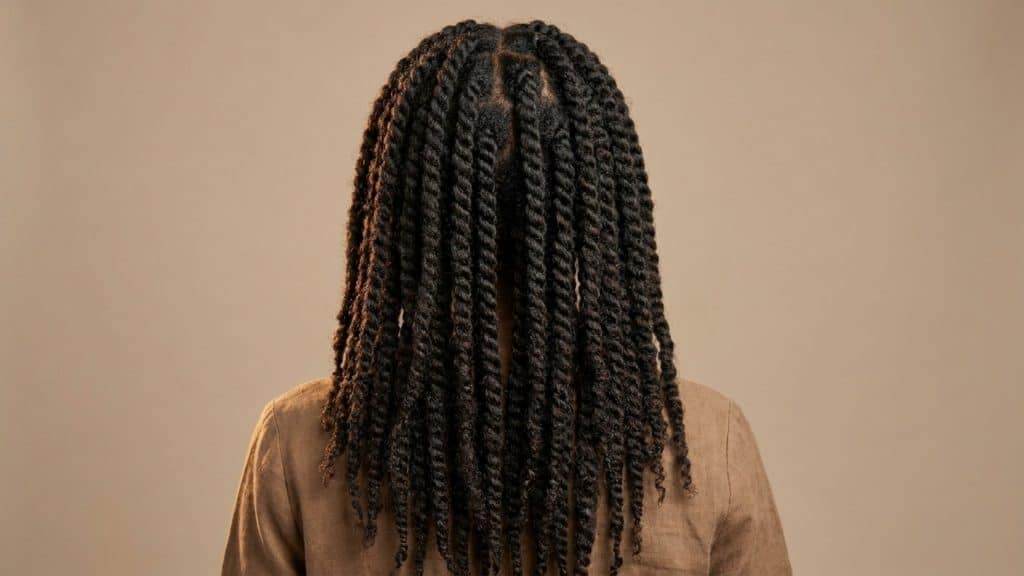
Level: Intermediate
Marley twists get their name from the Marley hair extensions used to create them.
The texture ends up looking natural and a little loc-like, which a lot of people love for the lower-maintenance vibe. They suit natural, coily, and kinky hair types and tend to look thicker and fuller than Senegalese twists.
How to Create the Look:
- Section clean, detangled hair into even parts across the head.
- Take a small section, add a piece of Marley extension hair, and split it into two strands.
- Twist the strands around each other from root to tip, keeping the twist looser than a Senegalese twist for a more natural texture.
- Seal the ends and repeat across the head, checking that the twists match in thickness.
20. Passion Twists
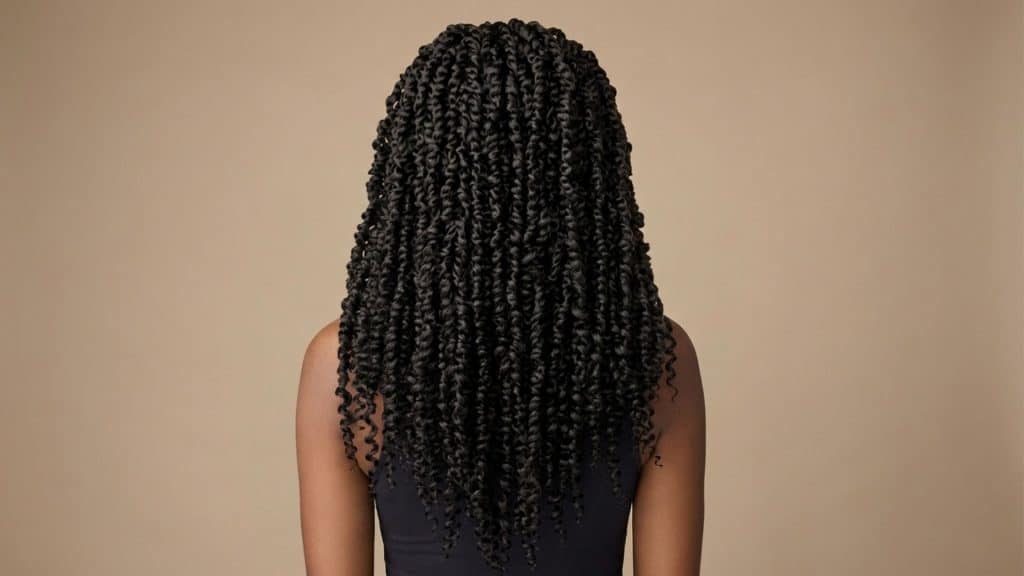
Level: Intermediate
Passion twists combine the twisting technique with curly extension hair, which gives you a soft, bohemian look without needing to add any curling after installation.
The curls are already built into the hair itself. They suit natural and coily hair and tend to look looser and bouncier than Senegalese or Marley twists.
How to Create the Look:
- Section clean, detangled hair into even parts.
- Take a small section, attach a piece of curly passion twist hair, and split it into two strands.
- Twist the two strands around each other from root to tip, letting the natural curl pattern of the hair show through.
- Seal the ends lightly, allowing some curl definition to stay loose rather than pulling too tight.
Trending Types of Braid Hairstyles for 2026
The braids getting the most attention this year blend traditional techniques with textured finishes, loose curls, and small creative details that make each style feel personal.
21. Waterfall Braids
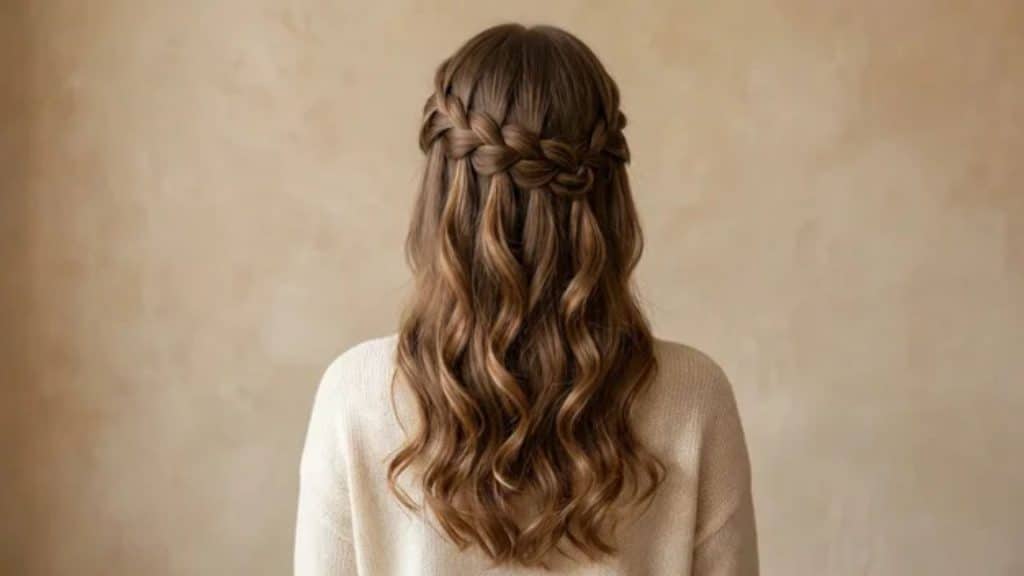
Level: Intermediate
A waterfall braid is a French braid variation where you drop sections through the Braid instead of crossing them all the way over, creating the cascading effect the style is named for.
I get asked for this one constantly around wedding season, especially worn half up.
How to Create the Look:
- Take a section of hair near your hairline and split it into three even strands.
- Cross the top strand over the middle, then the bottom strand over the new middle, just like a French braid.
- When you reach the point where you’d normally add a new bottom strand, drop that strand instead so it falls loose, then pick up a fresh section of hair from just behind it to replace it.
- Repeat this pattern horizontally across the back of your head, then finish the tail with a regular three-strand braid and secure.
22. Mermaid Braids
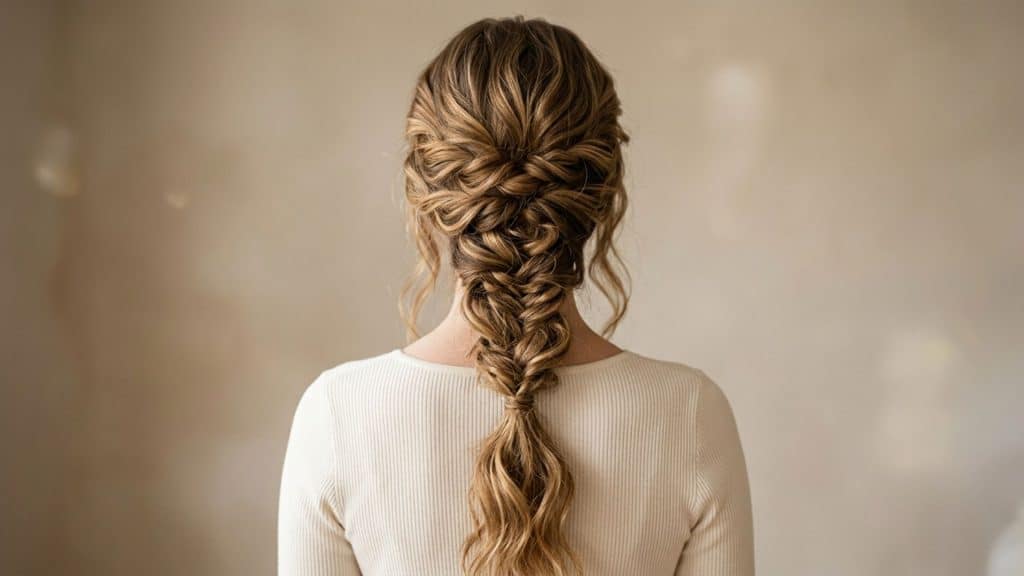
Level: Intermediate
Mermaid braids are a loose, textured braid inspired by mermaid-style waves.
They often mix in fishtail technique or combine a couple of braid sets, and the result is a soft, romantic finish that looks a little undone in the best way. It suits long, wavy, or curled hair best, since the texture supports the loose, pulled-apart finish.
How to Create the Look:
- Curl or wave your hair beforehand to add texture that will hold the loose braid shape.
- Divide hair into two sections and fishtail braid down the length, using slightly larger pieces than a traditional fishtail for a chunkier look.
- Secure the ends with a clear elastic.
- Gently pull apart each woven section with your fingers to loosen the Braid and add volume throughout.
23. French Curl Braids
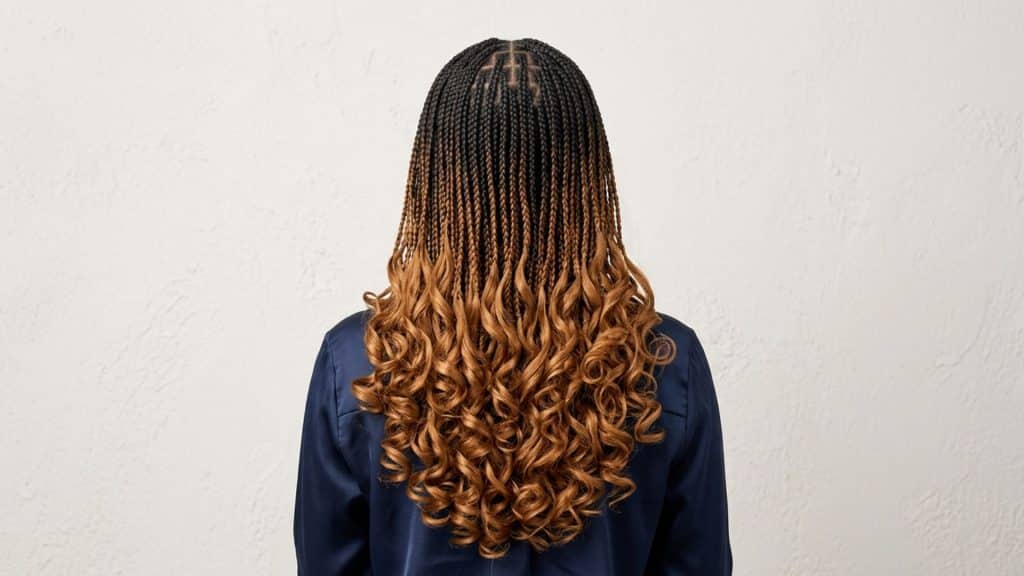
Level: Expert
French curl braids are a protective style built on a braided base, with curly synthetic French curl hair left loose at the ends instead of braided all the way down.
That curly, fluffy finish at the tips is the whole point of the style. They are different from a regular box braid in one key way: the curled ends are the feature, not an afterthought.
How to Create the Look:
- Section clean, detangled hair into small, even parts.
- Attach French curl extension hair at the root and braid a standard three-strand pattern for most of the length.
- Stop braiding a few inches before the natural end of the extension hair, leaving the curly portion loose.
- Repeat across the head, then gently separate the curls with your fingers for a fuller finish.
24. Boho Braids
Level: Expert
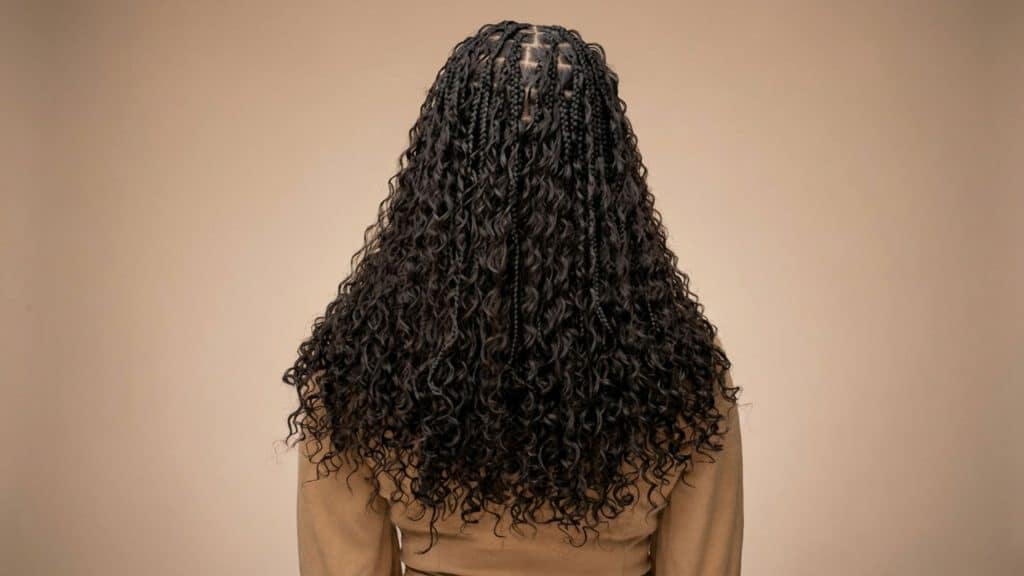
Boho braids combine a knotless or box-braid base with loose curly strands left out throughout the length.
That placement is what separates them from French curl braids, which usually keep most of the curl at the ends.
Human-hair curls give the softest movement, while synthetic curls are usually more affordable but may tangle faster.
I tell clients to expect more upkeep than a fully braided set because every loose curl can catch, frizz, or knot. Light mousse, gentle finger detangling, and a satin bonnet help preserve the textured finish.
How to Create the Look:
- Section hair into small, even parts and begin each Braid using the knotless, feed-in method.
- As you braid down each section, occasionally leave a thin strand of curly extension hair out instead of braiding it in.
- Continue this pattern down the length, spacing the loose pieces so they’re spread evenly rather than clustered.
- Finish the ends and gently separate the pulled-out curls with your fingers for a soft, blended look.
25. Butterfly Braids
Level: Expert
Butterfly braids start as one or two oversized feed-in braids, often created over a ponytail or cornrow base.
Once the Braid is secure, the outer loops are carefully pulled apart or pancaked to form wide, wing-like sections. The result should look soft and intentionally full rather than randomly messy.
How to Create the Look:
- Section hair into large, even parts and braid each into a simple three-strand pattern with extension hair if desired.
- Once every Braid is complete, go back through each one and gently pull the edges outward with your fingers.
- Continue pulling apart sections evenly across each Braid until the desired fullness is reached.
- Adjust any uneven spots by loosening or tightening specific sections to balance the volume.
Best Hair Products for Braids
Good products matter just as much as good technique. Here is what I actually reach for when I am installing or maintaining braids on a client.
1. A lightweight oil for the scalp. Something like jojoba or a light braid spray works well. You want moisture, not grease sitting on top of the hair.
Try: ORS Olive Oil Braidzone Soothing Scalp Oil
2. An edge control with a soft hold. Skip anything that hardens or flakes. Your edges need to move a little, not get glued down.
Try: SheaMoisture Coconut & Hibiscus + Flaxseed Edge Gel
3. A leave-in conditioner or mousse before installing. This helps the braid hold its shape without leaving your natural hair dry underneath.
Try: Cantu Shea Butter Leave-In Conditioning Repair Cream
4. A residue-free shampoo for wash day. Braids actually need a proper wash, not just a rinse and hope for the best. I always tell clients to dilute the shampoo first and focus it right at the scalp.
Try: PATTERN Clarifying Shampoo
5. A satin or silk scarf. I know it is not technically a product, but I bring it up every time. It cuts down on frizz and keeps your edges from catching on regular pillowcases overnight.
Try: Cantu XL Braid Sleep Bonnet
6. A small spray bottle with water and a bit of leave-in. This is my go-to for refreshing braids between washes without overloading them with product.
Try: ORS Olive Oil Braidzone 7-in-1 Braid Leave-In Spray
None of this needs to be expensive. It just needs to match what your hair and scalp actually need while the braids are in. All of these are available at Target, Walmart, Ulta, or the brand’s own site, so nothing here requires a specialty beauty supply run.
Celebrity Braids & Twists Inspiration
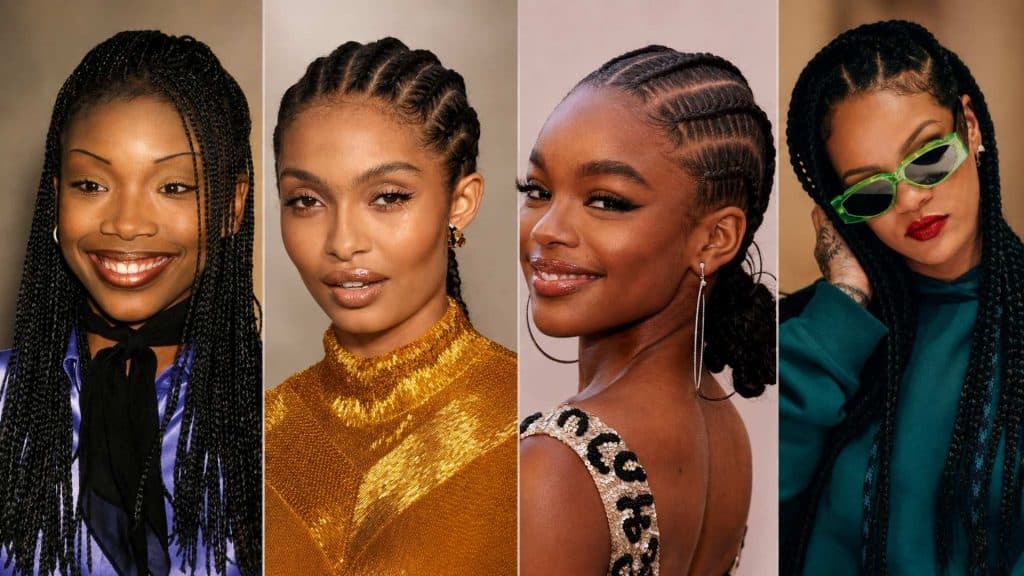
Seeing these styles on famous faces is often what pushes people to finally book the appointment. A few quick examples of how far each technique can stretch:
Rihanna→ Box Braids
Box braids come in sizes from extra-small all the way up to jumbo. They’re made with a three-strand braiding technique, knotted at the root and hanging straight down from the head, usually with clean square or triangle partings.
Marsai Martin→ Stitch Braids
Stitch braids are a type of cornrow, set apart by their sharply defined, parallel lines running through each row.
Yara Shahidi→ Cornrows
Cornrows are a three-strand style braided directly onto the scalp. They range from micro to medium width and often serve as the base technique behind bigger styles, though they hold up perfectly well worn on their own.
Brandy→ Micro Braids
Brandy is basically the reigning icon of micro braids. These are a miniature, three-strand version of box braids, and because each individual braid is so small, a full head takes a serious time commitment to install.
Pro Tip: Celebrity-inspired braids and twists can be customized with beads, cuffs, ribbons, or colorful extensions to match your personal style while protecting your natural hair.
How Long Do Different Types of Braids Last?
These wear-time ranges are common salon estimates rather than fixed medical limits.
The American Academy of Dermatology warns that repeatedly tight braids, cornrows, weaves, and extensions can contribute to traction alopecia, a form of hair loss caused by ongoing pulling.
Pain, headaches, scalp bumps, or strong tenderness mean the style is too tight and should be loosened or removed.
| Braid Style | Average Wear Time |
|---|---|
| Box Braids | 4 to 6 weeks (8 weeks max) |
| Knotless Braids | 4 to 6 weeks (8 weeks max) |
| Cornrows | 2 to 6 weeks |
| Ghana Braids | 2 to 6 weeks |
| Twists | 4 to 8 weeks |
| Waterfall or French Braids | 1 to 3 days |
Avoid repeatedly pulling braids into tight ponytails or heavy buns. Keeping the same areas under constant tension can increase the risk of traction alopecia.
If you’ve noticed thinning along your edges after a string of tight styles, it helps to understand what triggers hair thinning in the first place, since tension is only one of several possible causes.
How to Maintain Braided Hairstyles
Keeping braids looking fresh comes down to a handful of consistent habits.
Sleep with a satin bonnet or scarf to protect your edges and keep frizz down overnight.
Moisturize your scalp regularly with a light oil or water-based spray so it doesn’t dry out under the braids. Avoid excessive pulling, especially around your edges and hairline.
Clean your scalp gently rather than skipping washing entirely, ideally every one to two weeks with a diluted, residue-free shampoo focused right at the roots. And when it is time to take the style out, remove it carefully and slowly instead of rushing through it, working in small sections so you’re not tugging at tangled ends.
If you wear a wig or bun over your braids between touch-ups, the same friction-and-moisture rules still apply underneath.
Final Thoughts on Types of Braids
At the end of the day, braids give you options for pretty much every hair texture, lifestyle, and occasion you can think of.
When you gravitate toward a classic French braid or want to try one of the bigger 2026 trends like mermaid braids or French curl braids, the healthiest choice is always the one that respects your scalp and your hair’s actual condition.
Talk to your stylist about what your hair can realistically handle, and do not be afraid to try a few different types of braids before landing on your go-to.
The right one is usually more comfortable and more you than you expect.
Frequently Asked Questions
What are the Most Popular Types of Braids in 2026?
Knotless box braids, goddess braids, boho braids, mermaid braids, and Nubian twists are among the most requested styles this year.
Which Braids are Best for Natural Hair?
Box braids, cornrows, Ghana braids, and Nubian twists all work well on natural hair because they protect your strands without adding much weight.
Which Braid Style Lasts the Longest?
Box braids, knotless braids, and twists tend to last the longest, especially with proper nighttime maintenance and scalp care.
What is the Difference Between Fulani Braids and Cornrows?
Cornrows remain attached continuously to the scalp. Fulani braids combine patterned scalp cornrows with individual hanging braids and decorative accents.
Does Braiding Damage Hair?
Braiding should not damage healthy hair when the tension is comfortable, and removal is gentle. Repeated tight styles can cause breakage and traction alopecia.
How Much Do Braids Typically Cost?
Pricing depends heavily on the style, size, and length of hair, but simpler styles like cornrows or basic box braids generally cost less than detailed work like Fulani braids or micro braids, which take far more chair time to install.