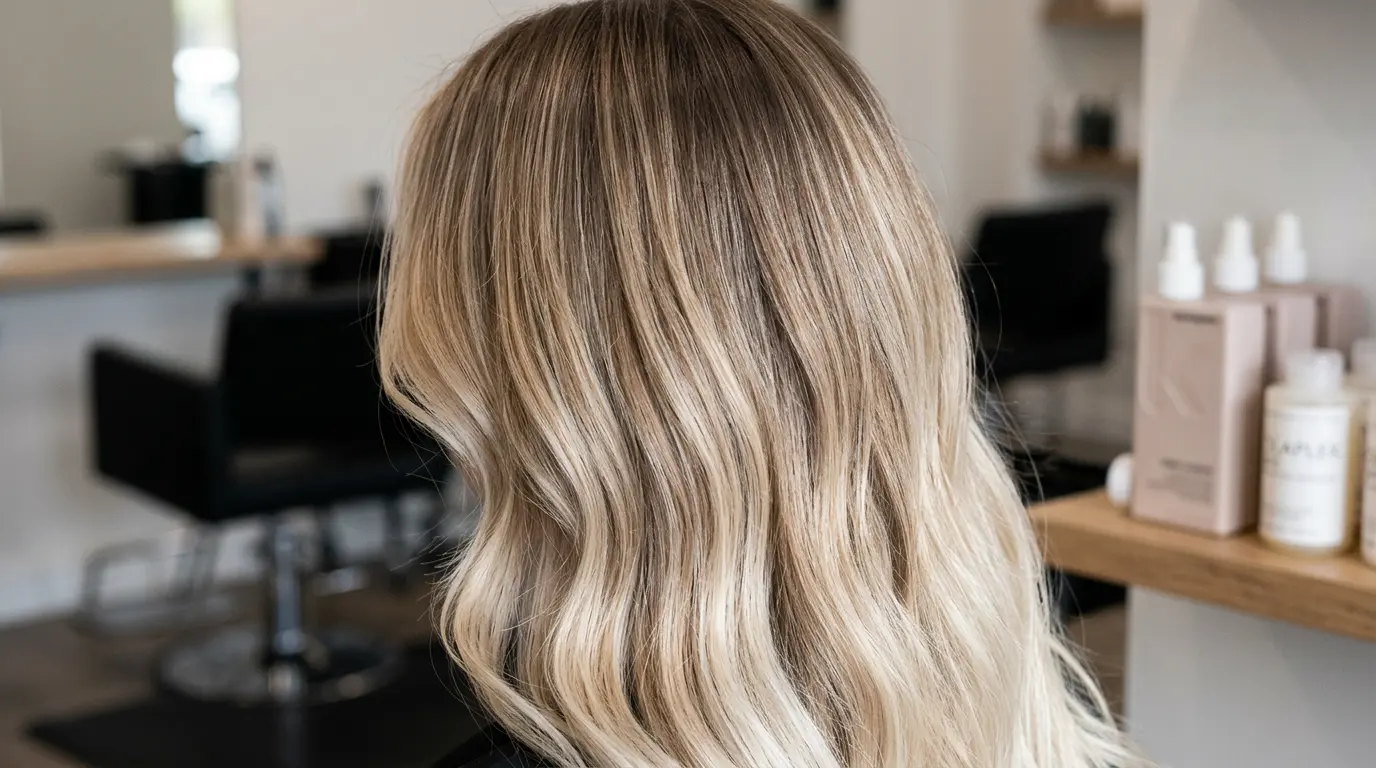
Half my consultations start the same way now. Someone slides me their phone, points to a photo, and asks how their roots can look like that.
What is a root melt? It’s the technique behind almost every “lived-in” blonde and quietly grown-out brunette you’ve scrolled past this year.
It’s also one of the most mixed-up terms in the whole salon vocabulary. Clients ask for a root melt and actually mean a root shadow. They book balayage and really want the melt hiding underneath it.
This is what I tell my own clients: what a root melt actually is, how it’s different from a root smudge, root shadow, and root tap, and whether it’s the right move for your hair and your calendar.
What is a Root Melt?
Before we get into how it compares to everything else, let’s nail down what’s actually happening on the hair.
A root melt is a color technique where your colorist applies a deeper shade at the root and blends it, or “melts” it, down into your lighter mid-lengths and ends.
There’s no hard stop where the color changes, just a gradual shift from dark to light. I describe the goal the same way to every client who sits in my chair: we’re blending a darker root shade into lighter, highlighted hair until that harsh line disappears completely, not just fading it a little.
Some salons call this “color melting” instead. Same technique, different name, and you’ll hear both used depending on where you sit down.
Ask any colorist to describe the end result and one word keeps coming up: lived-in. Not fresh-off-the-foils. Not “I clearly just paid for this.” Lived-in, like your color grew this way on purpose.
Ask three different colorists to describe a root melt and you’ll get three slightly different inch counts. That’s normal. The technique matters more than the exact terminology.
Once you know what a root melt is, the next logical question is where it fits alongside the three techniques it’s constantly mixed up with.
How a Root Melt Actually Happens in the Chair
This isn’t just “put some dark color near the scalp and call it a day.” There’s a real process behind why it blends so well.
- Your colorist checks your natural base color against your current lightened length, since the gap between the two determines how much blending the melt needs.
- A shade gets chosen, usually your natural root color or one level deeper, not a random dark tone pulled off the shelf.
- That color is applied at the root and dragged, or diffused, down the hair shaft, typically two to four inches, noticeably farther than a root smudge goes.
- Processing time for the root area typically runs 30 to 45 minutes, in line with standard demi- or permanent-color development. Once you add consultation, application, rinsing, and a blow-dry, most salons block off two to two and a half hours for a full root melt appointment.
- A toner or gloss usually finishes the job, unifying every section so the whole head reads as one cohesive color instead of two separate ones.
That extra length of drag down the shaft is exactly what separates a root melt from its more subtle cousins, which is where things usually get confusing.
Root Melt vs Other Root Blending Techniques
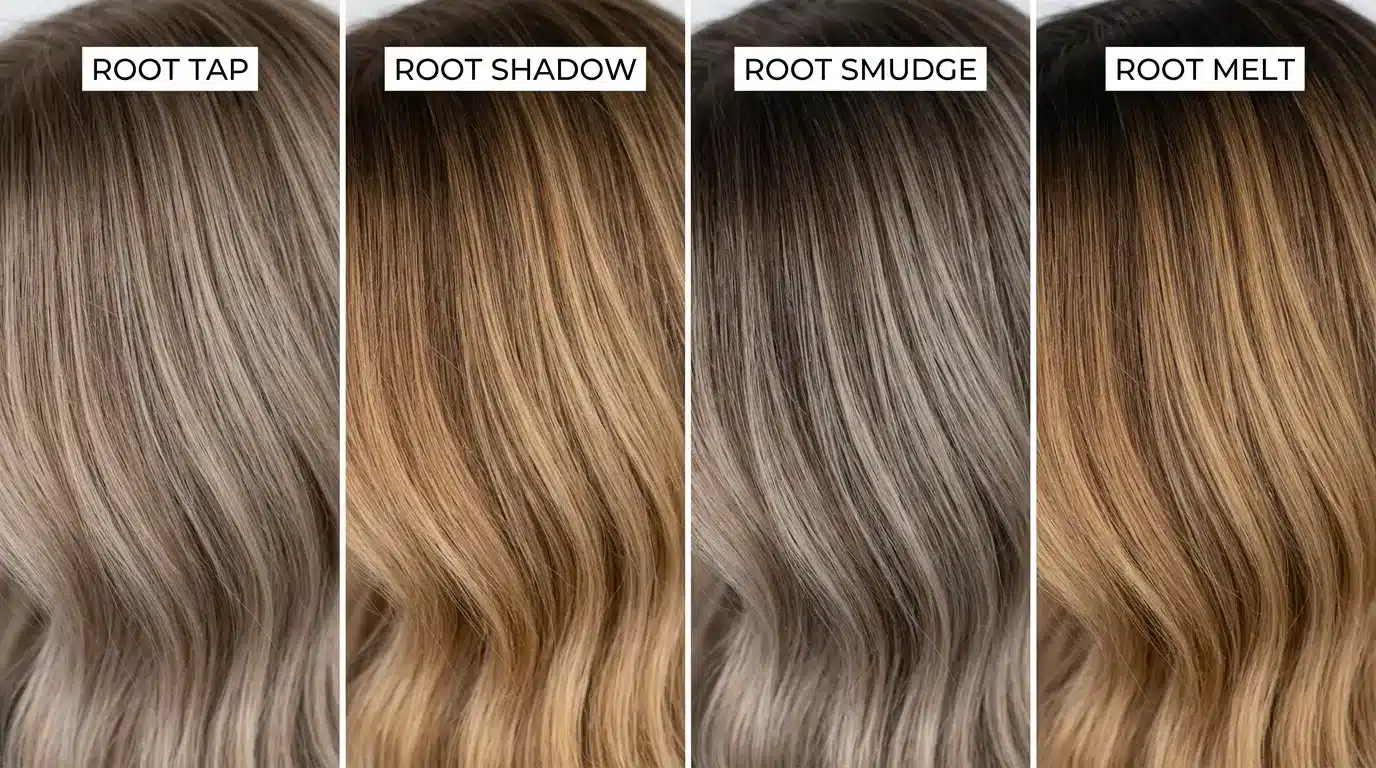
This is the comparison I get asked about the most, so let’s put it side by side instead of dancing around it.
| Technique | Placement | Color Used | Best For |
|---|---|---|---|
| Root Tap | About 0.5 to 1 inch from the scalp | Same as your natural base | Keeping a bright blonde soft at the part with almost no visible shift |
| Root Shadow | 1 to 2 inches from the scalp | 1 to 3 shades deeper than your lengths | Adding contrast and depth while keeping most of the brightness |
| Root Smudge | About 1 to 3 inches, softly diffused | Close to natural, gently blended | A quick, low-drama softener between touch-ups |
| Root Melt | 2 to 4 inches, sometimes farther | One or more shades gradually blended | Long grow-out windows and fixing harsh regrowth lines |
I’ll be honest, half my clients glaze over at this table the first time I show it. So here’s the shortcut.
The One-Line Way to Remember It
Tap is the smallest move a colorist makes. Melt is the longest drag. Smudge and shadow live somewhere in the middle, and plenty of colorists use those two names interchangeably anyway, since the exact terminology tends to shift from region to region and artist to artist. Don’t stress over which word you use when you book. Focus on describing the placement instead.
If adding depth without losing brightness sounds closer to what you actually want, it’s worth reading up on that technique on its own before you book.
Table aside, people search for root melt vs balayage far more than root melt vs root tap, so let’s clear that one up directly.
Is a Root Melt the Same Thing as Balayage?
I hear these two used all the time interchangeably, and they’re not the same at all.
Myth: Root melt and balayage are two names for the same technique.
Fact: Balayage is the lightening method, the hand-painted highlighting that puts brightness into your hair in the first place.
Fact: A root melt is a finishing step, often applied after balayage, that blends your natural root into that painted color.
Fact: You can get both in one appointment. They work together: one lightens, the other blends the regrowth.
Now that the technique is clear, the real question is whether it’s right for your hair.
Is a Root Melt Right for You?
Not every regrowth situation calls for a melt, so here’s the quick gut-check I use with clients.
Good fit if:
☑ You want 8 to 12 weeks, or longer, between color appointments
☑ You already have highlights, balayage, or babylights growing out with a visible line
☑ You’ve got some gray coming in near the part and want it blended, not fully covered
☑ You’re going darker for fall or winter and don’t want a hard stop at the root
Even with a melt stretching your gap between visits, plenty of my clients still keep temporary fixes between salon visits on hand for the last week or two before their appointment.
Skip it if:
☑ You want zero depth at the root at all (a root tap suits you better)
☑ Your natural color and your ends are more than a few levels apart with no bridge tone
☑ You want maximum brightness with no shadow whatsoever
If you’re checking the good-fit boxes, the next thing you’ll want to know is what it costs and how long it actually holds up.
How Long a Root Melt Lasts (and What It Costs)
This is the part that sells most people on it. Low maintenance is the entire point.
| Feature | Root Smudge / Shadow | Root Melt |
|---|---|---|
| Time between touch-ups | 8 to 12 weeks | 10 weeks to 3 months, sometimes longer |
| Processing time (root area) | 10 to 15 minutes | 30 to 45 minutes |
| Add-on cost | Lower, often $25 to $60 | Higher, often $35 to $100 as an add-on |
Those add-on numbers are for a root melt layered onto an existing color or highlight service, which is how most salons price it.
A standalone, full color-melt application (the kind that reworks the whole gradient, not just the root) tends to run higher, often in the $150 to $300 range, which also cites Matrix bilingual global educator Pati Rodriguez for how the technique itself works: blending two shades together to create a third, transitional tone.
Pricing swings hard by region, salon tier, and colorist experience, so treat these numbers as a ballpark. Ask your own salon for their exact add-on rate before you book.
Once the cost and timeline make sense on paper, the last piece is knowing how to ask for it correctly when you sit down in the chair.
How to Ask Your Colorist for a Root Melt
Saying “root melt” alone can still get you three different results depending on who’s behind the chair, so be specific.
- Bring a photo, and point specifically at the root area, not just the overall color.
- Say how far down you want the blend. Two inches versus four inches makes a real difference in how dramatic the transition looks.
- Mention your appointment gap goal, something like “I want to go ten weeks between visits,” so your colorist can plan the placement around that.
- Ask whether they’re using a demi-permanent or permanent formula at the root. Demi-permanent tends to win when softness and shine are the priority, while permanent color holds up better if gray coverage or longevity matters more to you.
With that vocabulary in your back pocket, you’re set up to walk in and get the exact lived-in blend you came in for.
Conclusion
Root melt is the technique I reach for most when a client tells me they’re tired of chasing their roots. It’s trending right now, but that’s really just a side effect.
What it actually solves is a real problem: the gap between what your color looks like on day one and what it looks like on day fifty.
Whether a tap, shadow, smudge, or full melt is the right call comes down to two things: how much contrast you want, and how much time you’re willing to let pass between visits.
There’s no universally “better” option here, just the one that matches your actual life and your actual hair.
My honest advice is simple. Don’t walk in asking for a technique by name and hope for the best. Bring the photo, use the vocabulary from this piece, and talk it through with your colorist at the consult. That conversation is worth more than any single term you could ask for.
Frequently Asked Questions
What is the Point of a Root Melt?
A root melt creates a softer grow-out by blending natural roots with lighter tones so there’s no visible line where regrowth starts
How Much Does a Root Melt Cost?
As an add-on, a root melt costs $35 to $100, depending on region and salon tier. A standalone color-melt application typically runs $150 to $300
How Long Does Root Melt Last?
Most clients stretch 10 weeks to 3 months between touch-ups, longer than the 8 to 12 weeks typical of a root smudge or shadow, since the color is diffused farther down the hair shaft.
Can Root Melt Be Done on Dark Hair?
Yes. On dark hair, a root melt usually blends your natural root into deep chocolate, espresso, or caramel tones instead of blonde. The contrast is often more subtle since there’s less of a level gap to bridge, so the transition can look even softer than it does on blonde hair.
Do You Do a Root Melt Before or After Toner?
Root melts are usually applied after lightening and before or during the toning process for better blending.