Most people finish a paint by numbers canvas and lean it against a wall for a few days while they figure out what to do with it. That’s a missed opportunity. A single completed canvas reads as a hobby piece; a curated collection of them reads as intentional art. Learning how to create a gallery wall with paint by numbers artwork is the difference between a canvas that sits in a closet and one that becomes the focal point of an entire room. The good news is you don’t need professional design training or expensive original art to pull it off. You need a clear plan, a consistent visual thread, and a bit of patience before you hang the first nail. This guide walks you through every step, from picking the right pieces to finishing the wall so it holds for years.
Choosing Paint by Numbers Pieces That Belong Together
A gallery wall succeeds or fails at the selection stage, long before anything touches the wall. Many creators browse unique paint by number art kits with individual canvases in mind rather than a collection, which leads to a wall that feels random instead of curated. The smartest move is to start with a unifying idea before you buy or paint a single piece. That idea doesn’t have to be complicated. It can be a recurring subject – landscapes, animals, botanicals – or a consistent color story, or a mix of both. What it can’t be is an afterthought. Think about the room the wall will live in and what mood you want it to carry. A hallway can handle something bold and graphic. A bedroom calls for something softer. Pick your anchor concept first, then build the collection outward from there.
Color Palette Decisions That Hold a Collection Together
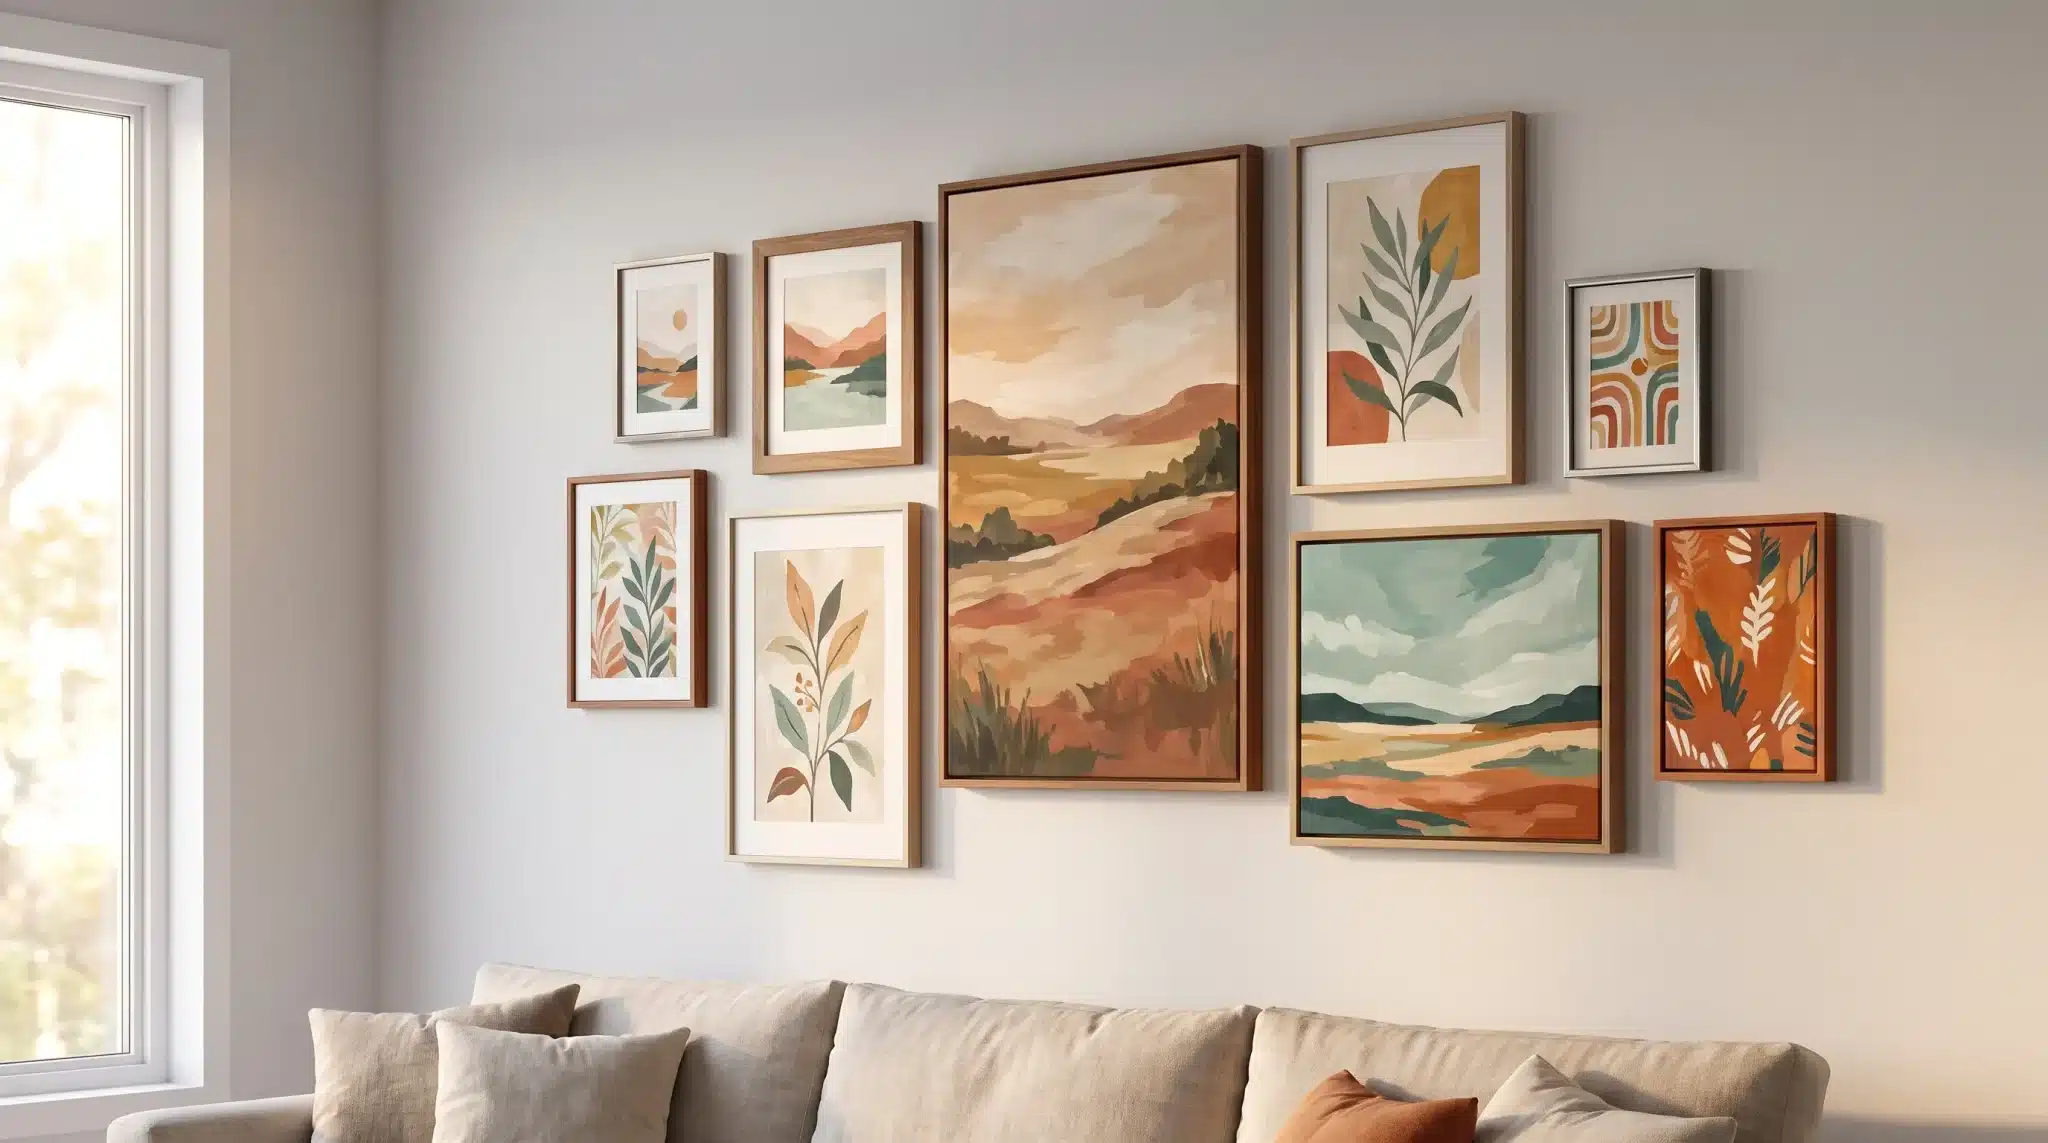
Color is the single most powerful tool for making a group of paintings read as a cohesive set. You don’t need every canvas sharing the same hues, but at least two or three colors should appear across multiple pieces. A warm terracotta threading through a sunset scene, a floral close-up, and an abstract field painting will tie those three canvases together even when their subjects have nothing in common. Pick your palette first, then choose pieces that feature those colors prominently, that’s the easiest approach. Pull paint chips or digital swatches from your room’s existing furniture, throw pillows, and rugs, then match to those tones. Cool blues and greens suit living rooms with natural wood floors. Earthy ochres and burnt oranges work well in kitchens and dining rooms. A neutral palette of blacks, whites, and warm grays gives you the broadest flexibility across different room styles.
Sizing Across Multiple Finished Canvases
Size variation is what separates a flat, forgettable gallery wall from one that genuinely holds visual interest. When every canvas shares the same dimension, the arrangement reads like wallpaper. But if the contrast is too extreme – say, one enormous canvas alongside a collection of tiny ones – the composition falls apart and the smaller pieces disappear entirely. A practical formula is to anchor your layout with one or two larger canvases in the 16-by-20 inch range, fill the mid-ground with three or four pieces around 12-by-16, and use smaller canvases sparingly as accents. This sizing hierarchy creates a rhythm your eye can follow naturally. It also keeps things flexible: a new piece you love can slot into the mid-range tier without disrupting the whole arrangement. Settle on your size categories before you start painting, not after you’ve already finished six canvases in identical dimensions.
Planning Your Gallery Wall Layout Before You Hang Anything

No experienced interior designer hangs directly from instinct on the first try. They test, adjust, and test again. The planning phase of a gallery wall is where most people cut corners and then regret it when the finished wall looks off-center or crowded. You need a concrete method for arranging your canvases before a single nail goes into the wall.
The Floor Test for Getting Your Arrangement Right
Lay all your framed canvases face-up on the floor directly in front of the wall you’re planning to use. Arrange them the way you picture the final display looking. Step back and view the grouping from a normal distance, at least six feet. What you see on the floor is a surprisingly accurate preview of the finished wall. Try shifting pieces around from there. The largest canvas doesn’t always want to sit dead center; anchoring it slightly off-center sometimes produces a more interesting composition. Make sure no two canvases of the same size sit directly beside each other, and mix portrait-oriented pieces with horizontally-oriented ones to vary the feel. Photograph the final floor arrangement before you move anything, then use that photo as your reference when you start marking the wall.
Spacing Rules That Prevent a Cluttered Look
Consistent spacing is the most underrated detail in a gallery wall. A two-to-three inch gap between frames is the standard range for a tight, cohesive arrangement. Go wider than four inches and the pieces start feeling disconnected, separate art statements rather than a unified collection. Tighter than two inches and the wall turns chaotic, especially with paint by numbers pieces that already carry heavy color and visual detail. Use painter’s tape or paper templates cut to the exact size of each frame to mark spacing before you commit to anything. It’s far easier than guessing with a measuring tape, and it cuts out the uncertainty that causes crooked or uneven arrangements. Keep spacing consistent across the whole layout. One off-gap draws the eye immediately, even from visitors who can’t quite say why the wall feels slightly wrong.
Hanging Your Finished Pieces Correctly
A well-planned gallery wall can still fall apart at the installation step if hanging is rushed or imprecise. A level, a pencil, and a good measuring tape aren’t optional here. They’re the difference between a wall that looks deliberate and one that looks like a hurried weekend project.
Practical Tools for Straight, Secure Frames
A laser level is the most useful purchase you can make for this project. It projects a horizontal line across the wall so you can align the tops or centers of your frames with certainty. If you don’t have one, a standard bubble level works fine but requires more careful measuring. For the anchors themselves, use picture-hanging strips rated for the weight of your frames if you want a damage-free option, or standard picture hooks with nails if your walls are plaster or drywall. Before you hang anything into the wall, mark each hanging point with a small pencil dot and double-check the measurement against your floor-plan photo. Hang your anchor canvas first, the largest piece, ideally placed slightly above eye level at around 57 to 60 inches from the floor to its center. Build outward from there, checking the level after every frame. Step back frequently as you work.
Conclusion
Creating a gallery wall with paint by numbers artwork comes down to three honest steps: choose pieces that share a visual thread, plan your arrangement on the floor before you touch the wall, and hang with precision rather than guesswork. The selection stage matters most. A cohesive color palette and deliberate size variation do most of the visual work before a single frame is in place. From there, the floor-test method saves you from the frustrating cycle of driving nails, stepping back, and starting over. Take the time to measure, use a level, and build outward from your anchor piece. The result is a wall that looks like it took real skill, because it did. Paint by numbers artwork earns that space on the wall.