There’s something magical about creating beauty products with your own hands.
Making lip gloss at home gives you the freedom to choose every ingredient, ensuring it’s gentle, nourishing, and tailored to your style.
From silky oils to natural colorants, you can experiment with endless textures and shades that reflect your personality.
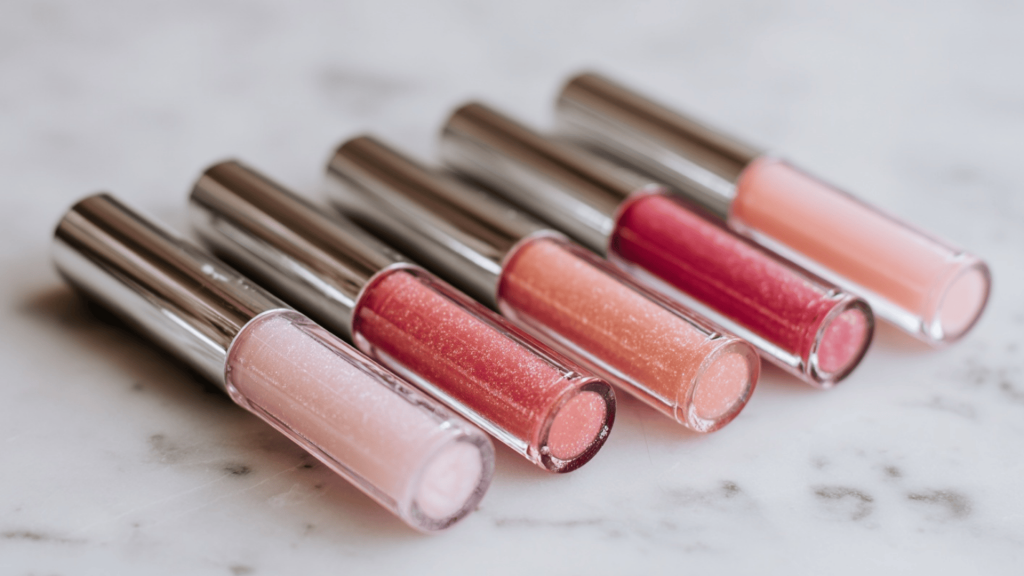
Homemade lip gloss has become a favorite trend not only because it’s simple and affordable, but also because it changes a routine item into something personal and enjoyable.
Even if you want a clear gloss for everyday wear, a tinted touch of color, or a sparkling finish, homemade gloss offers it all.
Why Make Your Own Lip Gloss?
Store-bought glosses may seem attractive at first, but many contain artificial fragrances, heavy preservatives, and petroleum-based ingredients that aren’t always kind to your lips.
Making your own lip gloss gives you the freedom to choose what goes into it, using natural oils, butters, and waxes instead of chemicals.
It also allows you to customize the texture, color, flavor, and even add a touch of shimmer so every gloss feels personal.
Beyond being more nourishing, homemade gloss is also more affordable, as a single batch can cost significantly less than a tube from the store.
It is also eco-friendly when you reuse containers, turning into a fun, creative project that can be enjoyed for self-care, with kids, or even as the start of a small business.
How to Make Lip Gloss (3 Ways)
There are three simple ways to make lip gloss at home, each using natural ingredients to achieve shiny, customizable, and nourishing lips.
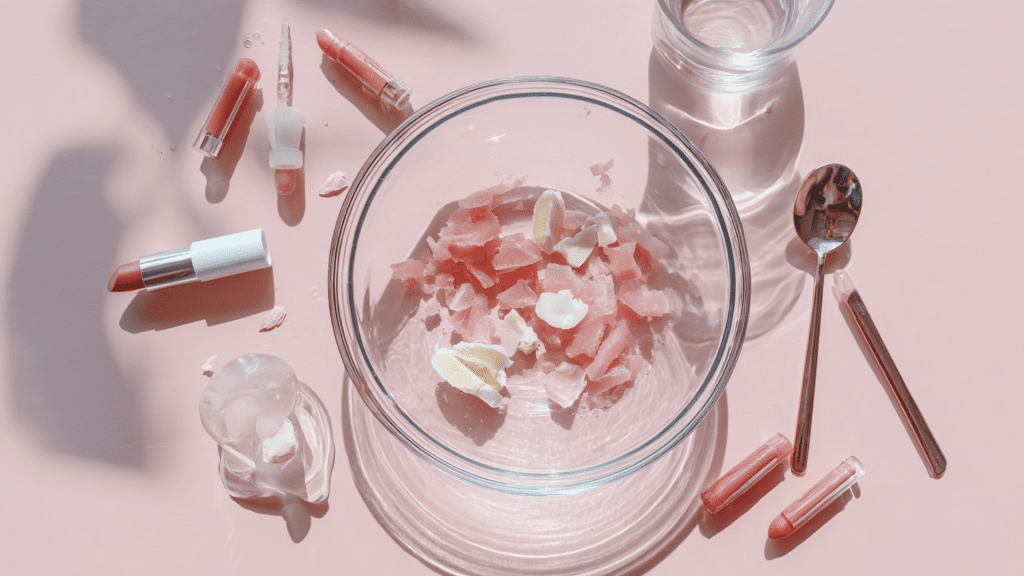
Recipe 1: Coconut Oil + Lip Balm Gloss
This easy recipe is perfect for beginners. Recycle old lip balms, add coconut oil, and create a hydrating gloss with a subtle, natural tint.
Ingredients You’ll Need
|
Instructions:
- Melt coconut oil in the microwave for about 30–60 seconds.
- Add the lip balm or Vaseline and stir until the mixture is smooth.
- Mix in jojoba or olive oil for a smoother texture.
- Add optional blush or pigment for extra color.
- Transfer the mixture into a clean glass container using a small plastic bag or syringe.
- Let cool, then apply for soft, glossy lips.
Recipe 2: Shea Butter + Lipstick Gloss
Rich and creamy, this gloss combines the deep hydration of shea butter with your favorite lipstick shade, creating a nourishing lip product that looks fresh and feels luxurious.
Ingredients You’ll Need
|
Instructions:
- Melt the shea butter in the microwave until it is liquid.
- Mix in your lipstick while the shea butter is still warm.
- Add jojoba oil to soften the texture and prevent hardening.
- Stir well until evenly blended.
- Let cool slightly, then transfer into a glass container.
- Apply for a creamy, tinted finish.
Recipe 3: Oil + Lipstick Gloss (2 Ingredients)
The simplest recipe of all, this two-ingredient gloss uses lightweight oils and leftover lipstick to create a vibrant, glossy finish that’s quick, easy, and customizable.
Ingredients You’ll Need
|
Instructions:
- Warm the oil in the microwave for 20-30 seconds.
- Add the lipstick and stir until it is fully melted into the oil.
- Mix until smooth and even.
- Transfer into a lip gloss tube or small pot.
- Let’s set it and use it for a glossy, vibrant lip look.
Creating lip gloss at home is a fun, affordable, and customizable process. Try these recipes, experiment with colors, and enjoy glossy, nourished lips made by you.
For a more detailed walkthrough, watch the full video tutorial by Eliena Hinch, where each step is clearly and visually demonstrated.
Tools You’ll Need
Before you start making lip gloss, gather a few basic tools you probably already have at home:
- Heat-safe glass bowl or double boiler
- Measuring spoons
- Stirring spatula or spoon
- Pipette or small funnel for filling tubes
- Lip gloss tubes, small tins, or pots
These simple tools make the process easier and ensure your gloss turns out smooth, mess-free, and ready to use.
DIY Lip Gloss Kits: A Beginner-Friendly Option
DIY lip gloss kits make creating lip gloss a simple, fun, and stress-free process. They come with everything you need, making them ideal for beginners, kids, or thoughtful gifts.
1. Natural Oils & Glitter Kits
These kits include natural oils, waxes, and glitter, offering a great way to experiment with shimmer and create shiny, moisturizing glosses at home.
- Make Your Own Cosmetics – DIY Lip Gloss Kit
- Renascent Bath & Body – Lip Balm/Gloss Making Kit (Starter Set)
2. Vegan Lip Gloss Kit Sets
For those who prefer plant-based beauty, these vegan kits use cruelty-free ingredients and natural tints, delivering nourishing, ethical lip gloss options.
3. Kids’ Lip Gloss Making Kits
Designed with safe ingredients and fun extras, these kits are perfect for creative play, parties, or as exciting DIY gifts for children.
- Jcoos Lip Gloss Making Kit, 73PCS
- Cra-Z-Art Shimmer N Sparkle Glitter & Gem Lip Gloss Locket DIY Lip Gloss & Accessory Craft Kit
Most kits include natural oils, containers, mixing tools, and fun extras like flavors and glitter—everything you need for easy, creative lip gloss making.
Tips for Customizing Your DIY Lip Gloss
Creating your own gloss means you can personalize it completely, experiment with textures, flavors, and finishes to match your mood and style.
- Add more oils for glossy shine, more wax for firmness
- Replace beeswax with candelilla or soy wax for a vegan gloss
- Mix vanilla and coconut for tropical flavor combinations
- Blend cocoa with peppermint for a chocolate-mint effect
- Store in a cool place; lasts up to 6 months
Small adjustments can make your homemade gloss unique, turning every batch into something fun, nourishing, and perfectly suited to your lips.
Making the Decision
Homemade lip gloss is more than a beauty project; it’s a creative ritual that blends self-care with self-expression.
Each gloss you make reflects your personality, your style, and the joy of choosing ingredients that truly nourish.
Crafting your own products gives you the freedom to experiment, add unique touches, and enjoy something that’s entirely yours.
It’s not just about shine, it’s about confidence, creativity, and care in every swipe.
Start experimenting today and explore new flavors and colors to create lip glosses that feel good, look beautiful, and remind you of the power of doing it yourself.
Frequently Asked Questions
How Long Does Homemade Lip Gloss Last?
Homemade lip gloss typically lasts 3–6 months if stored in a cool, dry place. Adding vitamin E can help extend its shelf life.
Can I Make Lip Gloss Without Beeswax?
Yes, you can! Replace beeswax with candelilla wax or soy wax to create a fully vegan alternative to lip gloss.
Is Homemade Lip Gloss Safe For Kids?
Yes, as long as you use natural, cosmetic-safe ingredients. Avoid essential oils for children under 10 to keep them gentle and safe.