My hair used to end up in a lopsided mess every time I tried a French braid, and it took a while before my hands finally caught the rhythm.
Once I understood how to French braid my own hair, though, the whole process stopped feeling like a fight with the mirror.
It comes down to a few habits: keeping sections even, pulling each cross snug near the scalp, and adding hair at a steady pace instead of rushing.
Curly, fine, thick- it doesn’t matter much once the basic pattern clicks.
What is a French Braid?
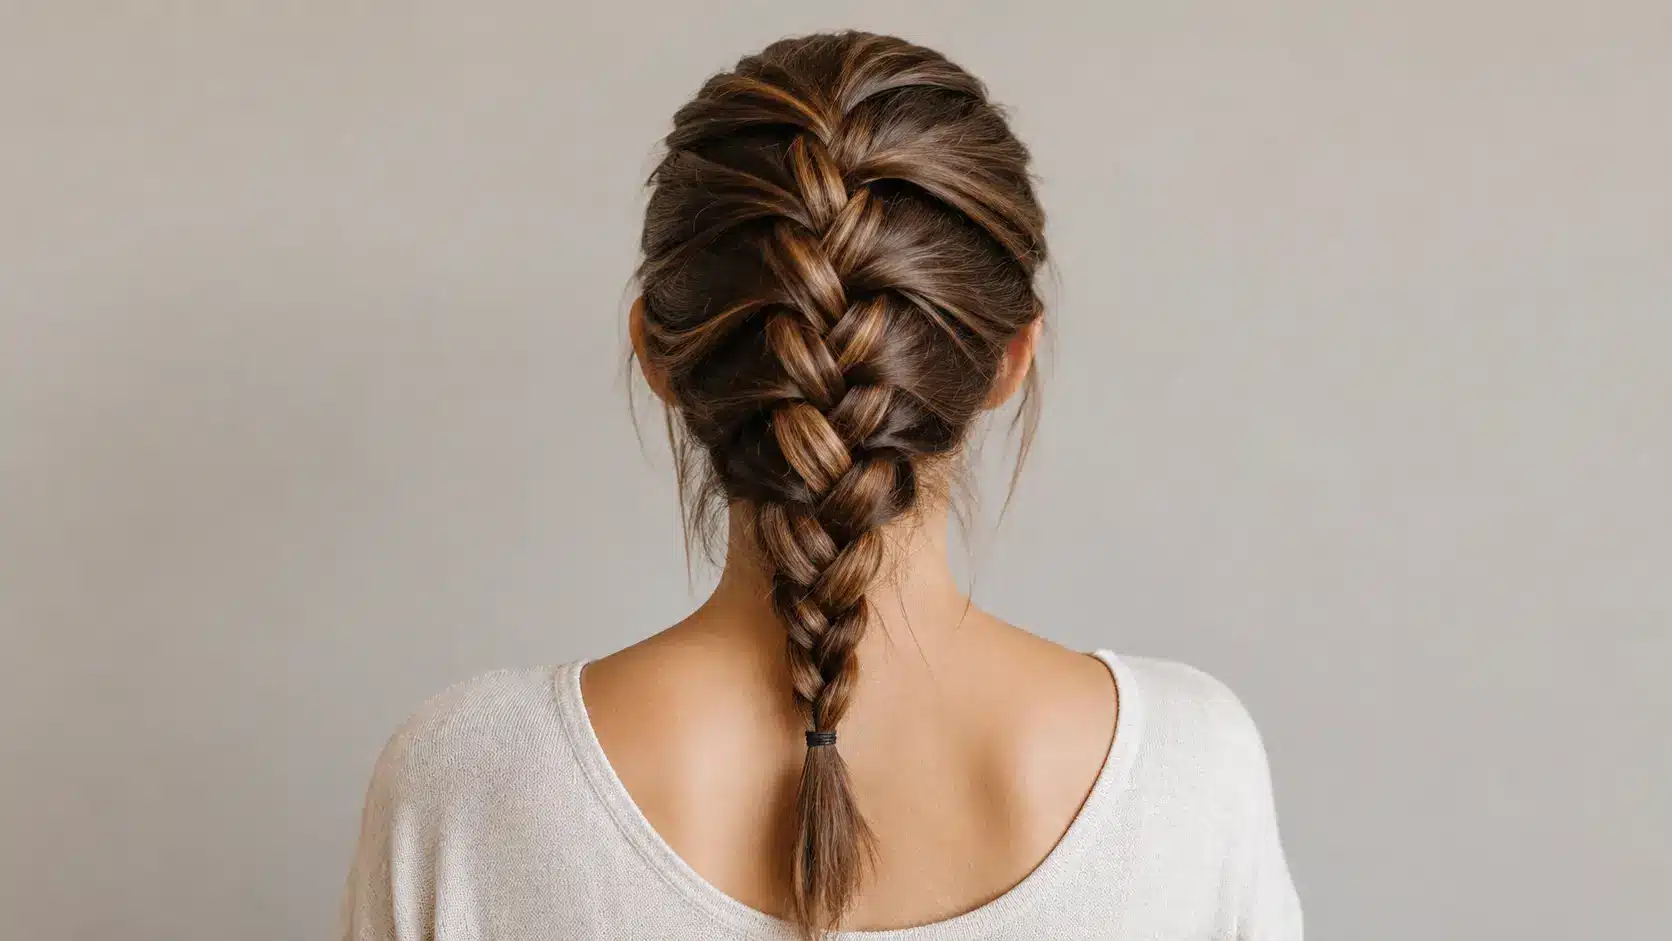
A French braid is a classic hairstyle that starts near the crown of your head and gradually adds new sections of hair as you braid downward.
Unlike a regular three-strand braid, it keeps the hair close to the scalp, creating a smooth and woven look that stays secure throughout the day.
A Dutch braid uses the same crossing pattern in reverse, with strands tucked under instead of over, which is why the two styles get mixed up so often.
The style works well for different hair lengths and textures and can be worn for casual days, workouts, or special occasions. Once the basic pattern feels comfortable, trying other braid variations like fishtail or waterfall French braids is a natural next step.
Learning the pattern may feel a little difficult at first, especially when braiding your own hair, but regular practice helps you build hand coordination and create a neat French braid with ease.
What You’ll Need Before You Start
Pro tip: Slightly dirty or second-day hair holds a braid better than freshly washed hair. |
How to Braid Your Hair in Easy Steps
A French braid is a classic hairstyle that works for everyday wear, special occasions, or keeping hair neatly tied back.
People often mix it up with an inverted braid style since both use the same crossing pattern near the scalp, just in opposite directions. Follow these simple steps to create a smooth braid.
Step 1: Brush and Section Your Hair
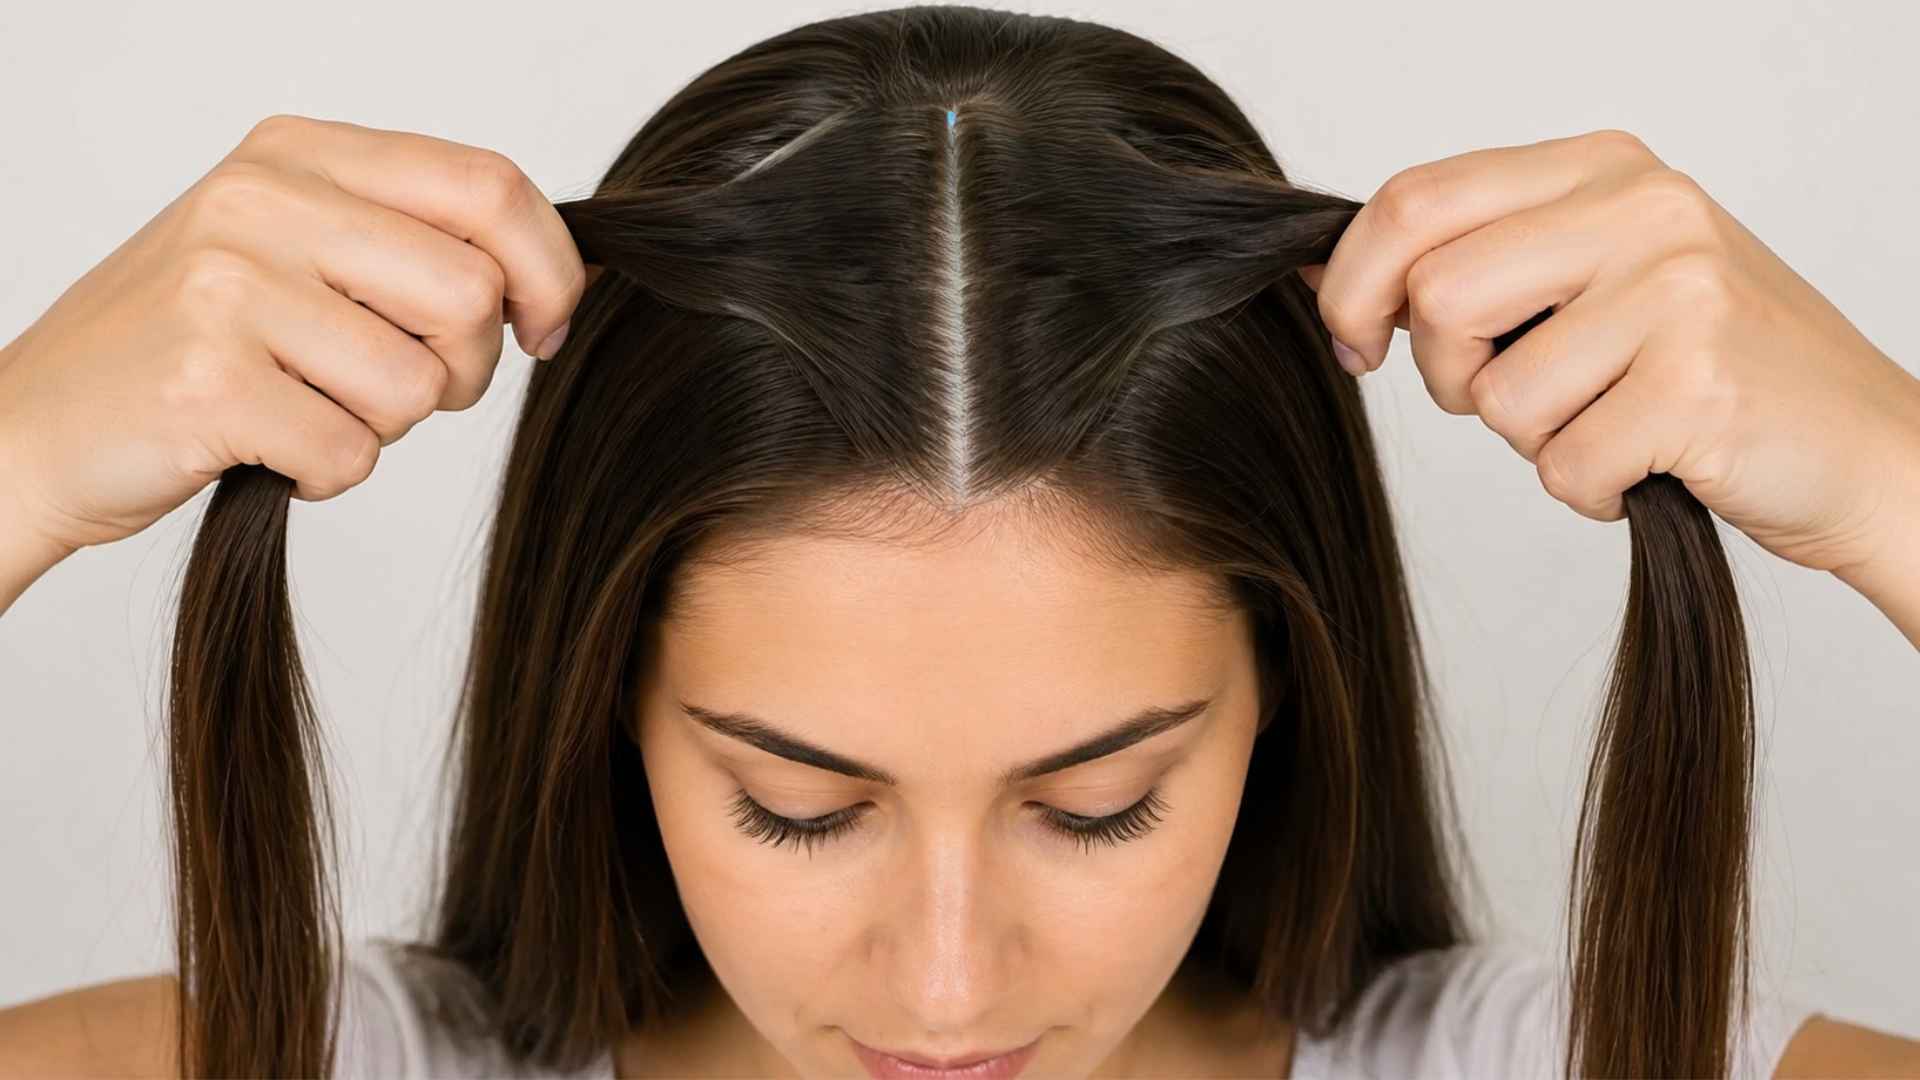
Start by brushing your hair all the way through, so there are no tangles. Take a section from the front of your head, running from one temple to the other. Split that section into three even parts.
Leave the rest of your hair down for now. Starting with smooth, tangle-free hair makes the rest of the process much smoother and keeps your braid from looking bumpy.
Step 2: Cross the First Three Strands
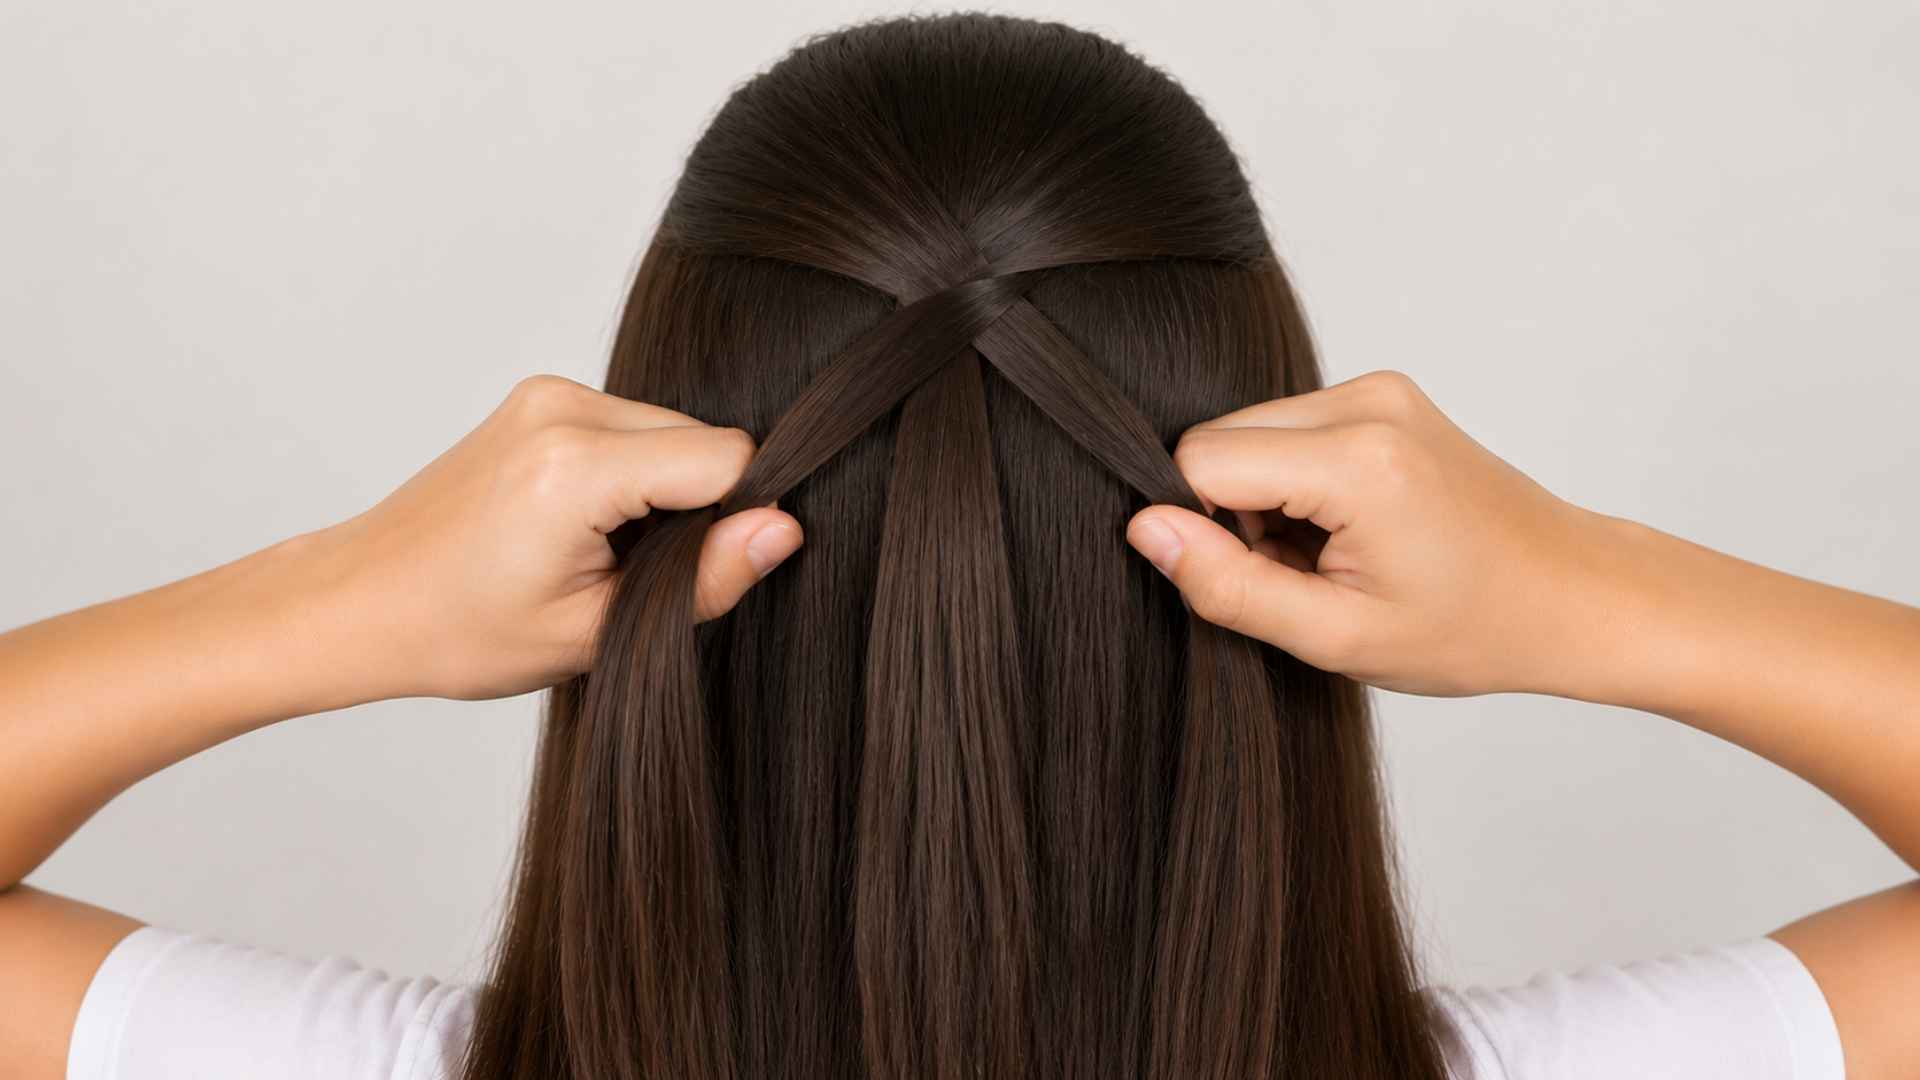
Now do one round of a plain braid. Cross the right section over the middle one, then bring the left section over the new middle. Nothing gets added yet; this step just sets the base of your braid.
Try to keep your hands close to your scalp and pull each strand snug so the first few crosses don’t look loose or messy later on.
Step 3: Start Adding Hair as You Go
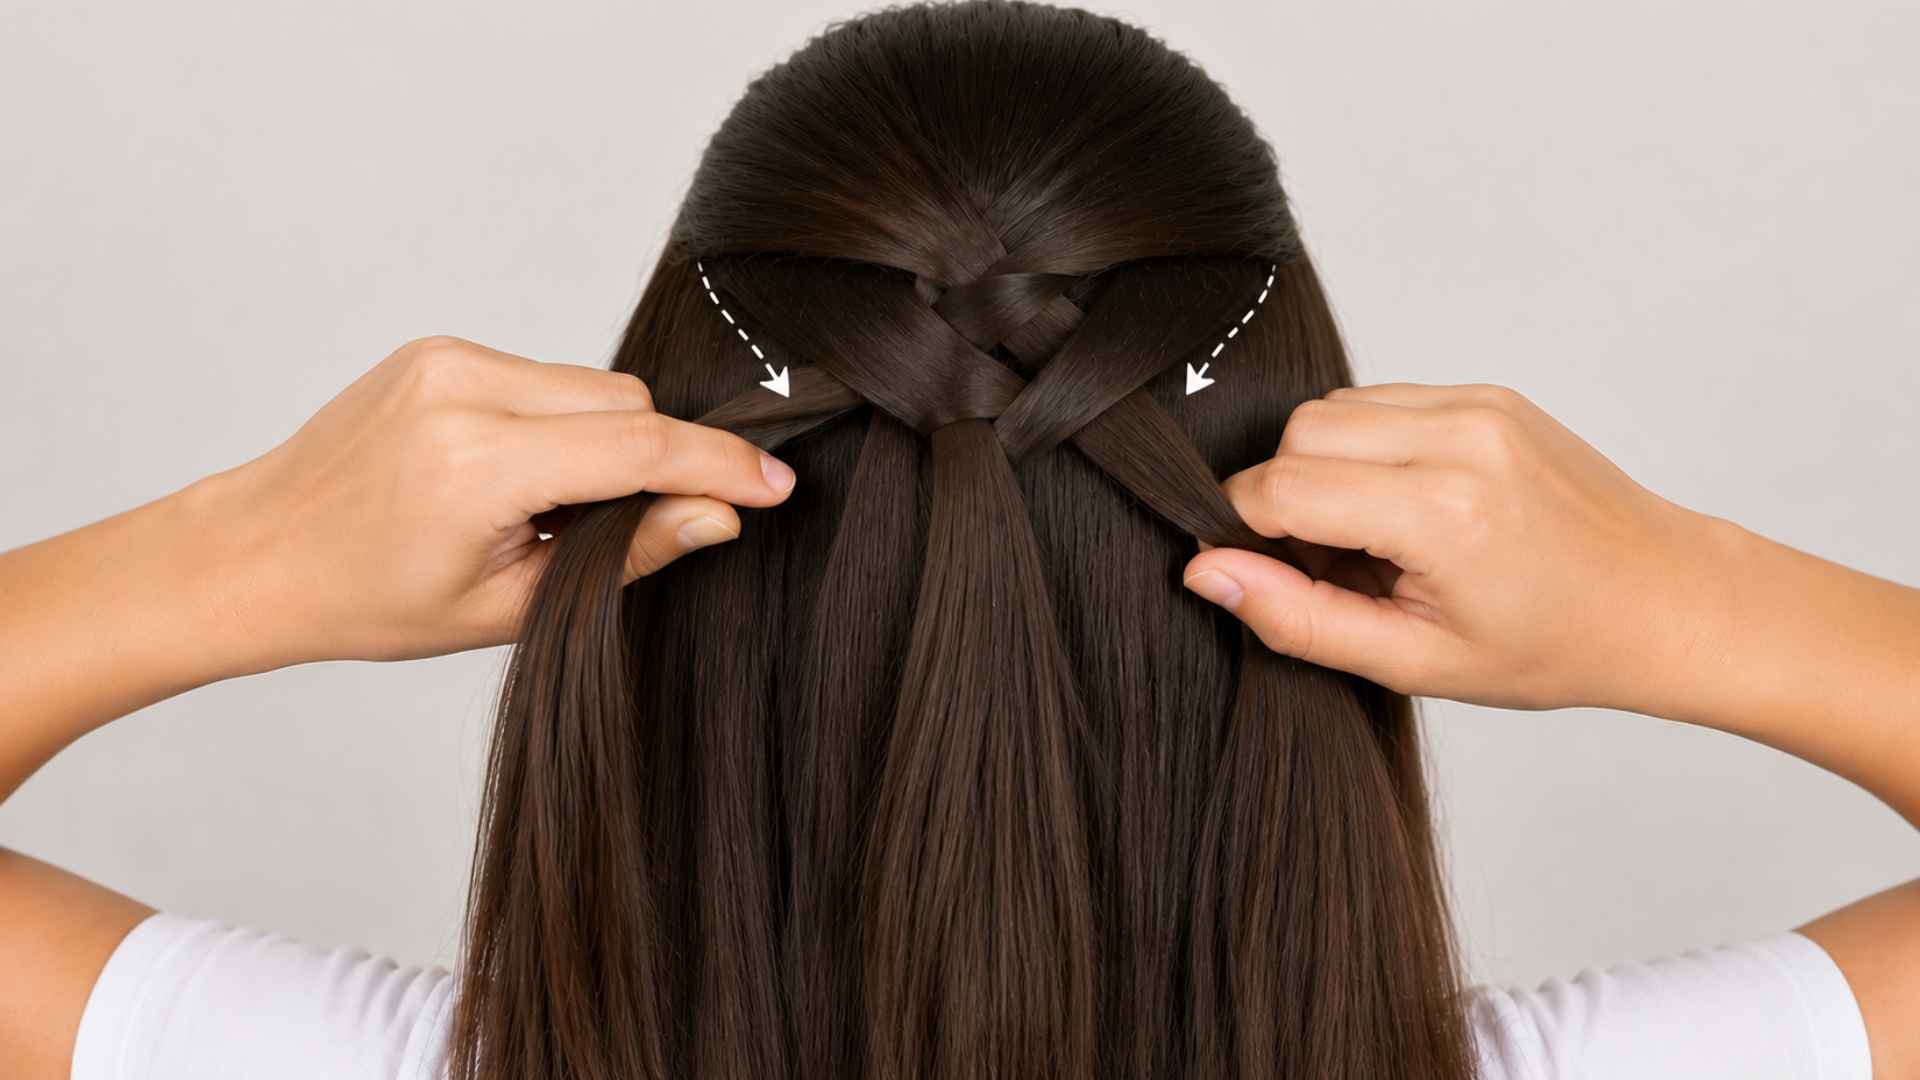
This is the step that turns a plain braid into a French braid. Before you cross a side section over the middle again, use your finger to pick up a small piece of loose hair and add it to that section.
Do this on both sides, switching back and forth every time you cross. Keep the new sections about the same size so your braid grows evenly.
Step 4: Keep Going Down to Your Neck
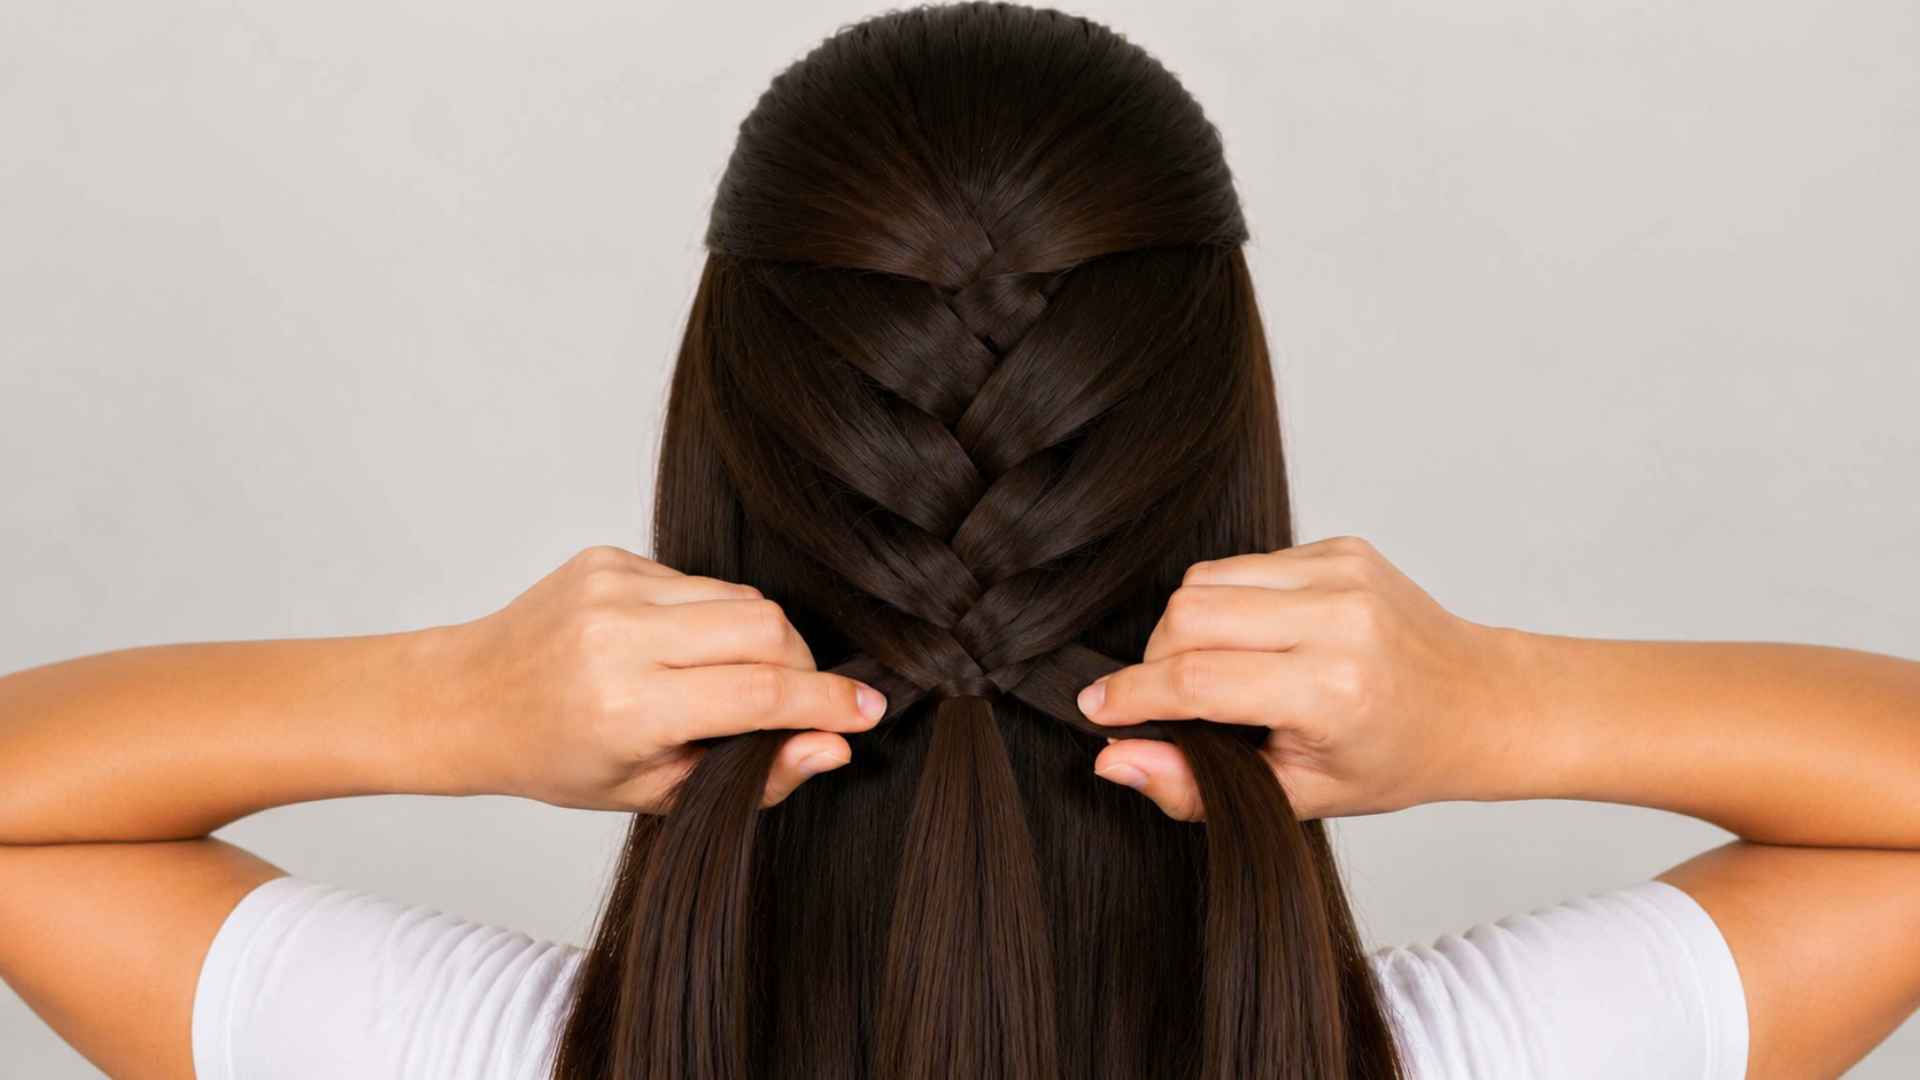
Continue crossing, adding hair, and switching sides as you move toward the back of your head. Your arms will likely start to feel tired around this point, especially the first few times. That’s normal; rest your elbows against your sides for a second if you need to, then pick the rhythm back up.
By the time you reach the nape of your neck, there shouldn’t be any loose hair left to pick up.
Step 5: Finish and Secure the Braid
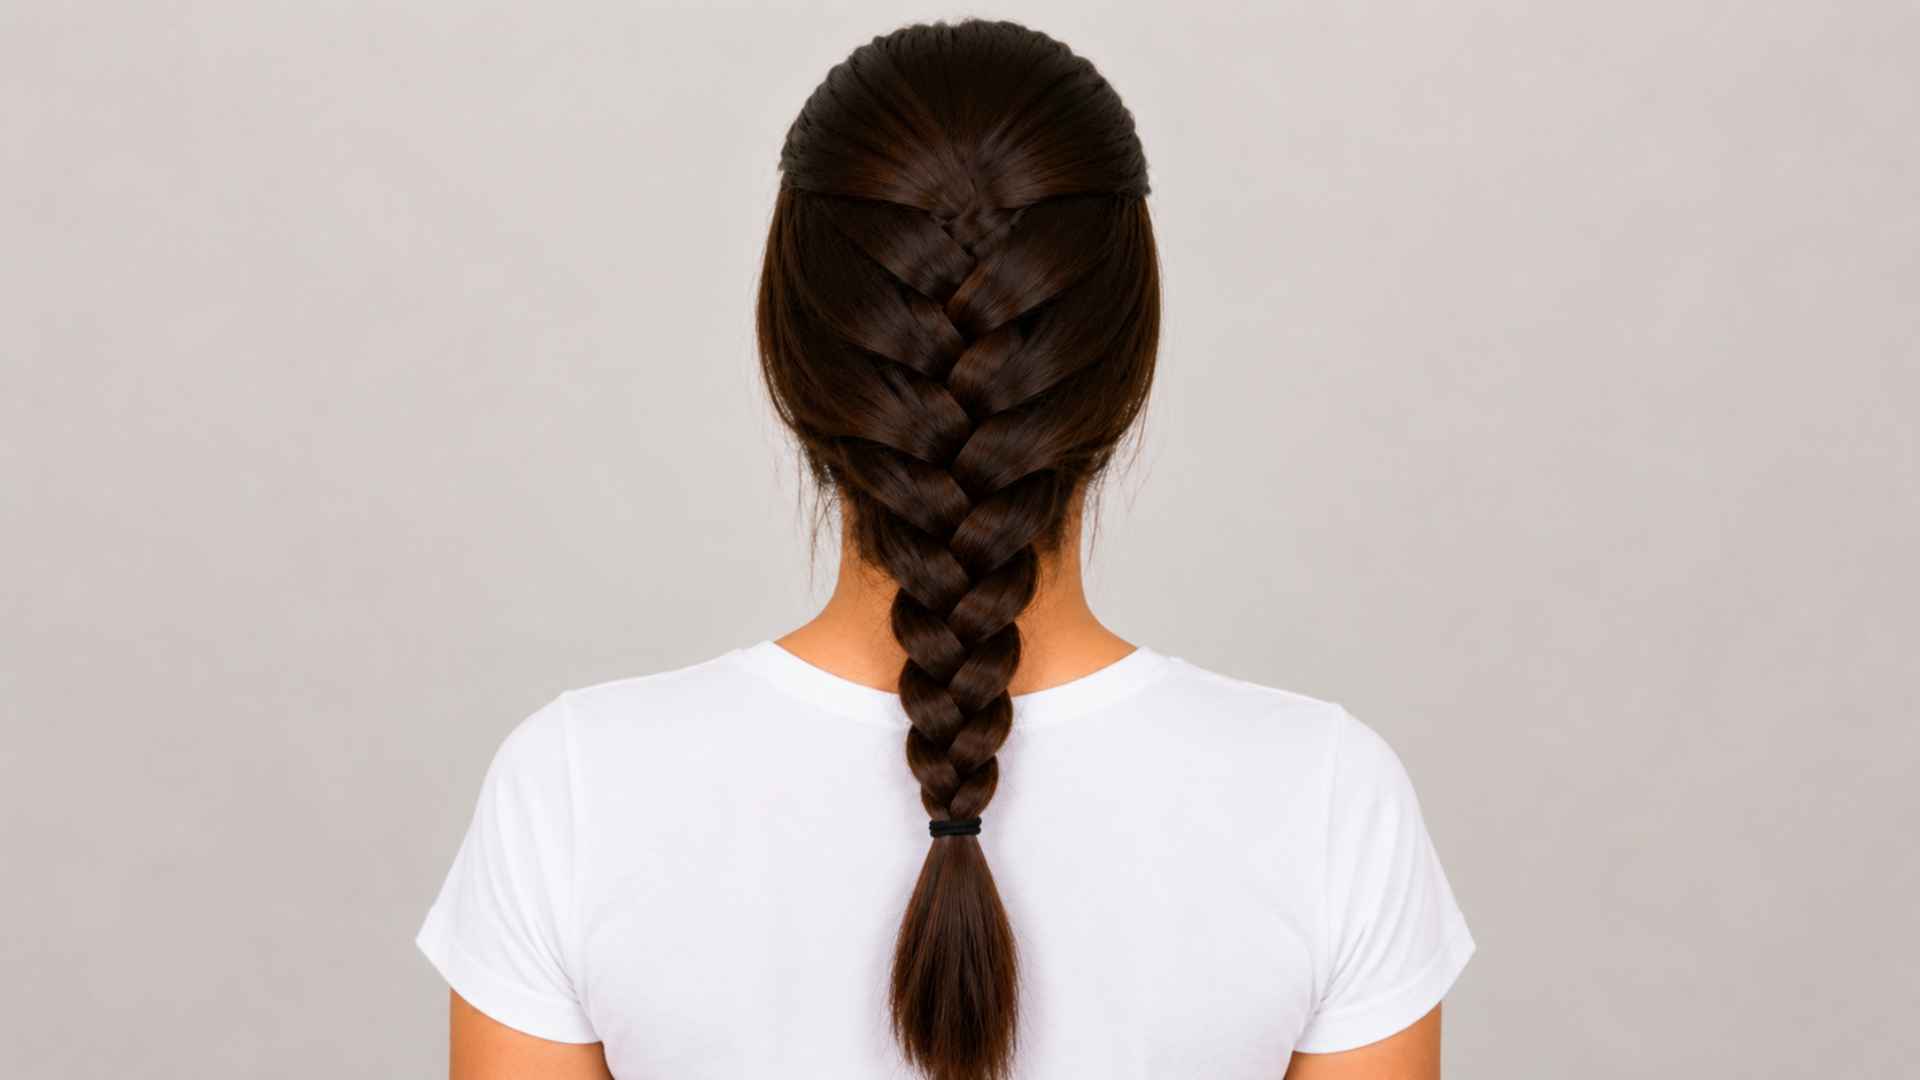
Once all your hair is woven in, switch back to a plain three-strand braid for the rest of the length.
Keep crossing the strands the same way until you run out of hair, then wrap a hair tie around the end. If you want a fuller look, gently pull on the loops along each side of the braid to loosen it a bit.
Once this one feels natural, browsing the many braid styles out there can help you figure out what else suits your hair.
How to French Braid Pigtails on Yourself
If a single center braid feels overwhelming, try pigtails first. You can actually see and reach both sides, which takes a lot of the guesswork out. Despite the name, the technique originated in Africa centuries before it became associated with France.
Use a comb to part your hair straight down the middle, from your hairline to the nape of your neck. Clip one half out of the way completely so it stays out of your hands.
Working on the unclipped side, follow the same steps above, but start your first section near your temple instead of the crown, and angle the braid down toward your ear as you go rather than straight back. Keep it close to your scalp the whole way down.
Once you reach the point where there’s no more loose hair to add, finish with a plain braid and secure the end. Unclip the other side and repeat the same steps, starting at the same height so both braids end up even.
How to Fix a Loose or Messy Braid
A slightly messy French braid is normal, especially early on, and most problems can be fixed without starting over.
- If a section feels loose, gently re-tighten it by pulling down on the loop closest to that spot
- Tuck stray flyaways behind the braid and pin them down with a small bobby pin
- If one side looks thinner than the other, loosen the fuller side slightly to even things out
- For a braid that’s sagging in the middle, mist it lightly with hairspray and press it flat with your palm
If the braid is falling apart from the top down, it usually means the first few crosses were too loose. Next time, pull those early sections snug before you start adding hair, since that sets the tone for the rest of the braid.
Braiding Without Watching the Mirror
Most of us learn to braid facing a mirror, but watching your reflection while braiding your own hair can actually work against you since everything you see is reversed.
Try closing your eyes or looking straight ahead instead, and let your hands work from feel rather than sight. It feels strange at first, but this is really how your hands build muscle memory for the pattern.
A hand mirror held up to check your progress partway through is still useful, just don’t rely on it for every single cross.
Tips by Hair Type for French Braiding Your Own Hair
Not all hair behaves the same way, so a few small changes can make braiding much easier depending on what you’re working with.
| Hair Type | What Helps Most |
|---|---|
| Curly | Use damp hair and leave-in conditioner. Curls hold the braid well. |
| Fine or Thin | Apply dry shampoo or texture powder for better grip and hold. |
| Short | Start lower on your head and use pins for shorter pieces. |
| Thick or Coarse | Use leave-in conditioner to smooth flyaways and manage sections. |
| Layered | Use gel or wax to hold shorter layers near the front. |
I usually reach for dry hair since each section stays put once I place it, but damp hair with a little leave-in conditioner smooths flyaways better if your hair leans curly. Try both and stick with whichever feels less fussy in your hands. With regular practice and a few simple adjustments, your French braid technique will improve.
Common Mistakes to Avoid
French braids can take a little practice, but once you understand the basics, creating one becomes much easier. These steps will help you braid your hair neatly.
- Uneven Hair Sections: Taking different amounts of hair on each side can make your French braid look uneven, tilted, or twisted as you continue adding strands.
- Loose Braid Tension: Keeping strands too loose near the scalp can create gaps and make the braid lose its shape after a few crosses.
- Unequal Side Switching: Adding hair unevenly between both sides can affect the braid pattern and make it appear off-center or inconsistent from the top.
- Rushing the Beginning: Skipping careful first crosses can make it harder to maintain control, creating mistakes that become noticeable as the braid grows longer.
- Poor Hand Rhythm: Moving your hands without a steady pattern can cause tangles and make the braiding process feel harder than it needs to be.
Let’s Start Braiding
Braiding my own hair from behind never came naturally, but repetition made a real difference. Slow, even sections and firm tension near the hairline solved most of the problems I ran into early on.
Learning how to French braid your own hair isn’t about getting it perfect on the first try; it’s about noticing where things went loose or crooked and adjusting the next time around.
Once a single braid feels comfortable, try pigtails next. They tend to feel easier since you can actually watch your hands work on each side.
Keep a comb, a couple of ties, and a bit of patience close by, and the rest tends to fall into place.
Frequently Asked Questions
How Long Does It Take to Learn to French Braid Your Own Hair?
A week of daily practice is enough for most beginners to get the hang of it. Muscle memory builds fast once your hands understand the crossing pattern.
Can You French Braid Short Hair?
Yes, though it’s trickier. Bobby pins help hold shorter pieces in place as you braid, especially near the front hairline.
Why Does My French Braid Keep Falling Apart at the Top?
This usually points to the very first few crosses, not the later ones. If those starting sections aren’t pulled snug against the scalp, everything above them has room to shift loose as you keep braiding.
Can You French Braid Wet or Dry Hair?
Both work, and it comes down to preference. Dry hair is easier to control section by section, while damp hair with a little leave-in conditioner smooths flyaways and can look neater on curly or textured hair.
How Do You French Braid Your Own Hair Without a Mirror?
Close your eyes or look straight ahead and let your hands work from feel instead of sight. A mirror reverses everything you see, so it can actually make the pattern more confusing rather than less.