I used to think a foundation wasn’t working because it looked streaky by lunchtime.
Then I’d switch to another one, only to end up with the same result.
It turned out the problem wasn’t the makeup at all. It was the brush I’d been using every day without thinking much about it.
Once I started cleaning my brushes on a real schedule instead of “whenever I remembered,” my makeup blended better, colors looked truer, and a couple of products I was ready to throw out started performing like new again.
That’s the short version of why knowing how to wash makeup brushes and how to sanitize them properly matters more than most routines give it credit for.
Why Clean Brushes Change How Your Makeup Looks and Feels
Here is what a clean brush actually gives me, based on years of testing both sides of this habit.
- Truer color payoff: Old product sitting in the bristles mutes and muddies whatever shade I apply next.
- Smoother blending: Clean bristles glide, while caked ones drag and create streaks or patchy edges. If you’re working on yourblending technique from scratch, clean brushes matter even more, since dirty ones drag product unevenly across the exact zones you’re trying to sculpt.
- Fewer breakouts: Bacteria and oil buildup on brushes are a well-documented driver of clogged pores, irritation, and in rare cases, real skin infections. Peer-reviewed research on cosmetic tool hygiene has identified Staphylococcus and E. coli among the bacteria found on used brushes and beauty tools.
- Longer brush life: Product left to dry and harden inside the bristles wears out the shape faster than washing ever will.
- A more hygienic routine overall: This matters even more if you share brushes, travel often, or apply makeup daily.
None of these benefits require fancy products or a complicated routine, just consistency. Once washing becomes a habit instead of an afterthought, the difference shows up in your skin and your application within weeks.
Cleaning vs. Sanitizing: What’s the Difference
Cleaning and sanitizing sound like the same task, but they solve two different problems.
Cleaning removes what you can see: dried foundation, powder residue, oils, and dust caught in the bristles. A basic wash with cleanser and water handles this part.
Sanitizing goes a step further. It targets what you can’t see, the bacteria living in the bristles even after a rinse looks clean. This is the step people skip most often, and it’s also the one most tied to actual skin health rather than just makeup performance.
Both matter. Washing keeps your brushes performing well. Sanitizing is what actually protects your skin.
How Often Should You Wash Makeup Brushes?
I get asked this constantly, and the honest answer depends on what the brush touches.
Liquid formulas demand more frequent care than powder ones, so I treat my kit on a rotating schedule instead of one blanket rule.
The short answer: foundation and concealer brushes need a wash every week, powder brushes can stretch to every two to four weeks, and anything used near the eyes should be cleaned every two weeks without exception.
| Brush Type | Recommended Washing Frequency |
|---|---|
| Foundation and concealer brushes | Weekly |
| Powder, blush, and bronzer brushes | Every 2 to 4 weeks |
| Eyeshadow and eyeliner brushes | Every 2 weeks |
| Brushes used near the eyes | Every 2 weeks, without exception |
| Makeup sponges (Beauty Blender style) | Weekly, since sponges hold moisture and product |
| Brushes shared with anyone else | Immediately after each use |
The American Academy of Dermatology recommends washing makeup brushes every seven to ten days as a general baseline to control bacterial buildup on the bristles.
|
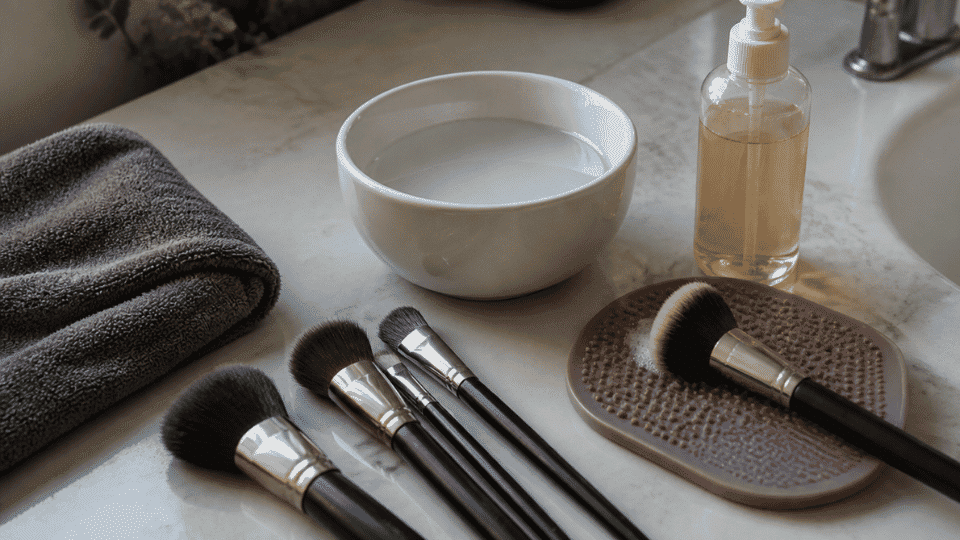
Tools and Materials Needed to Wash Makeup Brushes
|
How to Wash Makeup Brushes
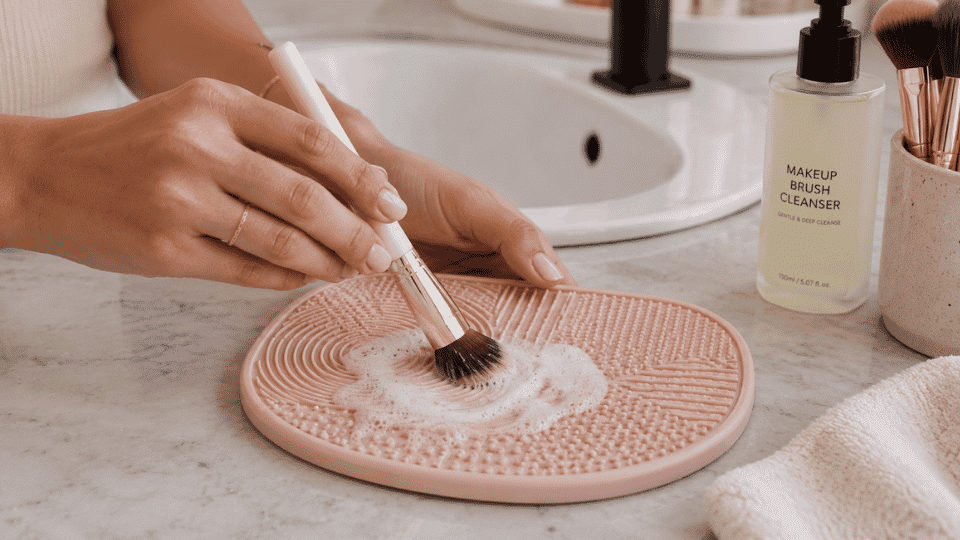
I have simplified my own routine down to four steps over the years, and it has not failed me yet. This works for nearly every brush type in a standard kit.
Step 1: Wet the Bristles Only
Hold the brush bristle side down under lukewarm running water, letting the water run through rather than pooling at the base.
Keep the ferrule, the metal part connecting the bristles to the handle, completely out of the water, since moisture seeping in there is the fastest way to loosen the glue and cause shedding down the line.
I run mine under the tap for a good ten to fifteen seconds before adding any product, just to loosen surface buildup first.
Step 2: Apply Cleanser and Swirl
Add a small amount of brush cleanser or gentle shampoo to your palm or a textured cleaning mat, then swirl the bristles into it using the same circular motion you would use to apply blush.
Keep the pressure light rather than pressing hard, since aggressive scrubbing is what actually splays and damages bristles over time, not the washing itself.
I usually watch for the lather to shift color as old product releases, which tells me the cleanser is doing its job.
Step 3: Rinse Until Water Runs Clear
Rinse the bristles under lukewarm water again, pointing them downward and checking the color of the water as it drains away.
If it still looks cloudy, tinted, or slightly gray, repeat the cleanser step once more before moving on to drying.
Dense brushes like foundation or powder brushes almost always need this second pass, so do not assume one rinse means the brush is fully clean.
Step 4: Reshape and Lay Flat to Dry
Gently squeeze out excess water with a clean towel, working from the ferrule down toward the tip rather than twisting the bristles.
Reshape the brush head back to its original form with your fingers while it is still damp, since this is the only window where reshaping actually holds.
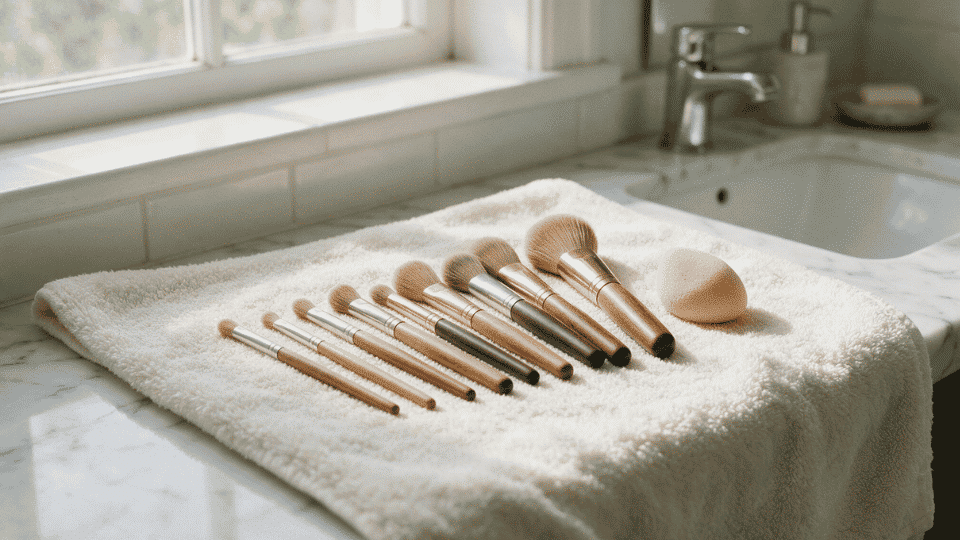
Lay the brush flat with the bristles hanging slightly off the edge of a counter or towel, never upright in a cup, where trapped water can travel down into the handle.
Following these four steps in order matters more than rushing through any single one of them on its own. Once this becomes muscle memory, the whole process takes less time than most people expect.
Quick Clean vs. Deep Clean: The Spot-Clean Method
A full wash isn’t always practical between uses, especially if you’re switching products several times a day or trying looks back-to-back. That’s where a spot clean comes in.
Spray a small amount of quick-dry brush cleaner or a light alcohol-based mist onto a folded paper towel, then swirl the brush into the damp spot the same way you’d swirl it into cleanser. This lifts surface product fast and the brush is usually dry enough to reuse within a minute or two.
Spot cleaning is not a replacement for the full wash steps above. Think of it as damage control between real washes, not a shortcut around them.
How to Clean Different Types of Makeup Brushes
Not every brush behaves the same way once it hits water, and treating them identically is where most people go wrong. Here is how I adjust my approach for each category I use daily.
1. Foundation Brushes
Foundation brushes hold the most product residue of anything in my kit, since liquid formula clings deep into dense bristles.
I wash mine weekly without fail, because skipped washes here show up fastest as patchy, uneven application on the skin.
- Tools and materials needed: Gentle cleanser, lukewarm water, silicone mat
- Steps to follow: Wet bristles downward, cleanse with a brush cleaner, and rinse until the water runs clear. Reshape the brush and lay it flat to dry completely before using again.
2. Powder Brushes
Powder brushes shed less product but trap fine particles deep in the fibers over time. I stretch these to every two to four weeks, since dry formulas do not spoil the same way liquid ones do.
- Tools and materials needed: Cleanser, lukewarm water, towel
- Steps to follow: Tap the brush gently first to release loose powder, wet and swirl with a small amount of cleanser. Rinse fully, then lay flat and fluff the bristles once dry.
3. Eye Makeup Brushes
Eye brushes get the shortest wash cycle in my routine because they work closest to a sensitive, infection-prone area. I clean mine every two weeks, sometimes sooner if I have been testing a lot of pigments.
This matters just as much for the brushes behind your eye look as it does for the products themselves.
A good long-wear eyeshadow primer pick only performs as well as the brush applying it, so a clean blending brush protects both your skin and your finish.
- Tools and materials needed: Small bowl, mild cleanser, cotton round
- Steps to follow: Dip just the tip into a bowl of diluted cleanser. Swirl gently on a cotton round to lift shadow or liner residue. Rinse briefly and reshape the tip before laying flat.
4. Makeup Sponges
Sponges hold onto more moisture than any brush, which makes them a genuine bacteria risk if I let them sit damp in a drawer. I wash mine after every single use, not on a weekly cycle like brushes.
- Tools and materials needed: Cleanser, lukewarm water, sponge cleaning mat
- Steps to follow: Wet the sponge fully until it expands. Massage cleanser through with your fingers or a mat. Squeeze (do not wring) and let it air-dry completely before storing.
How Long Does It Take Makeup Brushes to Dry?
Most of my brushes dry within four to eight hours when laid flat in open air, though density and bristle type change that window slightly.
Natural hair brushes tend to hold moisture a bit longer than synthetic ones, so I usually give those an extra hour or two before touching them again.
Thicker brushes like foundation or powder brushes also take longer than slim eye brushes simply because there is more bristle to dry through.
I always wash my brushes at night so they have a full stretch of hours to dry undisturbed before morning. Rushing this step with a hairdryer or heat source can warp the shape permanently, so patience genuinely pays off here.
When Should You Replace Makeup Brushes?
Washing keeps a brush going, but it will not fix one that has already reached the end of its life. A few clear signs tell you when it is time to let go instead of washing again.
- Heavy shedding that continues after a gentle wash, not just a stray hair here and there
- A brush head that will not hold its shape even after reshaping while damp
- Bristles that feel stiff, frayed, or split at the tips no matter how well you clean them
- A loose or wobbly ferrule, which means the glue has already started to fail
If your brush is showing any of these signs, cleaning will not bring it back. Replacing brushes on a regular cycle matters for the same reason regular washing does: colonized bristles that keep touching your face are a real, if usually minor, source of skin irritation and breakouts.
If breakouts keep showing up in the same spots no matter how often you replace your tools, it may be less about the brush and more about the skin underneath. Our guide to what causes clogged pores breaks down what’s actually happening under the surface.
Can You Use Household Products to Clean Makeup Brushes?
I get this question often, usually from people trying to avoid buying a dedicated brush cleanser. Some household products work fine in a pinch, while others can damage bristles and glue over time.
| Household Product | Safe to Use? | Notes |
|---|---|---|
| Baby shampoo | Yes | Gentle enough for daily cleansing, my personal go-to |
| Dish soap (mild, no degreaser) | Occasionally | Fine for a deep clean, not for weekly use |
| Olive oil | Yes, for oil cleansing method | Helps break down waterproof or heavy pigment |
| Rubbing alcohol | Sanitizing only | Drying if used as a primary cleanser |
| Bar soap | Yes | Works well, especially for a quick swirl clean |
| Laundry detergent | No | Too harsh, can strip and fray bristles |
| Hand sanitizer | No | Alcohol content is too high for regular use |
When in doubt, gentler always wins over stronger when it comes to what touches your brushes. A dedicated brush cleanser is still worth owning, but these swaps work when you are in a pinch.
How to Sanitize Makeup Brushes Properly
Sanitizing is the step that goes beyond visible cleanliness. Washing removes product and oil, but it does not reliably kill the bacteria sitting deep in the bristles, especially on brushes used daily or shared with anyone else.
- Spray a light mist of 70% isopropyl alcohol directly onto clean, dry bristles and let it sit for a few minutes before wiping or air drying, since disinfecting takes real contact time and not just a quick pass.
- Use a quick-dry antibacterial brush cleaner between full washes if you switch products or clients often throughout the day.
- Avoid soaking brushes in alcohol, since prolonged exposure breaks down both bristle quality and the glue in the ferrule.
- Sanitize immediately after illness, especially pink eye, cold sores, or any skin infection, before the brush touches your face again. Dermatology and public health guidance consistently flags shared or unsanitized makeup tools as a possible route for spreading bacterial skin infections such as staph, so treating this step as non-negotiable after any illness is well supported.
- Store sanitized brushes upright and open, never sealed in a bag while slightly damp, since trapped moisture invites bacteria back in.
If these brushes are just for your own face, sanitizing once a week alongside your regular wash is enough. Anyone working on multiple clients or sharing brushes should sanitize between every single use, not just weekly.
Sanitizing is not a replacement for washing; it is a quick backup between real cleans. Keep both habits running side by side, and your brushes and your skin stay in far better shape.
If a stubborn breakout shows up anyway despite a clean kit, resist the urge to pick at it. Our safe way to pop a pimple walks through how to handle it without making things worse.
Final Thoughts
A clean brush kit is one of those habits that pays off quietly. You won’t notice it while it’s working, only when it stops.
Build the wash-and-sanitize rhythm into your week once, and it stops being a chore and just becomes part of how your makeup routine runs.
Frequently Asked Questions
How Long Does Foundation Last Before It Expires?
Most liquid foundations last 6 to 12 months after opening. Replace it sooner if it develops an unusual smell, changes color, or starts to separate.
Why Does My Foundation Look Darker Hours Later?
This is called oxidation. Skin oils and air can cause foundation to darken, so using a primer and choosing the right shade can help.
How Often Should I Clean My Brushes and Sponges?
Wash makeup sponges after every use and clean foundation brushes at least once a week. Replace sponges every 1 to 3 months.
Can you clean makeup brushes with just water?
Water alone will rinse away surface dust, but it won’t fully break down oil-based product or kill bacteria in the bristles. A gentle cleanser is still worth the extra thirty seconds, especially for brushes used with liquid foundation or concealer.
Why do my brushes still smell after washing?
A lingering smell usually means product is still trapped deep in the bristles, not on the surface. Try a second pass with a cleanser and make sure you’re rinsing until the water runs fully clear before you stop.