There was a time when getting ready felt more like trial and error than a routine.
Some days my makeup came together effortlessly. Other days, I somehow ended up applying products in the wrong order without even realizing it.
The truth is, how to apply makeup is not about owning more products or copying complicated tutorials.
It starts with following a simple sequence that helps every product do its job. Once you understand that order, the rest of your routine feels surprisingly easy.
What Is the Correct Order to Apply Makeup?
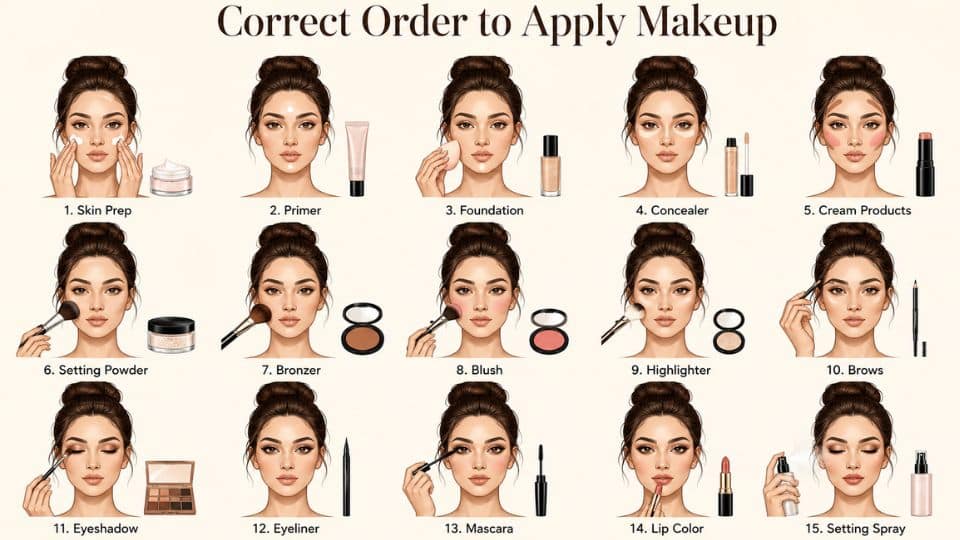
Every face benefits from the same basic sequence, even if the products inside each step change with the occasion.
Here is the order I follow every single time, no matter how simple or done up the look is.
Quick answer: Skin prep → Primer → Foundation → Concealer → Cream products → Setting powder → Bronzer → Blush → Highlighter → Brows → Eyeshadow → Eyeliner → Mascara → Lip color → Setting spray
I built this order around one rule: whatever sits closest to your skin goes on first, and whatever needs to hold its shape goes on last.
Skip a step or do them out of turn and you will notice it by lunchtime, usually as patchiness or fading color.
Basic Makeup Products Beginners Need
Before touching a single product on your face, it helps to know what actually earns a spot in your kit. I get asked constantly what someone truly needs versus what is just nice to have, so here is my honest take on it.
A solid starter kit covering everything in this table runs about $50 to $80 at drugstore prices, and that is plenty to start with.
| Product | What It Does | Beginner Tip | Recommended Pick |
|---|---|---|---|
| Moisturizer | Hydrates skin so makeup does not cling to dry patches | Match to your skin type, not a generic pick | CeraVe Daily Moisturizing Lotion |
| Primer | Smooths texture, helps makeup grip longer | A pea-sized amount covers the whole face | e.l.f. Poreless Putty Primer |
| Foundation | Evens out tone and covers discoloration | Start one shade lighter, warm it against your jaw | L’Oréal Infallible Fresh Wear Foundation |
| Concealer | Targets dark circles, redness, blemishes | Dab, don’t drag | Maybelline Instant Age Rewind Concealer |
| Setting powder | Locks base in place, cuts shine | Light dusting only where you get oily | e.l.f. Halo Glow Soft Focus Setting Powder |
| Blush | Adds color back into the face | Cream for a natural flush, powder for control | NYX Rouge Cream Blush |
| Mascara | Opens up the eyes fast | One coat on top lashes changes the whole look | Maybelline Great Lash Mascara |
| Lip color | Finishes the look | Balm first if lips are dry, always | Burt’s Bees Tinted Lip Balm |
| Brush or sponge | Applies and blends base products | A damp sponge gives the most skin-like finish | Real Techniques Miracle Complexion Sponge |
I built my own kit slowly, adding one product at a time as I figured out what my face actually needed. Yours does not need to look like mine on day one, and a smaller kit used well beats a full vanity used badly.
Skin Prep Before Makeup
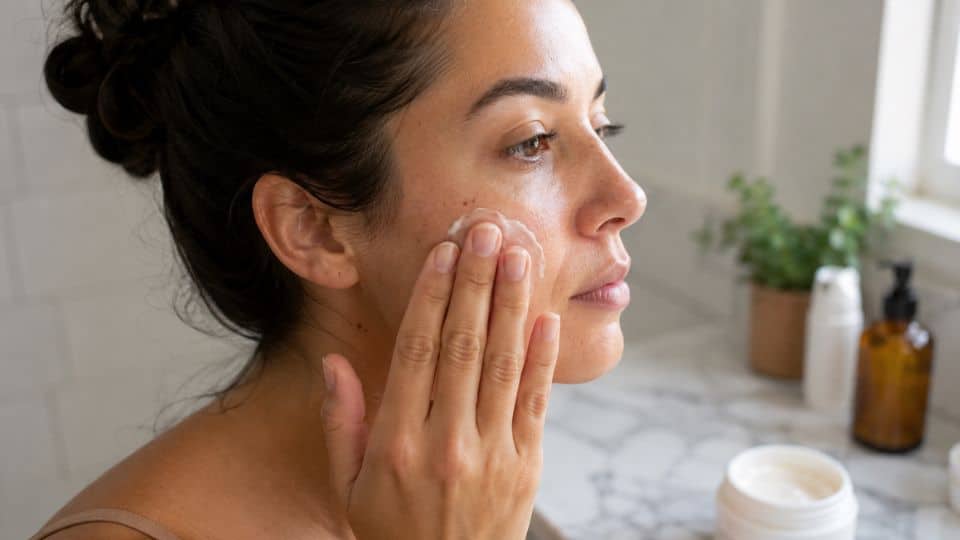
Good skin prep is the difference between makeup that melts into your face and makeup that sits on top of it. I never skip this part, even on mornings when I am running out the door in five minutes flat.
Step 1: Cleanse Your Face
A clean face gives every product underneath something even to hold onto instead of fighting dirt or leftover oil.
I use a gentle cleanser and pat dry rather than rub, since rubbing right before makeup leaves skin a little pink and that shows under foundation.
On days I wear sunscreen or heavier products, I cleanse twice, once to break everything down and once to actually clean the skin.
Step 2: Moisturize
Dry skin grabs onto foundation unevenly, so I let a moisturizer sink in fully before moving on.
A minute or two is usually enough. Rush this step and primer over half-wet moisturizer is basically how pilling gets started.
I keep a lighter, gel-based moisturizer for warmer months and switch to something richer in winter when my skin pulls moisture from makeup fast.
Step 3: Apply Sunscreen
If it is daytime, sunscreen goes on before any makeup product and needs a few minutes to fully settle in. I treat this step as nonnegotiable, since skipping it undoes a lot of the skincare effort from the rest of my routine.
A standalone layer protects far better than sunscreen mixed into moisturizer or foundation. I wait five minutes before primer so it has time to sink in.
If I am out for hours, I reapply with a sunscreen spray or stick over my makeup rather than skipping it, since the FDA recommends reapplying sunscreen at least every two hours, more often if you are sweating.
Step 4: Prime Your Skin
Primer fills in pores and fine lines, giving foundation a smoother surface to sit on for the rest of the day. I press it in with my fingers rather than swiping, which keeps the layer thin and stops it from balling up later.
I only prime the areas that actually need help, usually my T-zone and the sides of my nose, instead of coating my whole face.
Face Makeup Steps
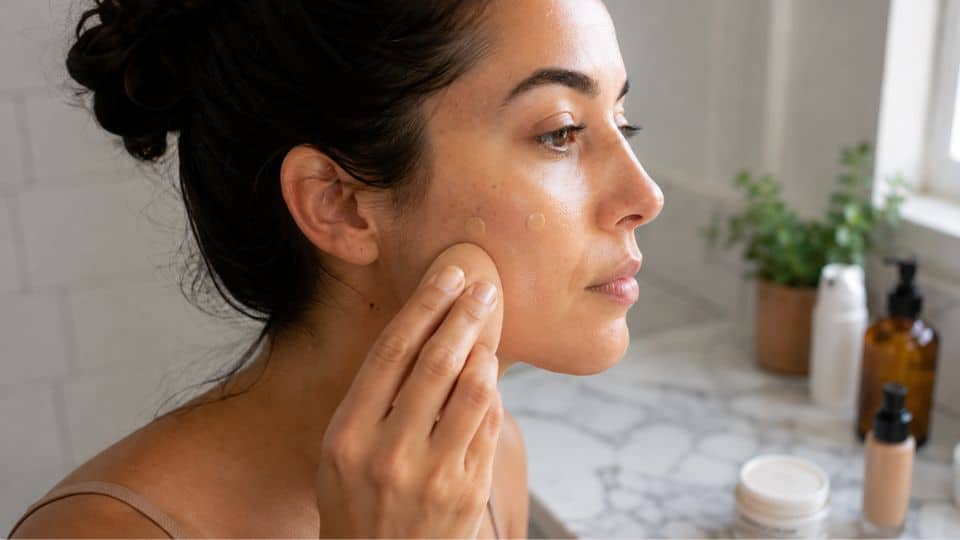
This is the part most people picture when they think about how to apply makeup, and it is where blending really matters.
I build my base slowly here, checking in the mirror at each stage instead of piling everything on at once.
Step 5: Apply Foundation
I dot foundation across my forehead, cheeks, nose, and chin, then blend outward with a damp sponge for a skin-like finish.
Working from the center out keeps coverage lightest near the hairline and jaw, which is exactly where you want it thinnest anyway.
I check my match in daylight, not bathroom light, since bathrooms cast a warm tint that throws the shade off.
|
Finding Your Foundation Shade Undertone matters more than depth, so I check if my skin leans warm, cool, or neutral first. I test swipes along my jaw, not my hand, and check the match in daylight near a window for the truest read. Between two shades, I pick the lighter one, since foundation oxidizes darker after it sits. |
Step 6: Conceal Where Needed
Concealer only goes where it is actually needed. Dab it, do not drag it. Under the eyes, I pat a small amount into an inverted triangle and blend the edges straight into the foundation, so there is no harsh line.
For blemishes, I use a small brush instead of my finger, since fingers move product around rather than leaving it exactly where it needs to sit.
Step 7: Set With Powder
A light dusting of setting powder keeps my base from sliding around, especially through the center of my face where I get oily first.
I use a fluffy brush and press the powder in rather than sweeping it, which avoids that dry, flat look nobody wants.
I only hit the areas that actually shine, usually my forehead, nose, and chin, and leave dry cheeks alone that day.
Step 8: Add Bronzer
Bronzer goes where the sun would naturally hit, along my cheekbones, forehead, and the bridge of my nose. I keep the brush nearly dry so the color builds slowly instead of showing up as one heavy stripe.
A cool-toned bronzer tends to look ashy or muddy on warm undertones, so I match the bronzer to my own undertone rather than assuming one shade works for everyone. Warm bronzers are the safer starting point if you are not sure which way your skin leans.
Step 9: Apply Blush
A smile helps me find the apples of my cheeks, which is exactly where blush belongs for a natural flush. I blend upward toward my temples so the color fades rather than stopping abruptly.
Cream blush layered under a touch of powder blush gives more staying power than either one alone. I build it in thin layers since it is far easier to add than remove.
Step 10: Highlight
Highlighter goes on the highest points of my face: cheekbones, brow bone, and the very top of my cupid’s bow. A little goes a long way here, so I tap it on rather than dragging a heavy brush across.
I skip highlighter on oily days, since it tends to slide by afternoon, and reach for a cream formula on drier days instead.
Eye Makeup Steps
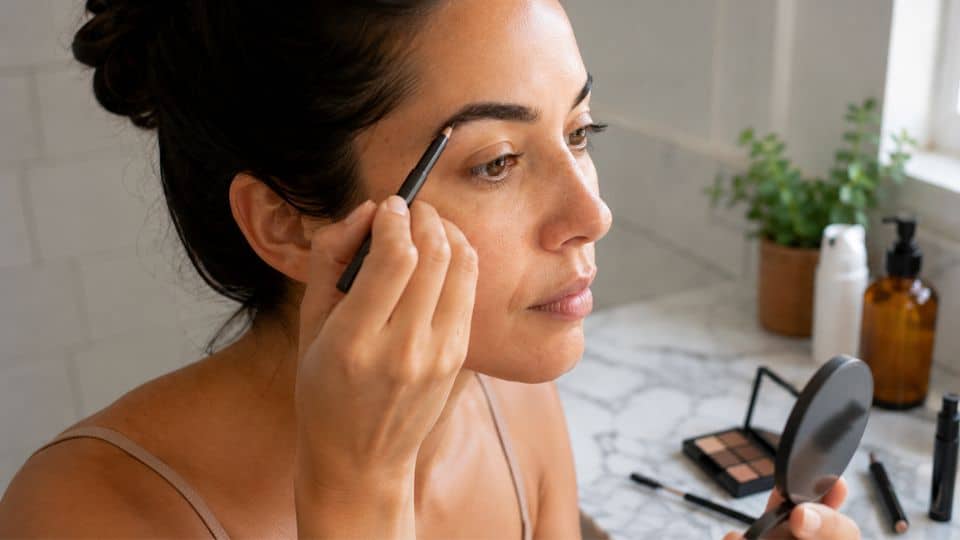
Eyes take the most patience of any part of my routine, but they also make the biggest difference in how put together a face looks.
I always work from the lightest shade forward so nothing gets muddy or overworked.
Step 11: Fill In Brows
Groomed brows frame everything else on the face, so I fill in sparse spots with light, feathery strokes that mimic real hair. I use a spoolie afterward to blend the color so it never looks drawn on.
I match my brow product to my hair color, going one tone lighter if dark, since a pencil too dark reads harsh no matter how careful the strokes are.
Step 12: Apply Eyeshadow
I start with a light shade across the lid, a medium tone in the crease, and blend until the line between the two disappears.
Neutral browns and taupes are the easiest starting point. They blend into almost any skin tone, and a slightly uneven blend still reads fine up close.
I finish with a clean, fluffy brush to soften harsh edges, moving in small circles rather than one direction.
Step 13: Line Your Eyes
I pull my eyelid taut and draw small connected dots along the lash line rather than one long sweeping stroke. Pencil liner forgives mistakes far better than liquid, which makes it my go-to when I am short on time.
If my line comes out uneven, a small angled brush with dark eyeshadow cleans the edge without wiping off everything underneath.
Step 14: Finish With Mascara
One or two coats on the top lashes open the eyes up more than almost any other single product I own. I wiggle the wand at the base of my lashes before pulling through, which coats every lash instead of just the tips.
I let the first coat dry before applying a second, since wet-on-wet mascara is how lashes clump. Bottom lashes get one light coat, if any.
Lip Makeup Steps
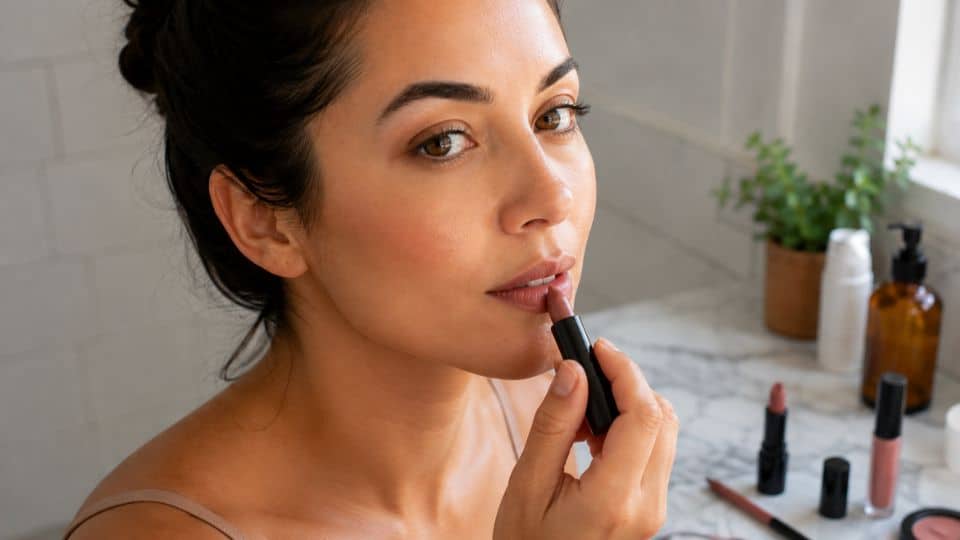
Lips are the last thing I touch, and they pull the entire look together once everything else is already in place. I keep this part quick, since overworking lip color tends to make it look heavier than intended.
Step 15: Prep and Line
A swipe of lip balm a few minutes before I start keeps my lips smooth enough for color to sit evenly.
I trace my natural lip line with a liner close in shade to my lipstick, which helps it stop feathering later in the day.
If my lips are especially dry, I gently buff them with a soft towel first, since lipstick over flaky skin grabs unevenly no matter the formula.
Step 16: Apply Lipstick or Gloss
I fill in my lips with color from the liner outward, blotting once with a tissue if I want it to last longer. A single swipe of gloss on top of matte lipstick adds dimension without needing a whole new product.
For extra staying power, I apply one layer, blot, then add a thin second layer on top. It traps the first coat and holds color much longer.
How to Apply Makeup for Your Skin Type
Skin type changes more than most beginners expect, and using the wrong approach is often why makeup looks off by midday.
I get asked about this constantly, so here is what I actually shift depending on what someone’s skin is doing.
| Skin Type | Prep Focus | Product Choices | Watch Out For |
|---|---|---|---|
| Oily | Oil-free, lightweight moisturizer | Mattifying primer, powder foundation or long-wear liquid, powder blush | Heavy cream products that slide by afternoon |
| Dry | Rich, hydrating moisturizer | Hydrating primer, dewy or satin liquid foundation, cream blush | Setting powder over dry patches, which reads flaky |
| Combination | Lightweight moisturizer all over | Mattifying primer on the T-zone, hydrating primer on cheeks | Using one product everywhere instead of zone by zone |
| Sensitive | Fragrance-free, gentle formulas | Mineral or hypoallergenic foundation, cream products over powder | New products without a patch test first |
I have combination skin myself, so I actually use two primers most mornings, one for my T-zone and one for my cheeks.
Small adjustments like that matter far more than buying an entirely new routine every time your skin shifts with the seasons.
How to Keep Makeup From Looking Cakey
Cakey makeup almost always comes down to using too much product or building layers before the one underneath has settled.
I let each layer sit for a moment before adding the next, since rushing is the fastest way to end up with product sitting on top of skin instead of blending into it.
A damp makeup sponge does more for a natural finish than a dry brush ever will, since it presses product into skin rather than just laying it across the surface.
I also skip powder entirely over any dry patches, since powder grabs onto dryness and turns it into visible flaking within an hour.
If my base starts looking heavy partway through, I press a clean sponge over the area to lift excess product rather than adding more concealer to fix it.
How to Remove Makeup Properly
Taking makeup off well matters just as much as putting it on well, and I treat this step as part of the routine rather than an afterthought.
- Start with an oil-based cleanser or balm: This dissolves foundation, sunscreen, and waterproof formulas that water alone will not touch.
- Use micellar water for a lighter cleanse: It lifts makeup without rubbing, which makes it a good option on nights when your skin needs less handling.
- Give eye makeup extra time: Press a soaked cotton pad against closed lids for a few seconds before wiping, so mascara and liner lift off instead of getting tugged at.
- Always follow up with a water-based cleanser: This second cleanse, often called double cleansing, clears any leftover residue that the first step alone leaves behind.
- Pat skin dry instead of rubbing: Rubbing a towel across freshly cleansed skin can leave it irritated right when it needs the least stress.
- Moisturize right after: Skin left bare after cleansing loses moisture fast, so I never skip this last step, even at midnight.
Final Thoughts
Getting your makeup to look good is not about following a long list of rules.
It is about knowing what each product does and giving it the best chance to work by applying it in the right order.
Once that sequence becomes part of your routine, everything else feels much easier, from blending foundation to finishing with lipstick.
Use these steps as your starting point, then make small adjustments as you find what works best for your skin, your products, and your personal style. The more you practice, the more natural your makeup routine will feel.
Frequently Asked Questions
How Long Should a Full Makeup Routine Take Once I Know the Order?
Most beginners finish in 20 to 30 minutes, while regular practice can cut that down to about 10 minutes.
Can I Skip Primer if I Am Short on Time?
Yes, but your makeup may not last as long. A moisturizer can work as a quick substitute, though primer gives better all-day wear.
Do I Need Different Brushes for Every Single Product?
No, a few basic brushes for foundation, powder, blush, and eyeshadow are enough. Fingers and sponges also work well for cream products.
Why Does My Makeup Look Fine at Home but Different in Photos?
Flash can highlight texture and make heavy powder look dull. A setting spray and a natural finish usually photograph better.
Is It Okay to Reuse the Same Routine for Day and Night?
Yes, the application order stays the same. For evening, simply build up your eye and lip makeup for a more dramatic look.
Do I Need Both Primer and Moisturizer?
Yes, they do different jobs. Moisturizer hydrates skin, while primer smooths texture and helps makeup grip. Skipping one still works in a pinch, but using both gives the most even base.
What Is the Difference Between Concealer and Foundation?
Foundation evens out your entire skin tone, while concealer targets specific spots like dark circles or blemishes with more concentrated coverage.